Configure Social Login
Microsoft
To enable Microsoft OAuth, you need to create an OAuth client in Azure Portal and set the generated Client ID and Client Secret in your project created in the Furo Console. The following steps are based on the Microsoft official documentation.
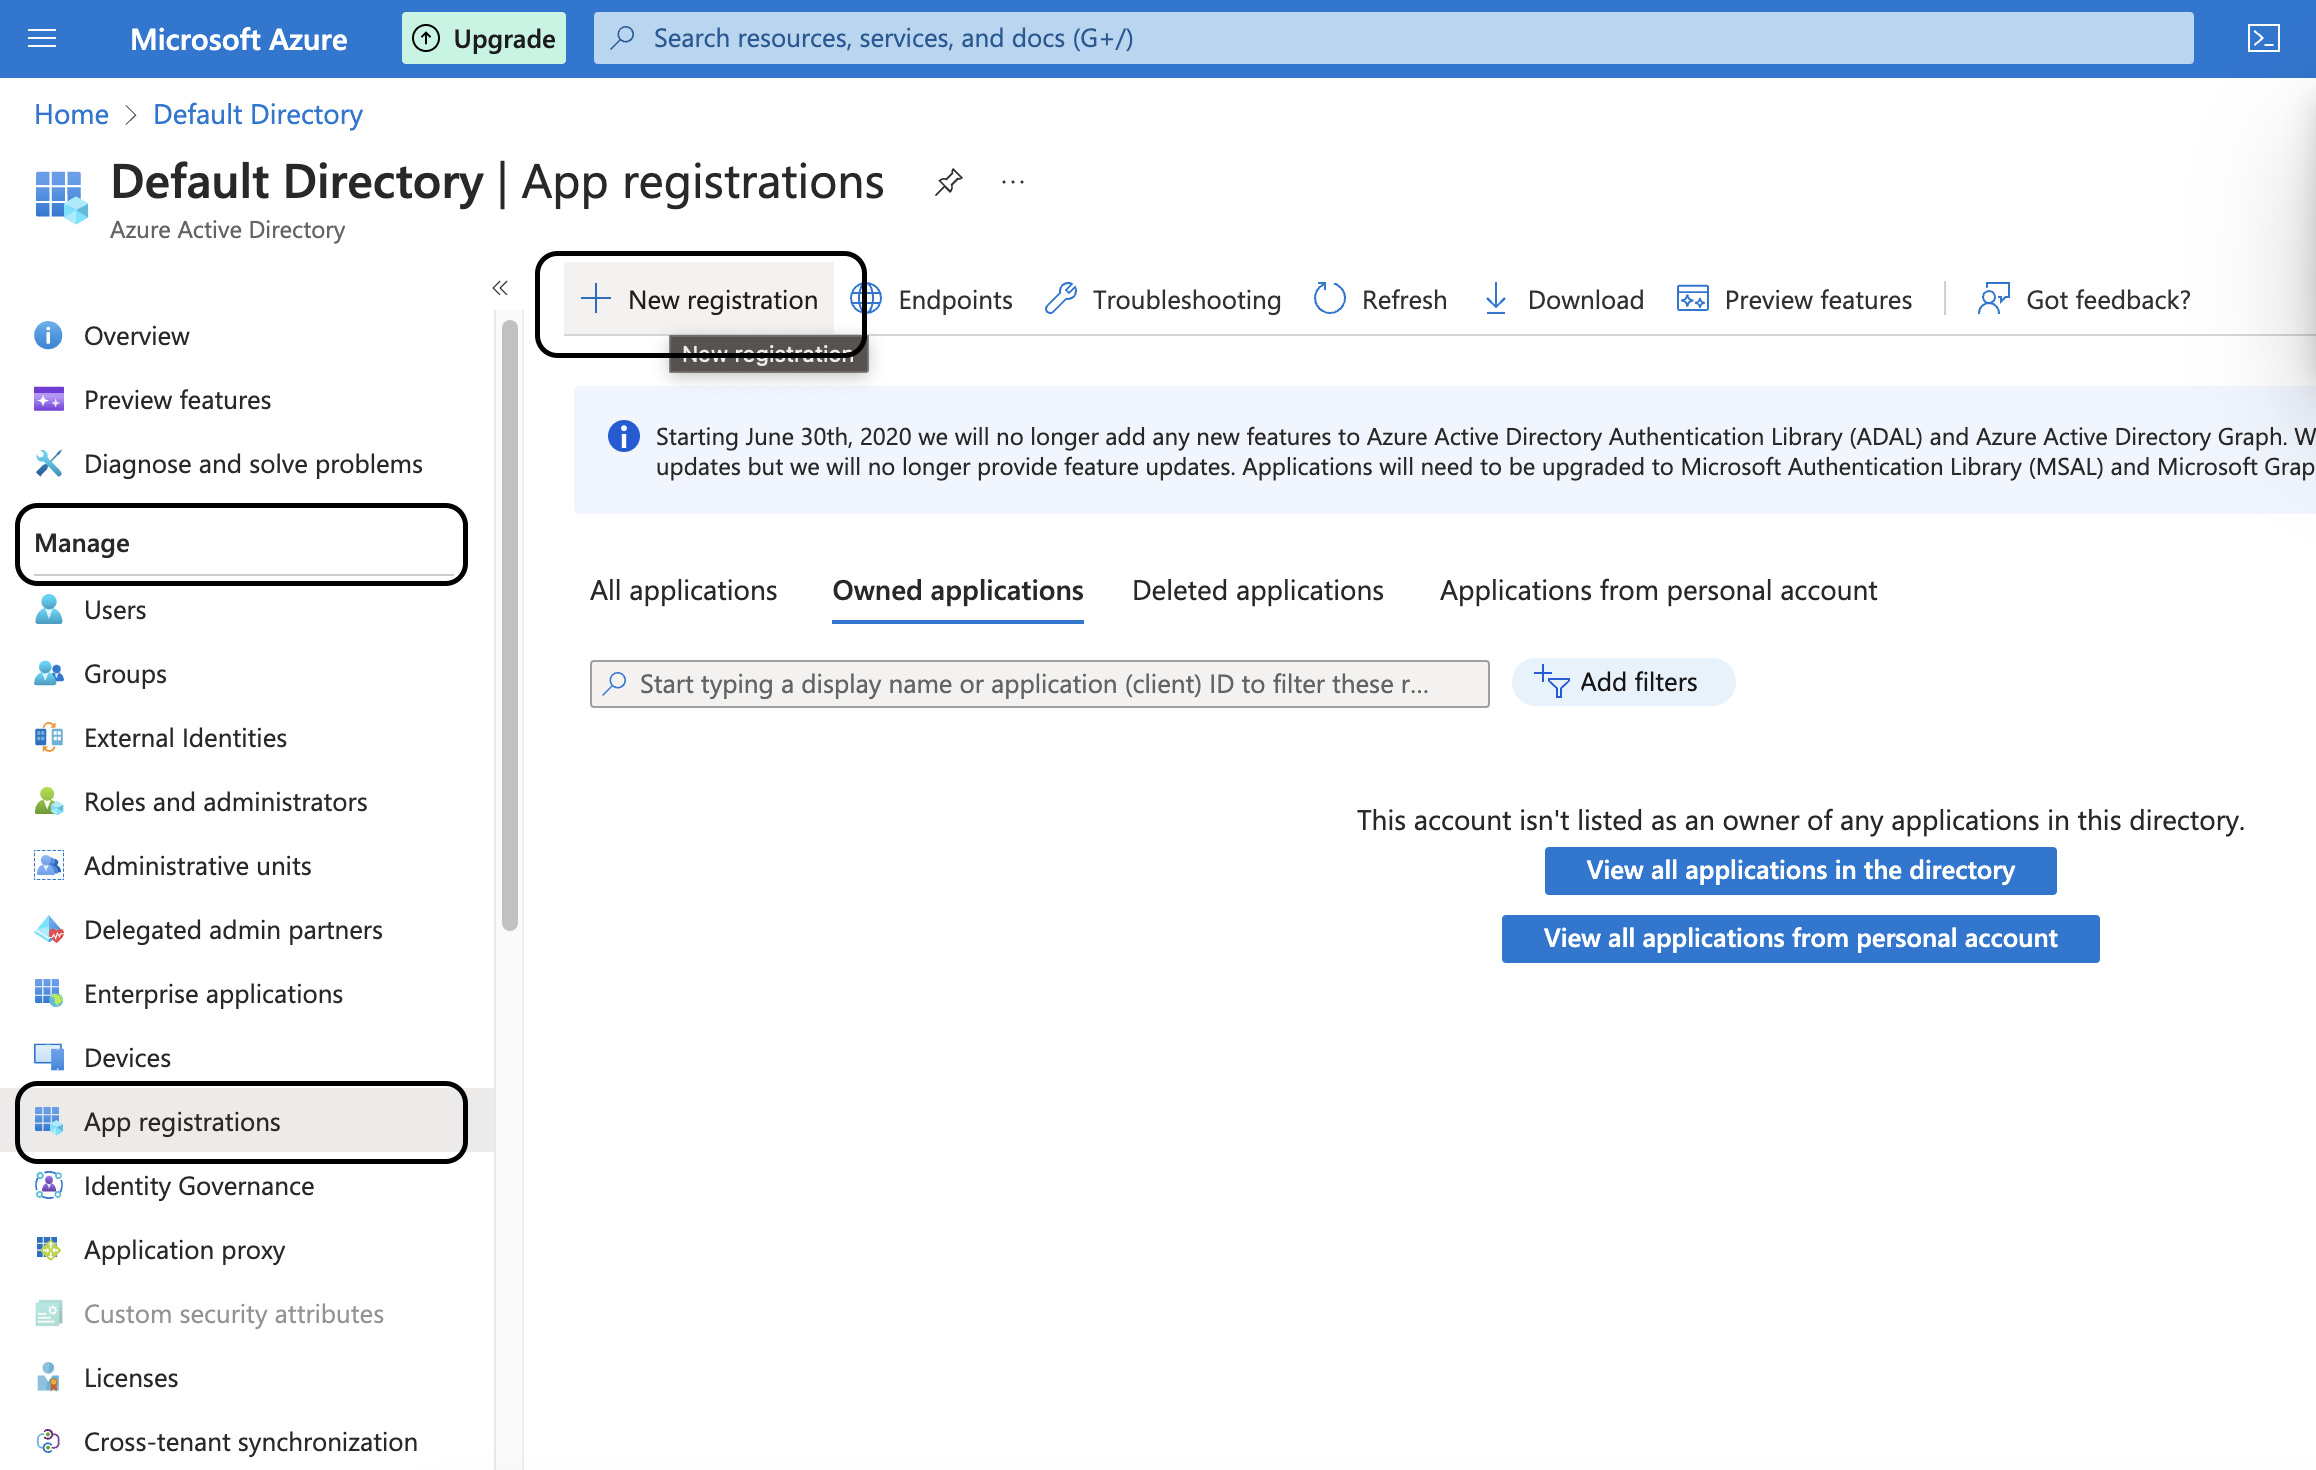
 Under the Manage menu tab on the left, click on App registrations and then click New registration on the top tab.
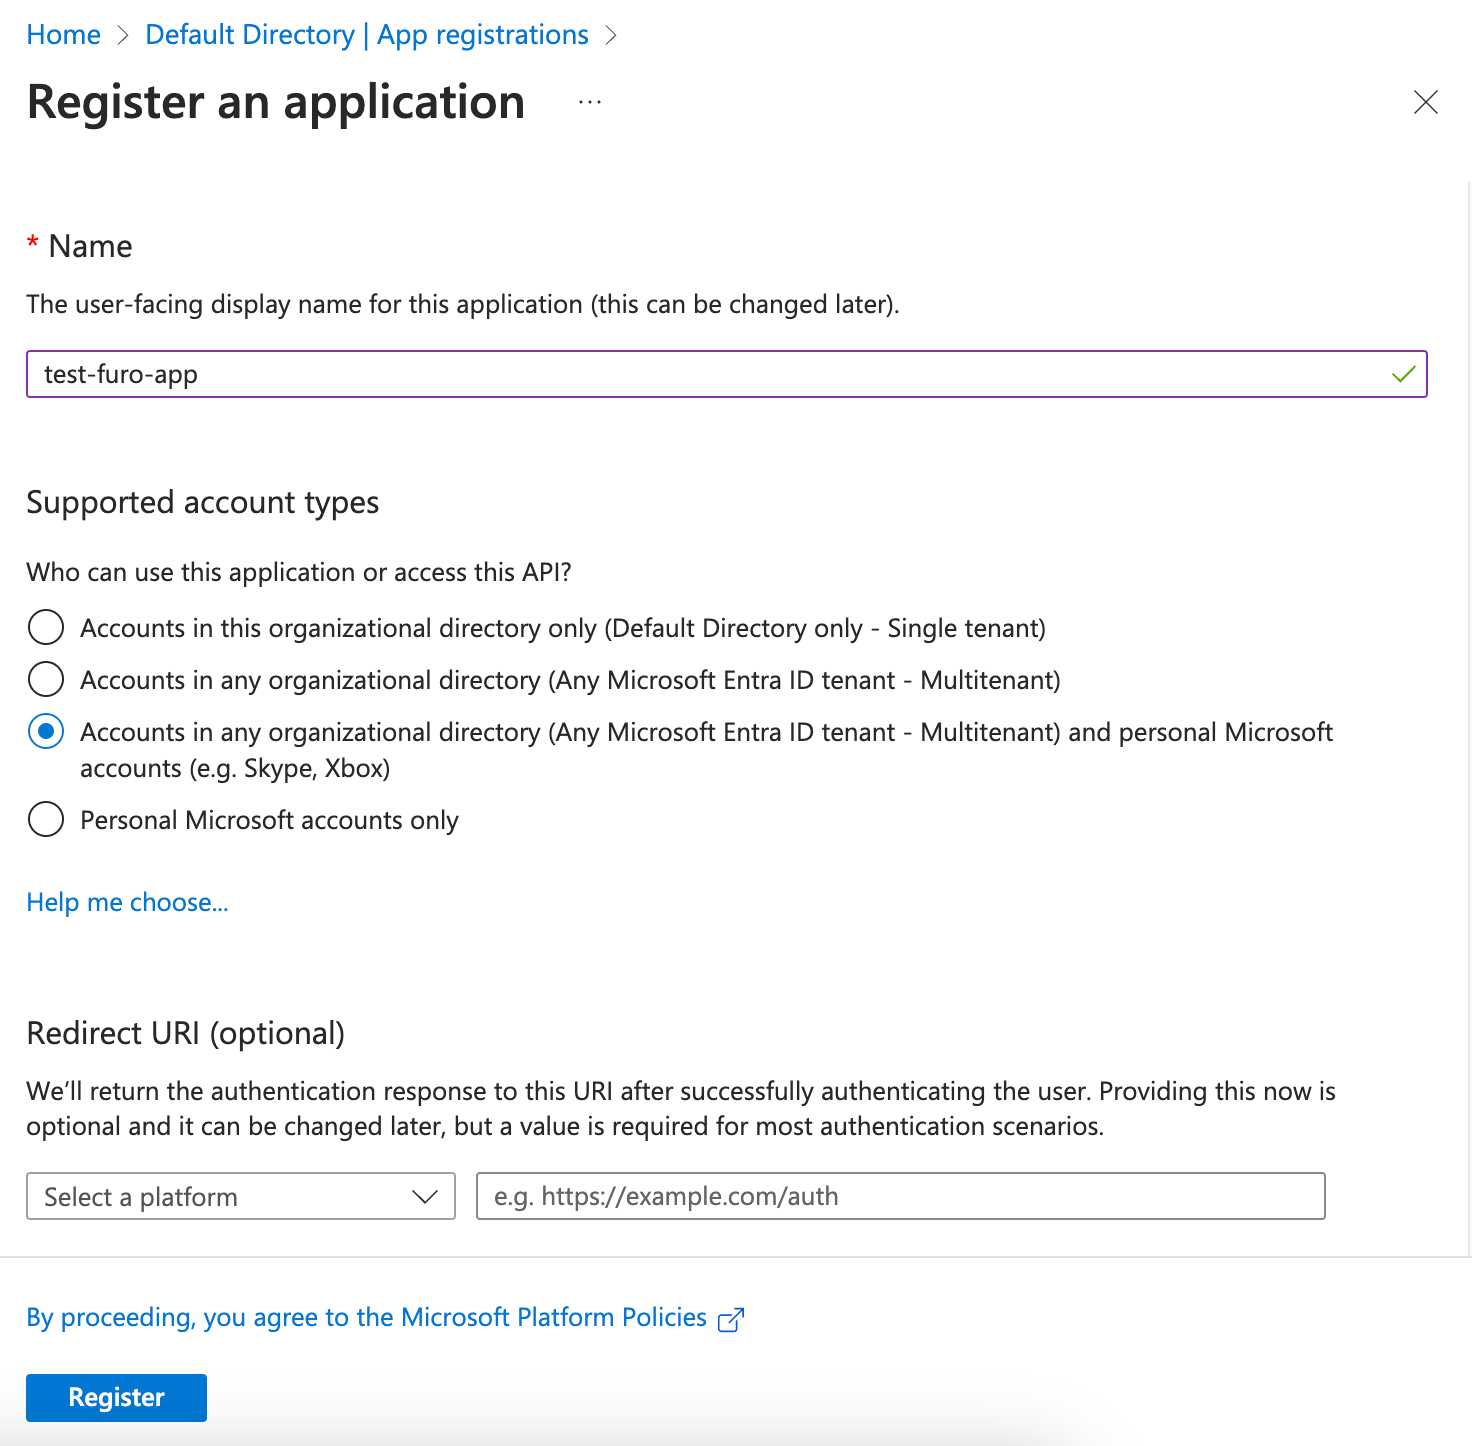
 Enter the application information. Set the application name and choose the Supported Account Type according to your user scope. Skip the Redirect URI setup for now; we will proceed with it in the next step.
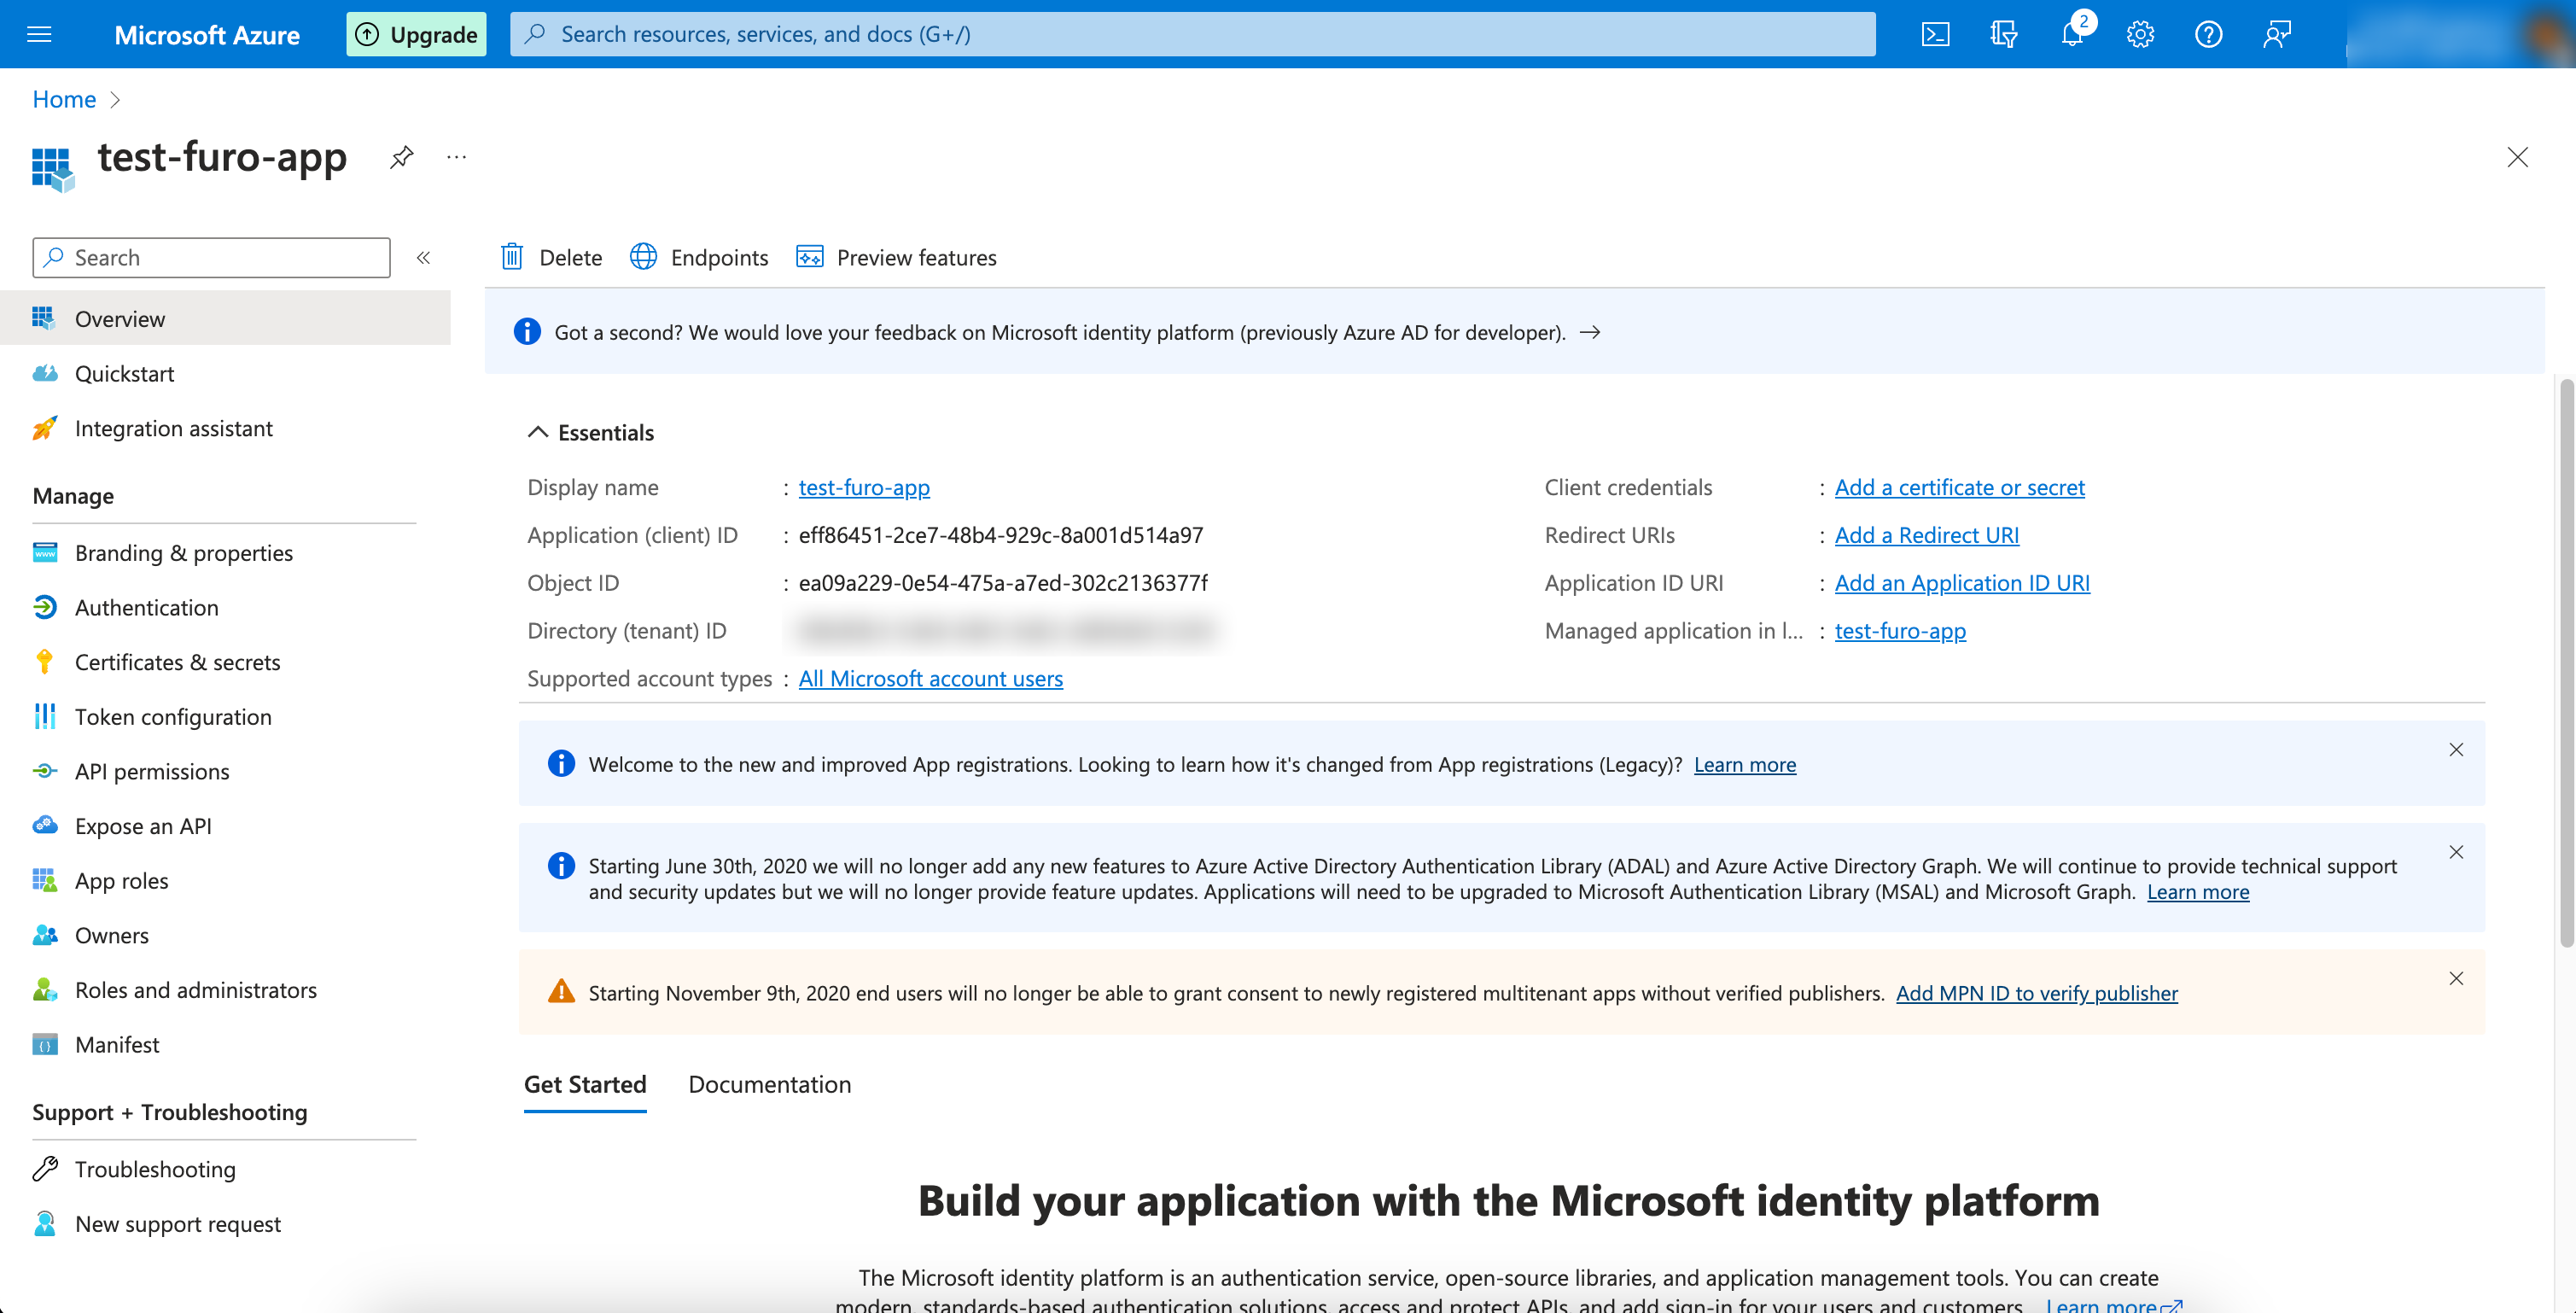
 After creating the project, you will see a completion screen like this.
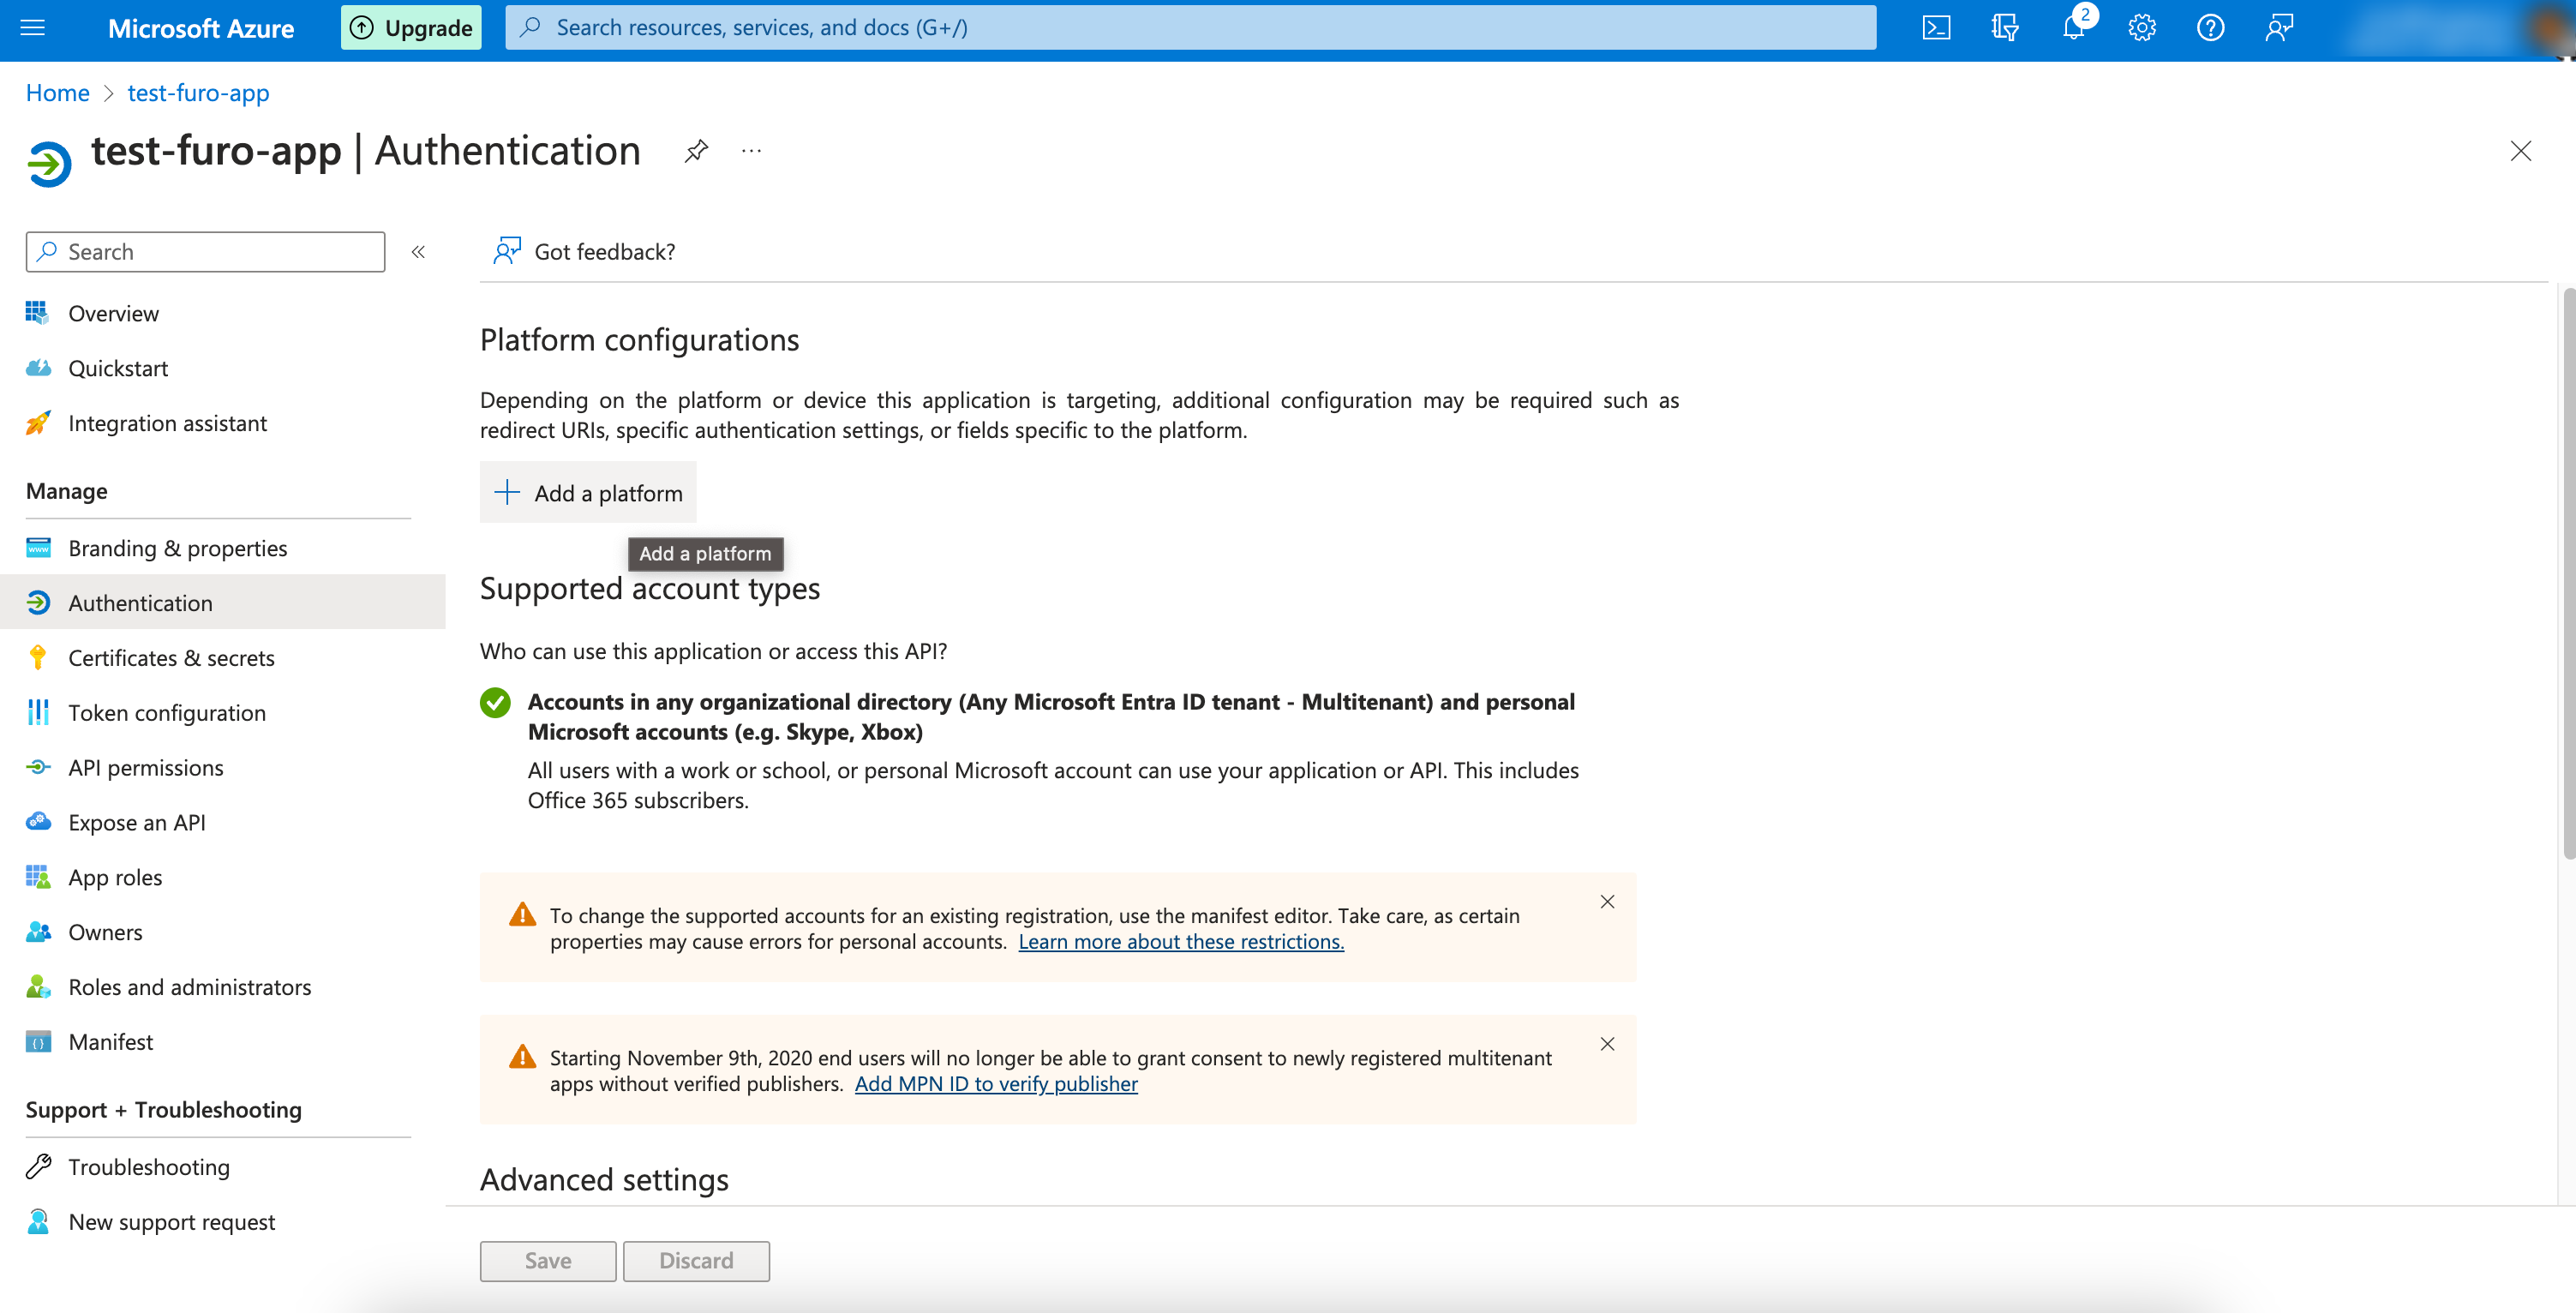 Under Platform configurations, click the Add a platform button.
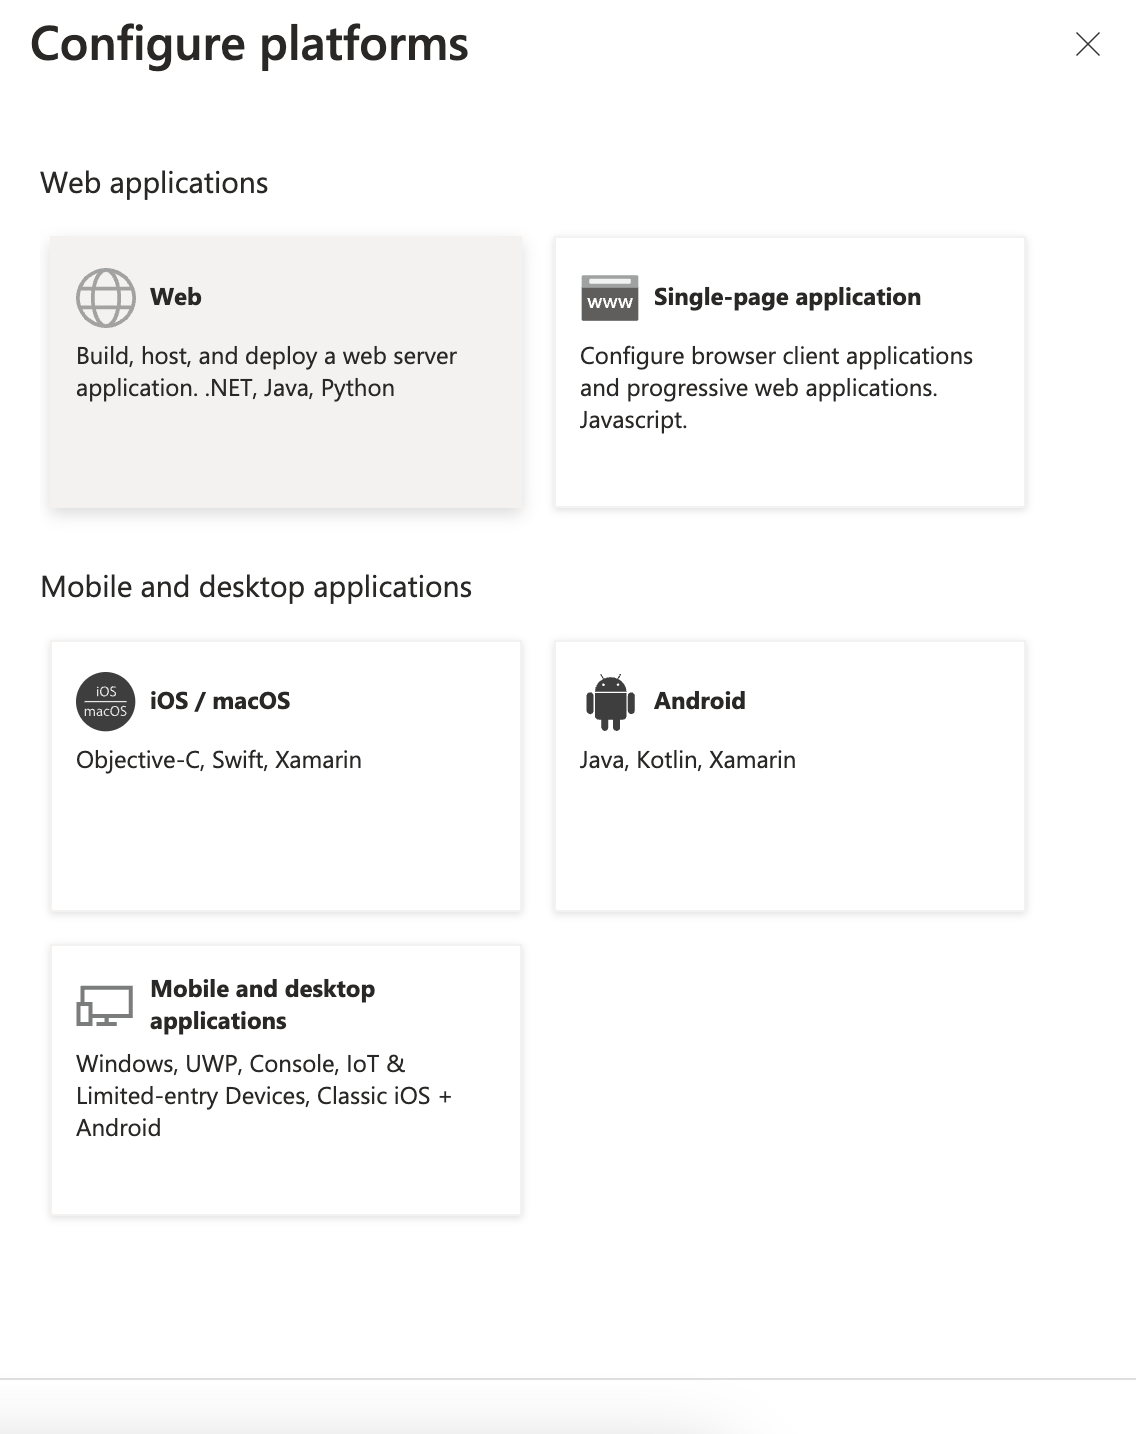
Set up the Application platform according to your needs. In this example, we proceed with the Web platform.
Under Platform configurations, click the Add a platform button.
Set up the Application platform according to your needs. In this example, we proceed with the Web platform.
 Add
Add 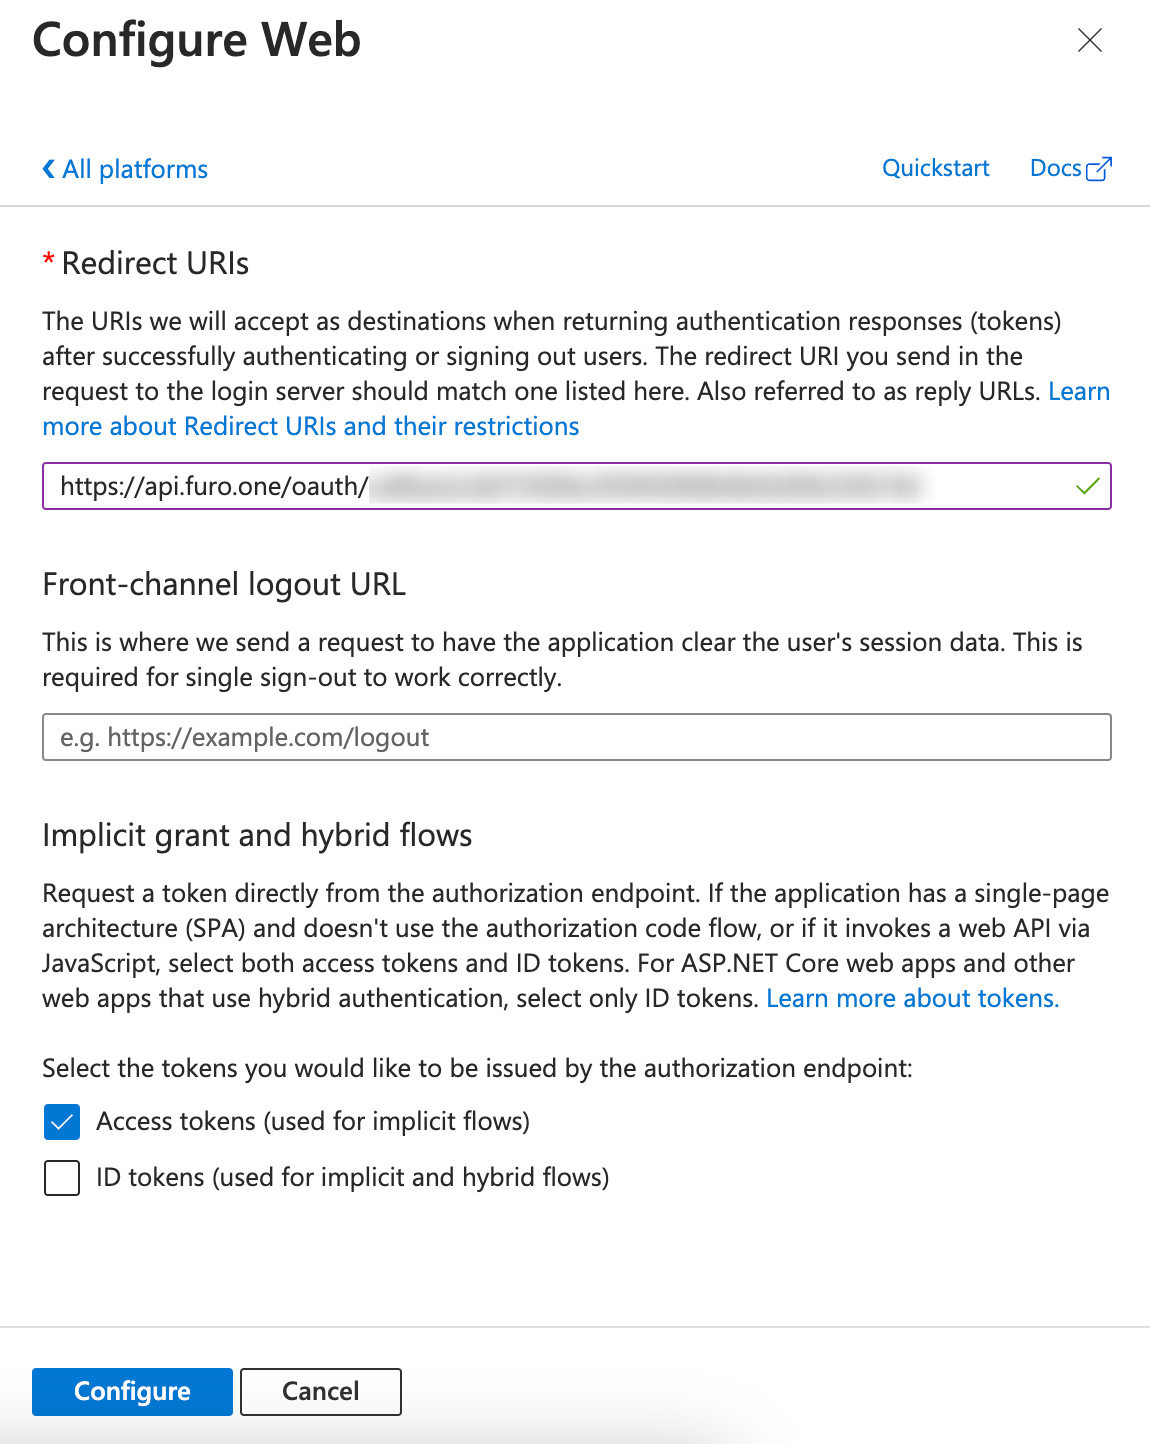 Check Access tokens under Implicit grant and hybrid flows. Click the Configure button.

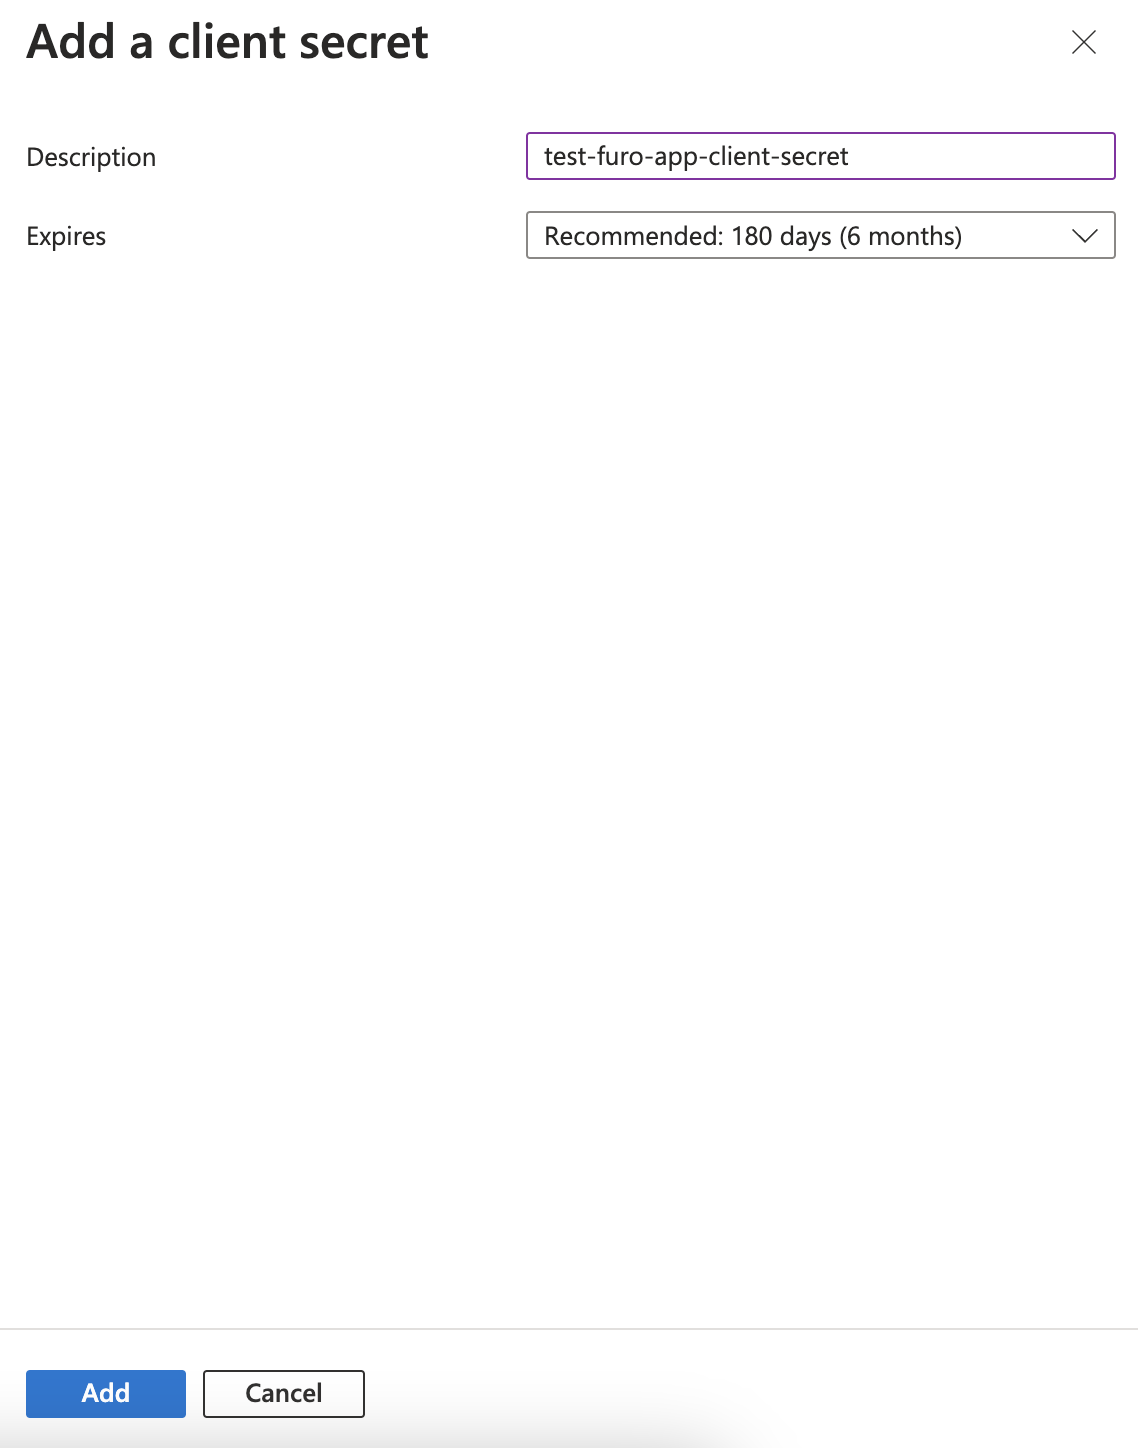 Click the New Client Secret button, set Description and Expires, and then click the Add button.
 After creation, copy the Value. This value is only available during creation, so be sure to save it. Additionally, this value needs to be set as the Client Secret value in the Microsoft Login settings in the Furo Console.
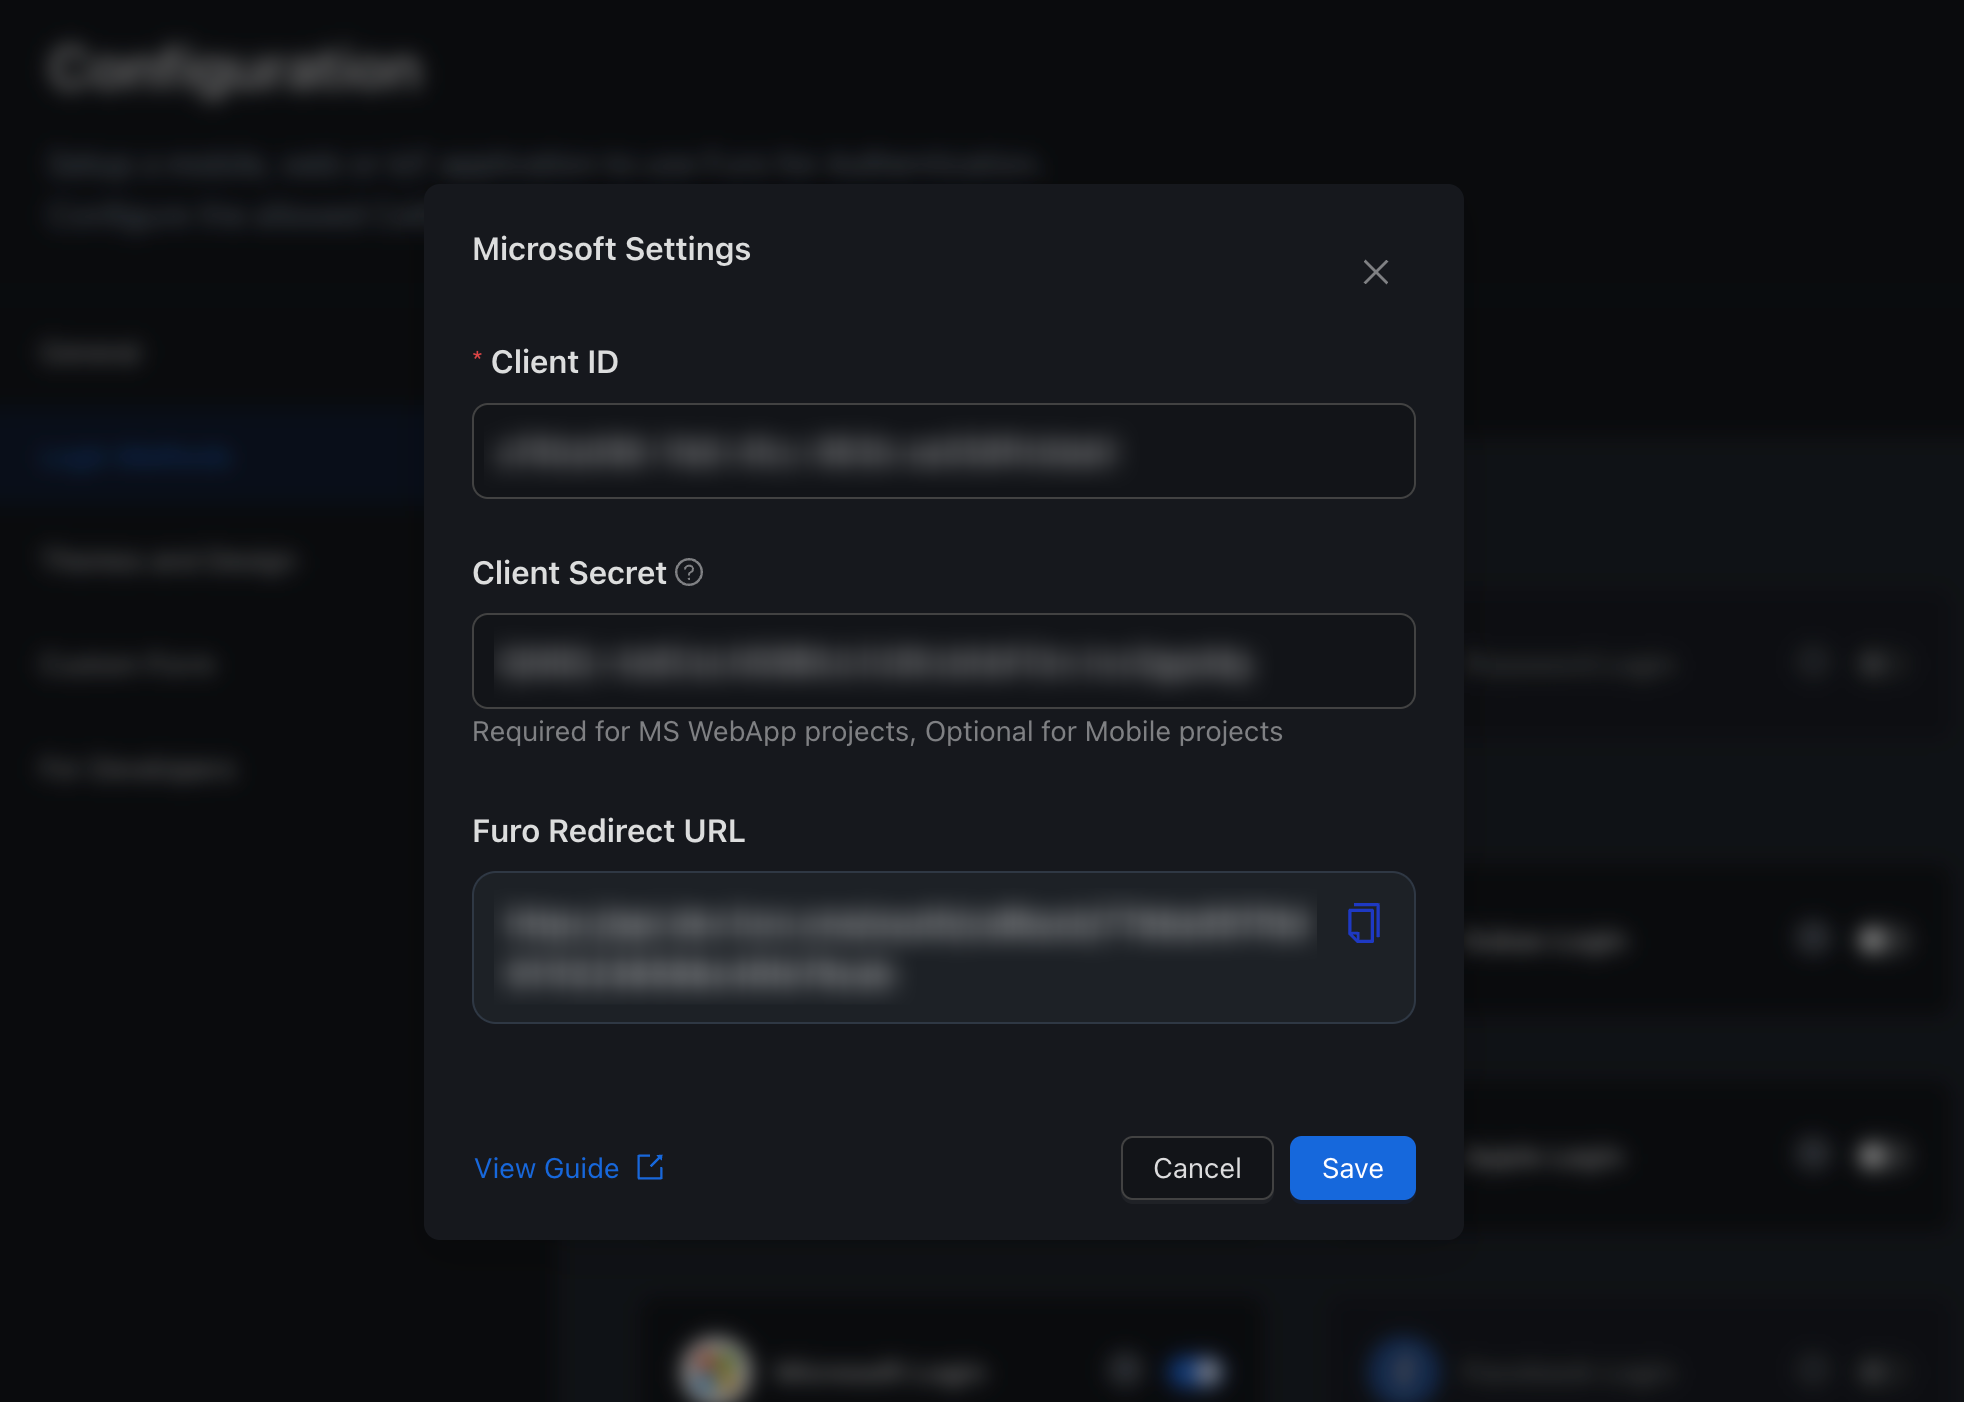
 Paste the copied Client ID and Client Secret into the Microsoft Login Setting in the Furo Console.
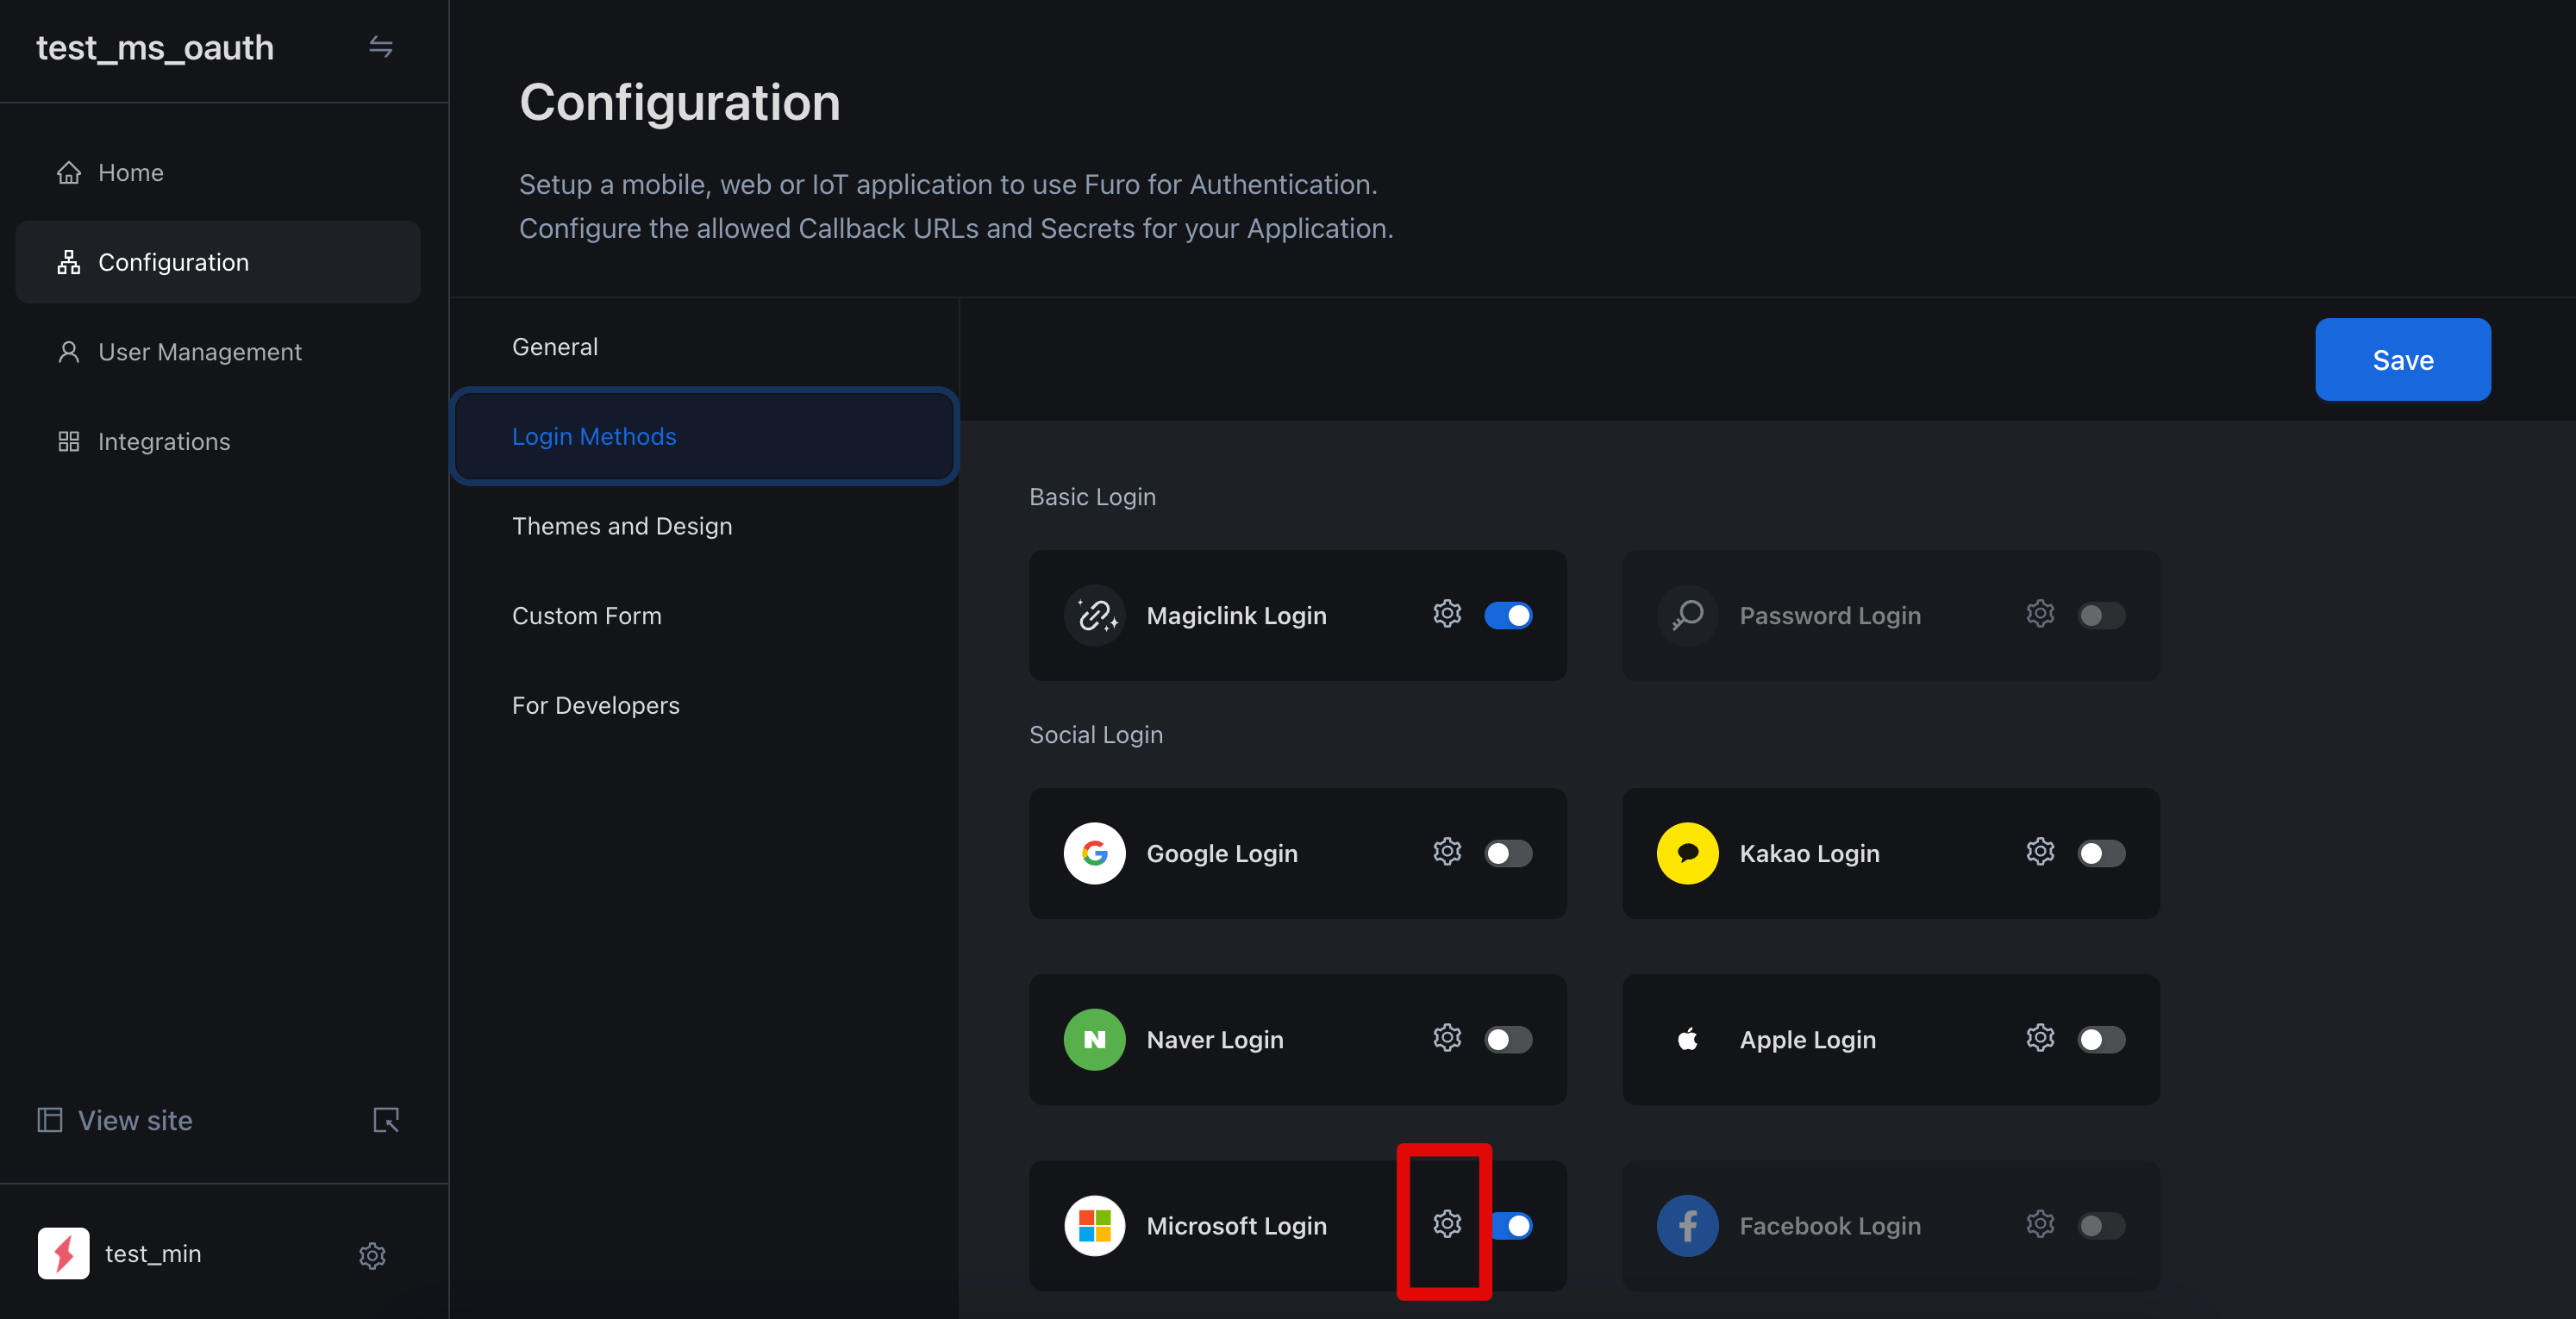
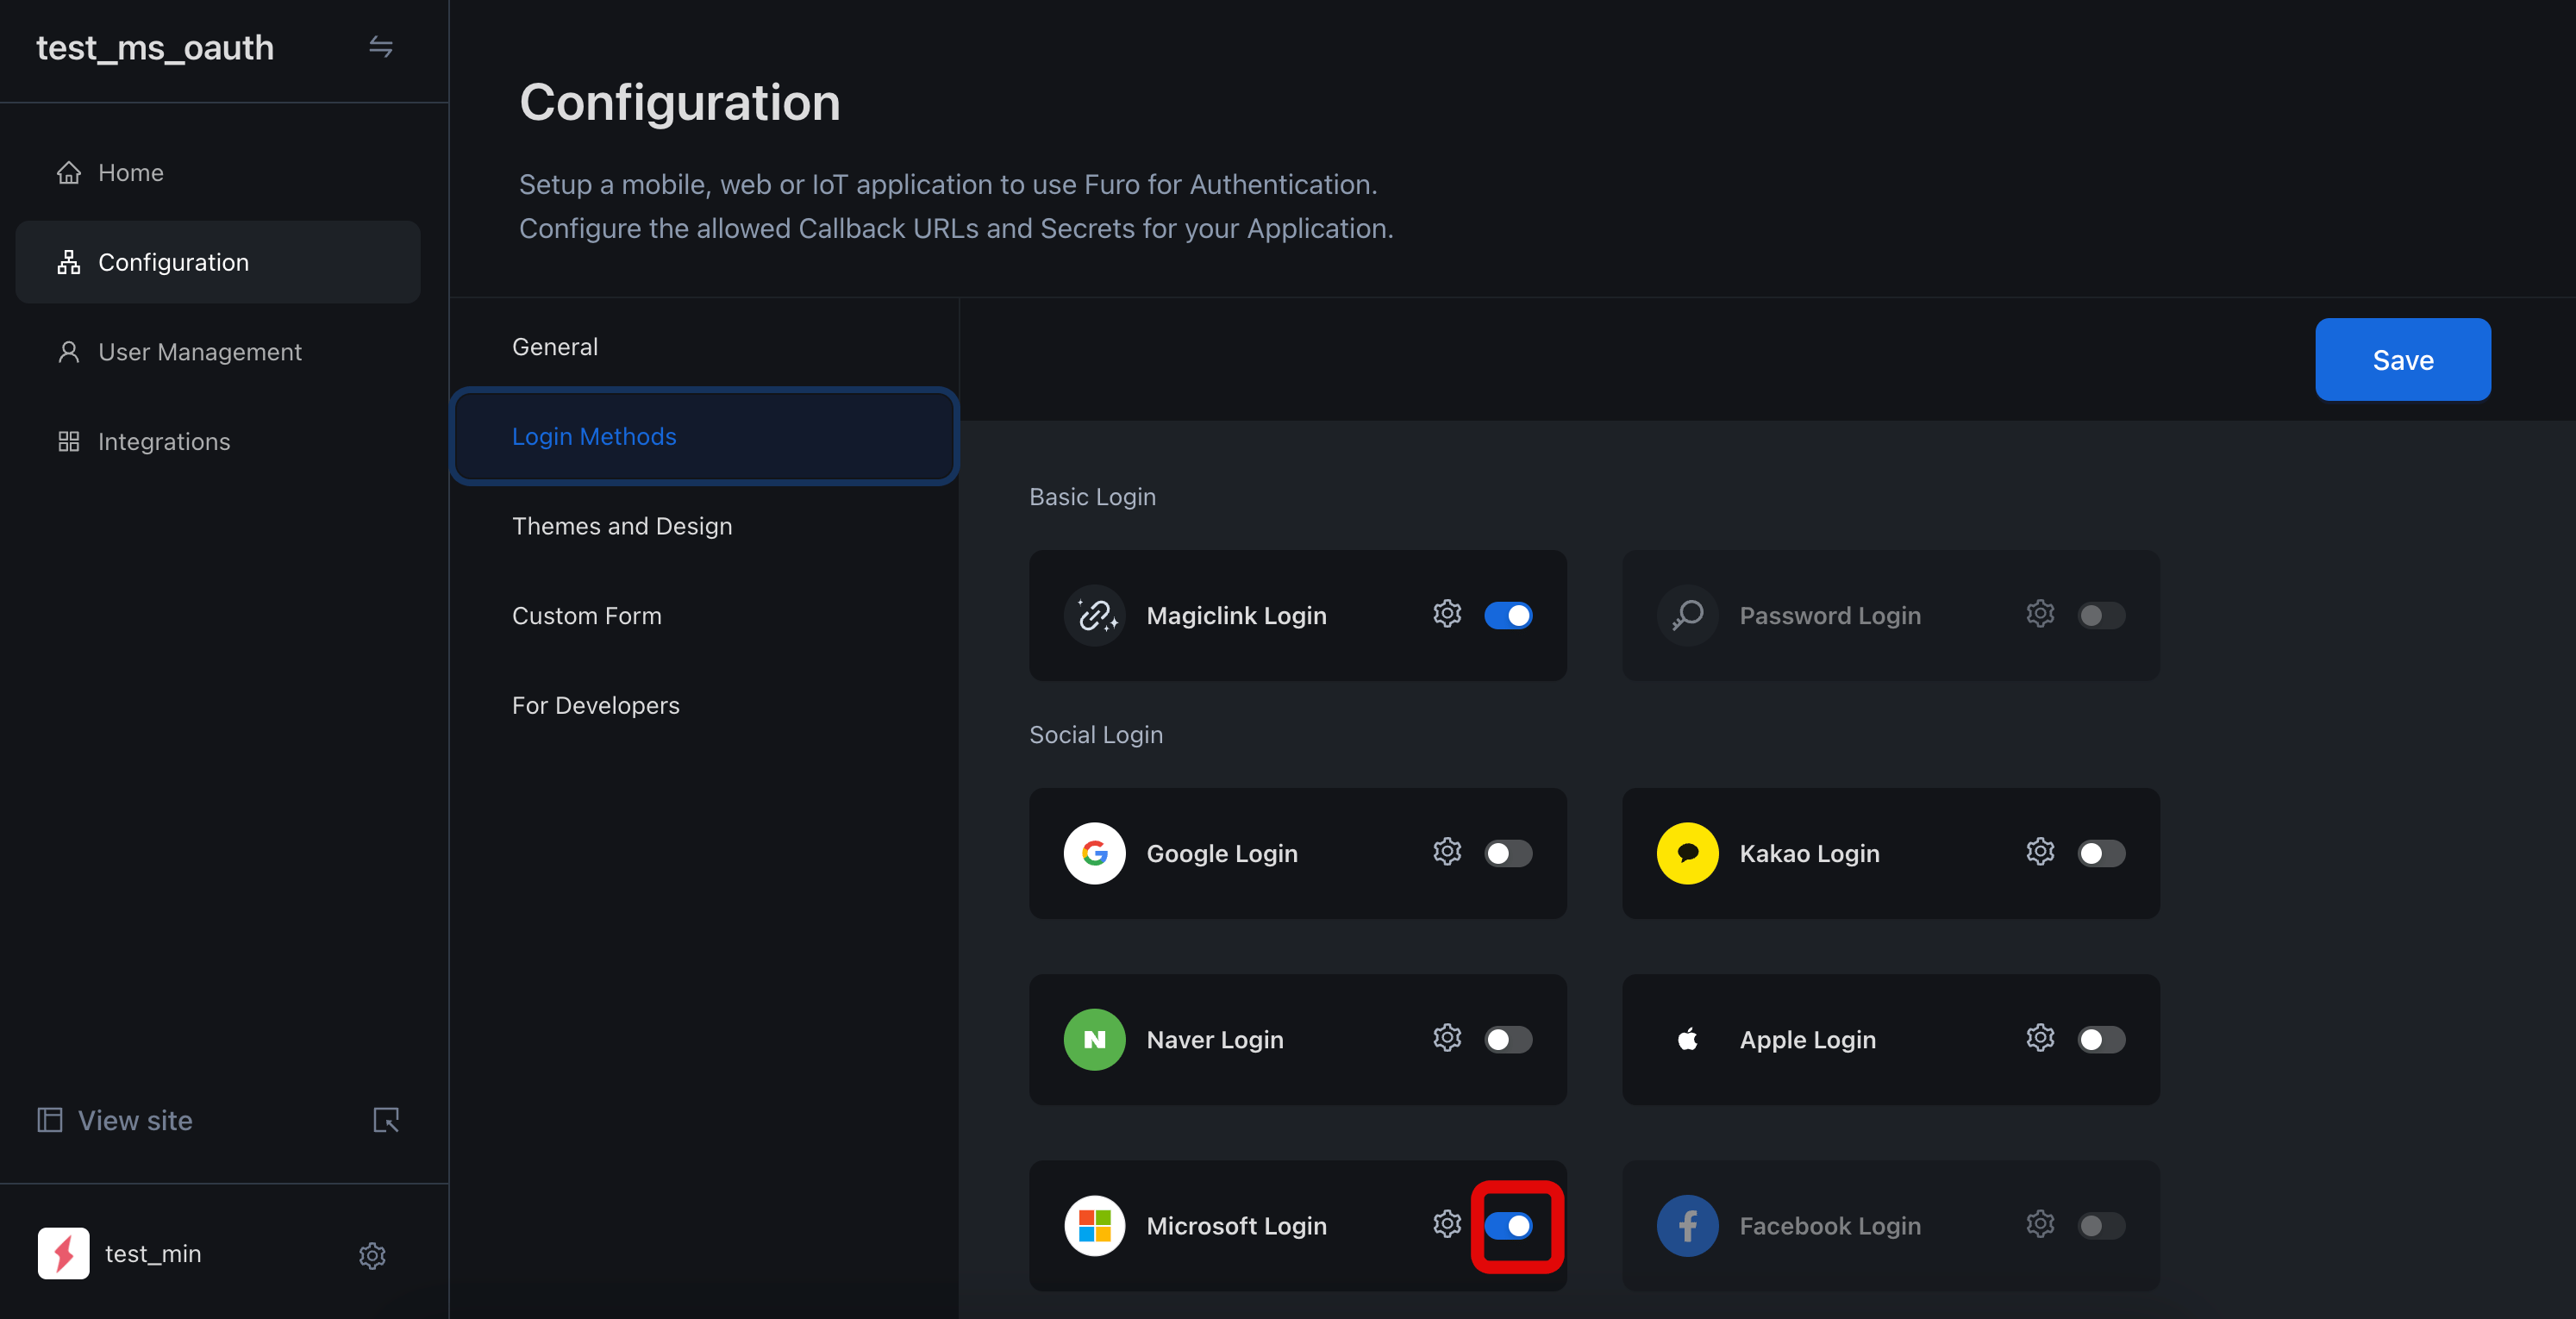 Activate Microsoft Login.
 By calling a method that redirects to the URL above in the onClick() prop of your custom button, users will be taken to the Microsoft login prompt. Once Microsoft authentication is completed, they will be redirected to the Callback URI configured in your project.
1. Register an Azure App
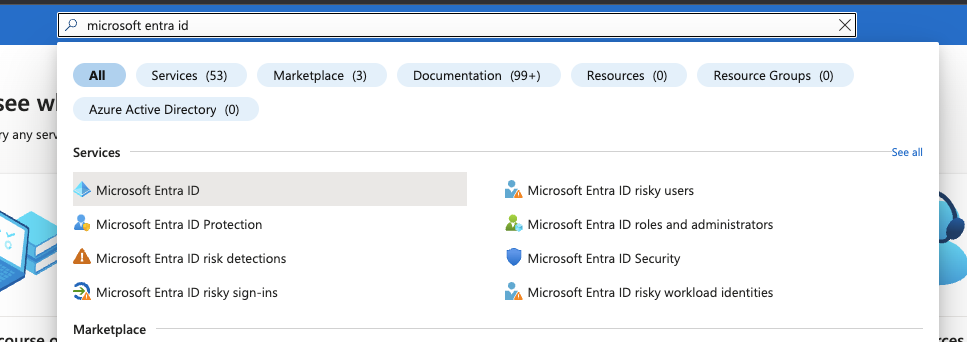
Go to Azure Portal. Search for Microsoft Entra ID and select it.
Under the Manage menu tab on the left, click on App registrations and then click New registration on the top tab.
Enter the application information. Set the application name and choose the Supported Account Type according to your user scope. Skip the Redirect URI setup for now; we will proceed with it in the next step.
After creating the project, you will see a completion screen like this.
2. Configure App Settings
Set up Redirect URI
Click on the Authentication tab in the left Manage tab of your created Azure Application.
Under Platform configurations, click the Add a platform button.
Set up the Application platform according to your needs. In this example, we proceed with the Web platform.
Add https://api.furo.one/oauth/callback/<FURO_PROJECT_CLIENT_ID> to the Redirect URI. You can copy this value from the Furo Redirect URL field in the Microsoft Login settings in the Furo Console.
Check Access tokens under Implicit grant and hybrid flows. Click the Configure button.
Obtain Client Secret
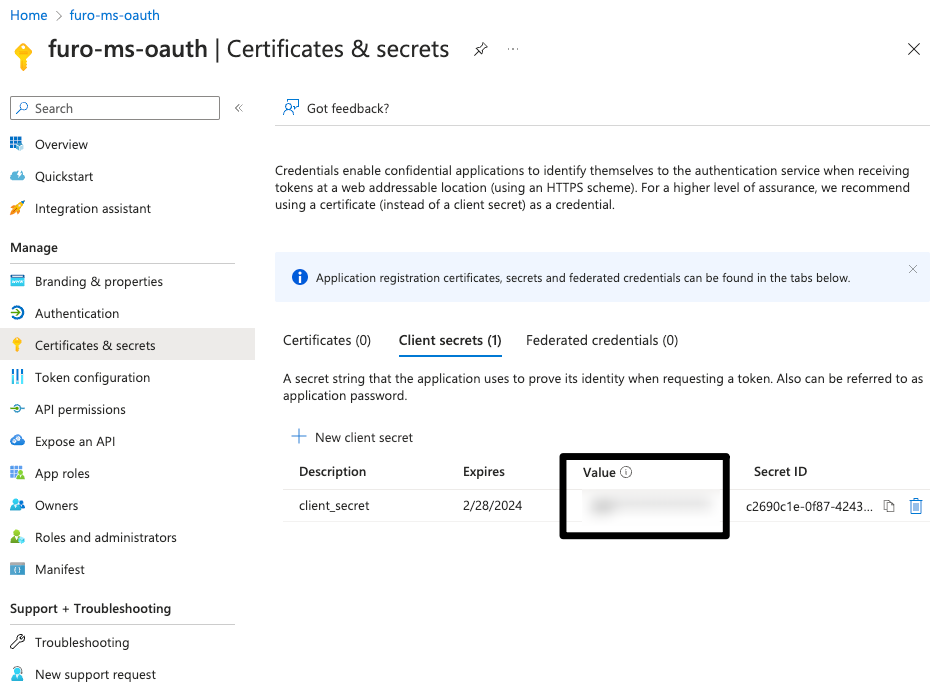
Click on the Certificates & secrets tab under the Manage menu of your created Azure Application.
Click the New Client Secret button, set Description and Expires, and then click the Add button.
After creation, copy the Value. This value is only available during creation, so be sure to save it. Additionally, this value needs to be set as the Client Secret value in the Microsoft Login settings in the Furo Console.
3. Activate Microsoft Auth for Furo Project
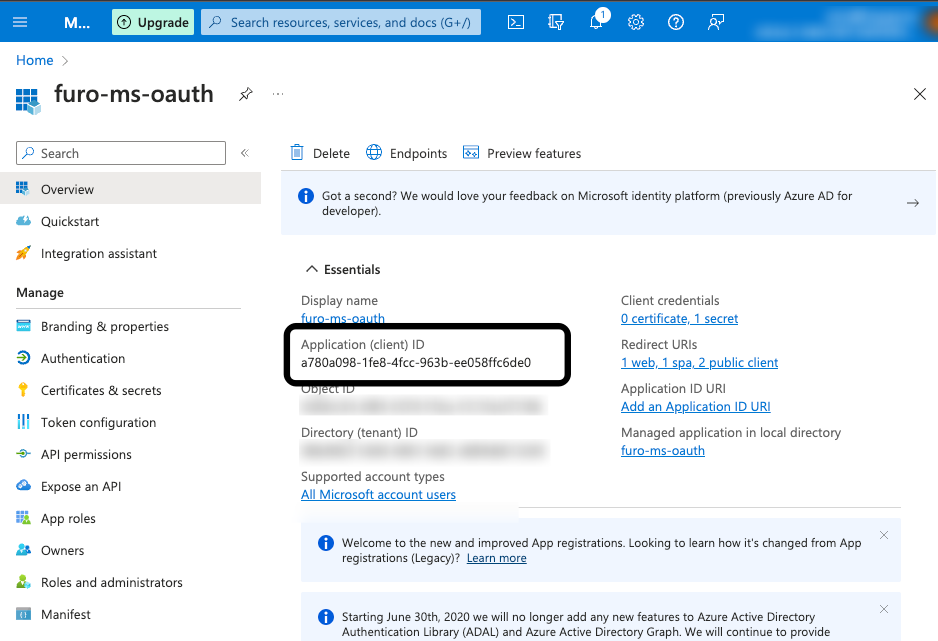
Copy the Client ID and Client Secret of the OAuth Client created in the Azure App Portal.
Paste the copied Client ID and Client Secret into the Microsoft Login Setting in the Furo Console.
Activate Microsoft Login.
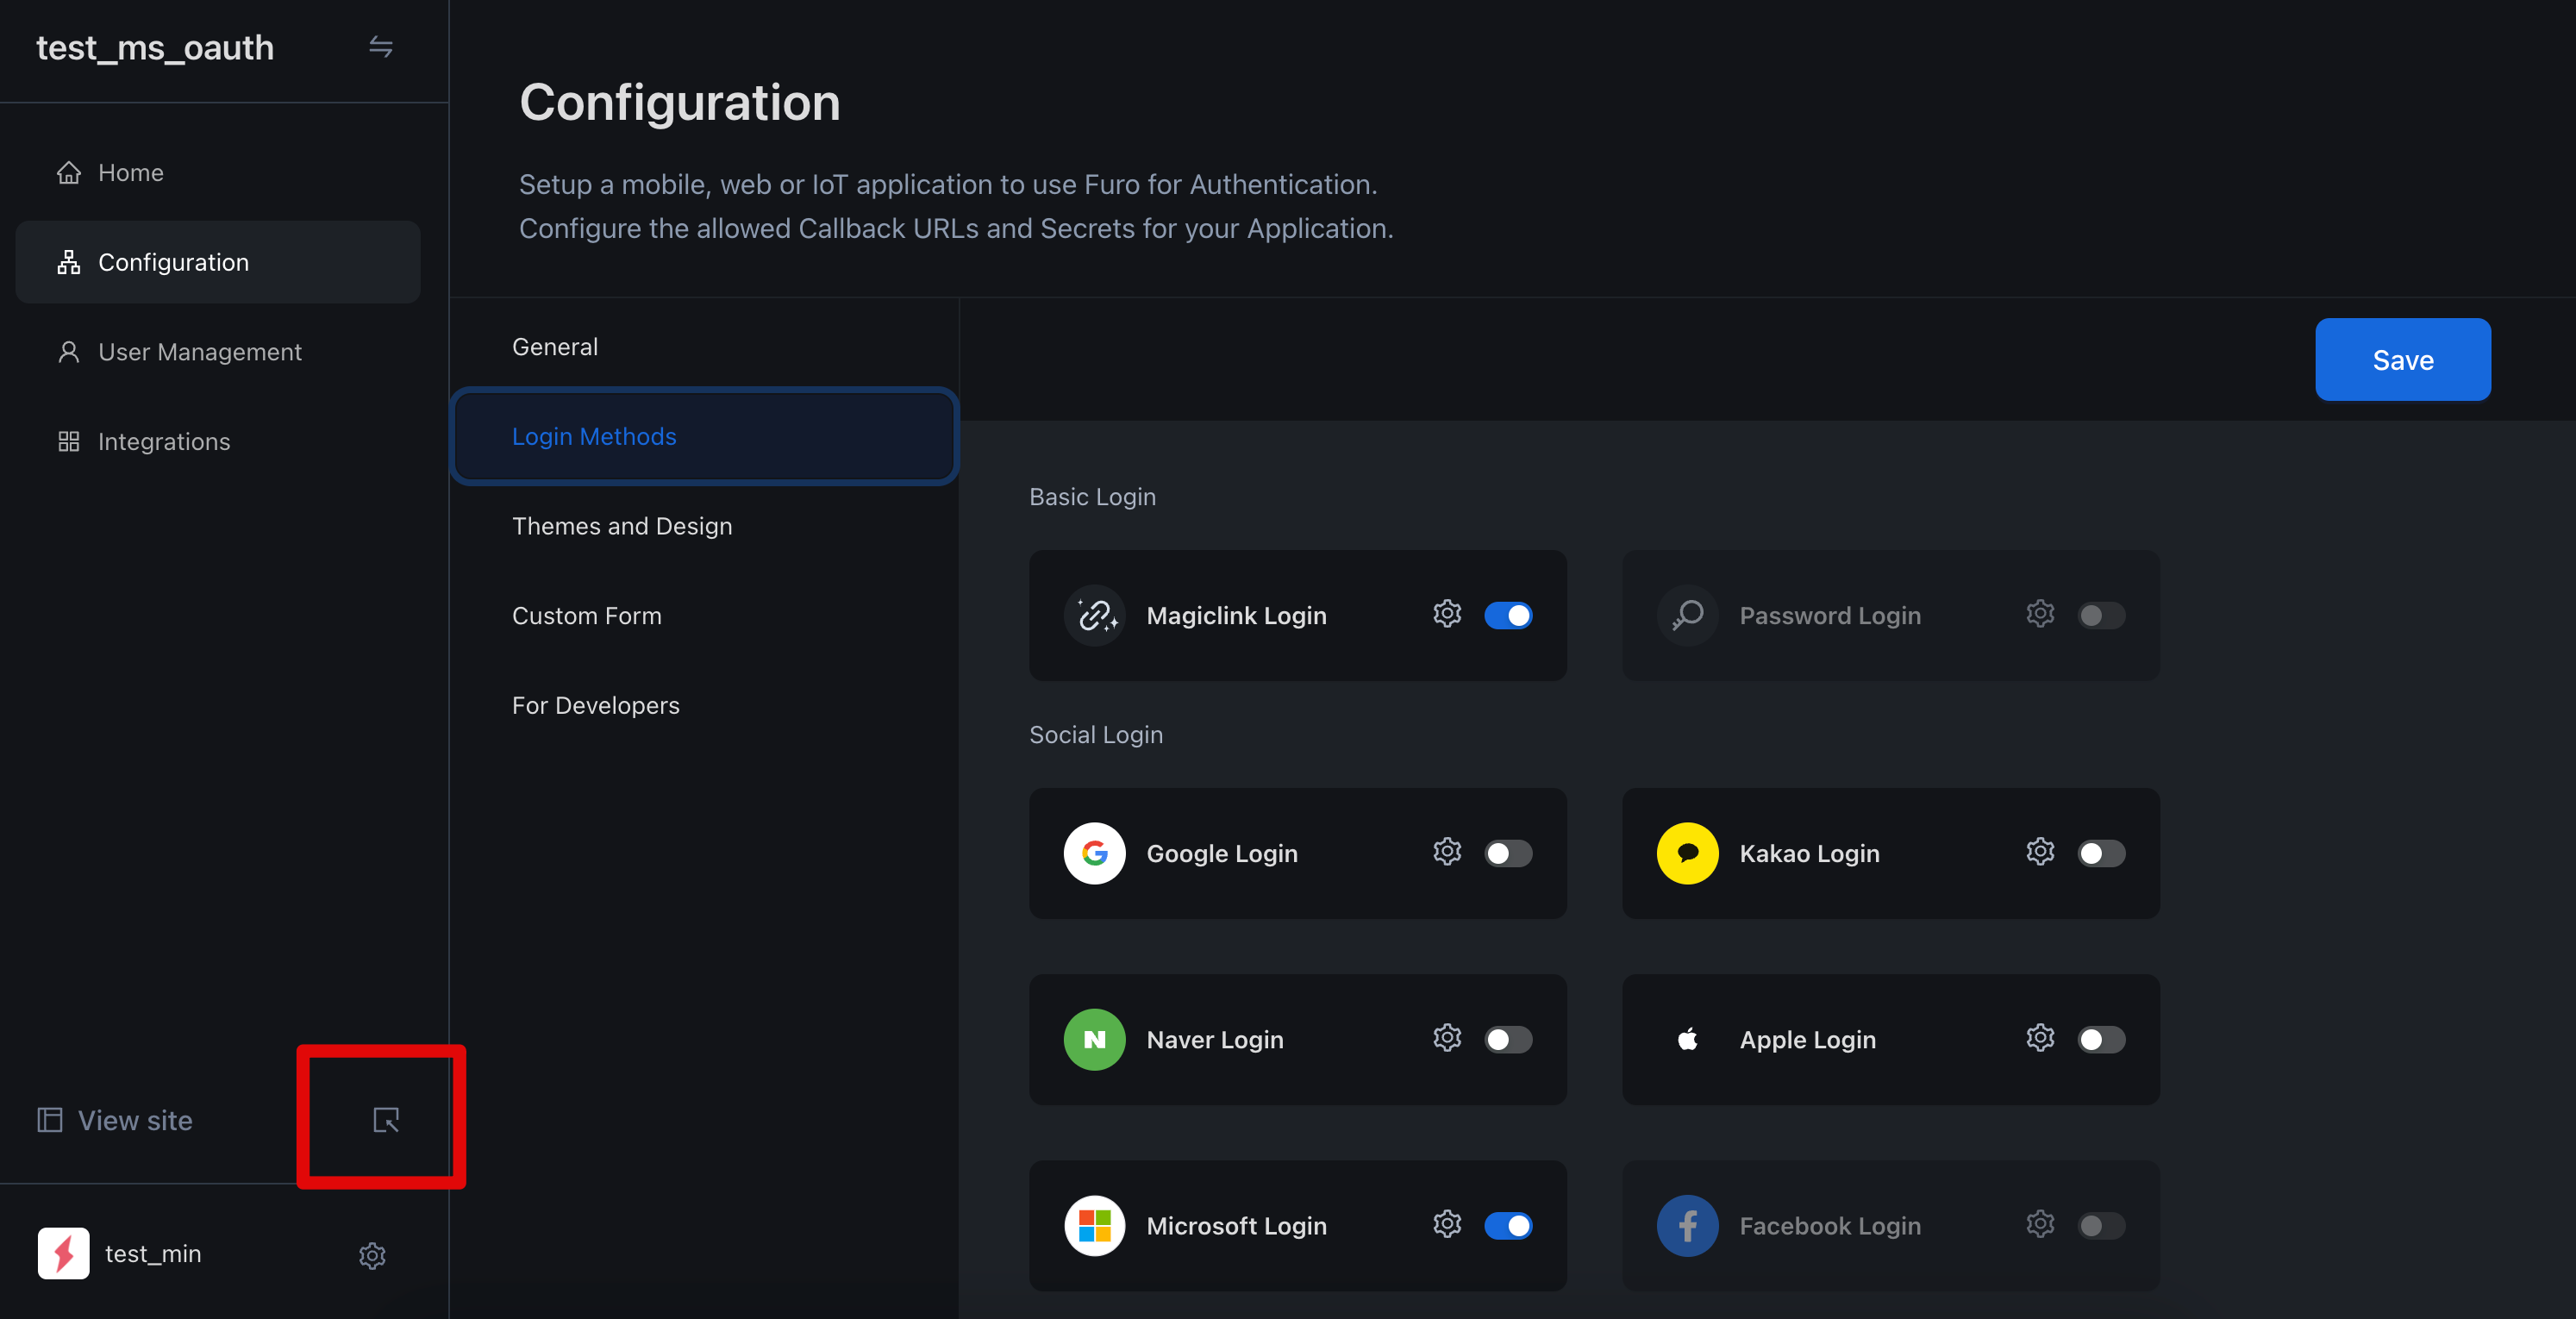
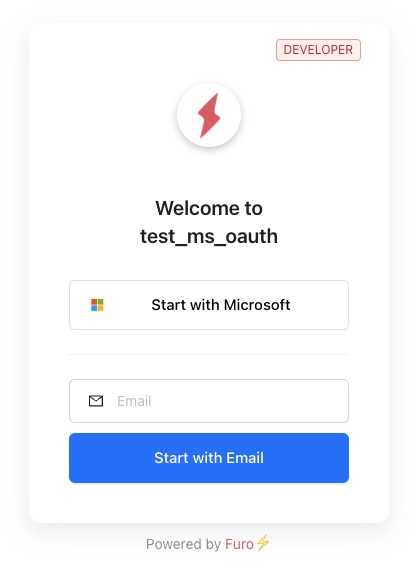
4. Check the Login Page
Press View site at the bottom left of the Furo Console to confirm that Microsoft Login is activated.
5. Customize the Microsoft Login Button
If you wish to customize the Microsoft Login button, you can embed the API URL provided by Furo in your custom login button.
By calling a method that redirects to the URL above in the onClick() prop of your custom button, users will be taken to the Microsoft login prompt. Once Microsoft authentication is completed, they will be redirected to the Callback URI configured in your project.