Configure Social Login
Kakao
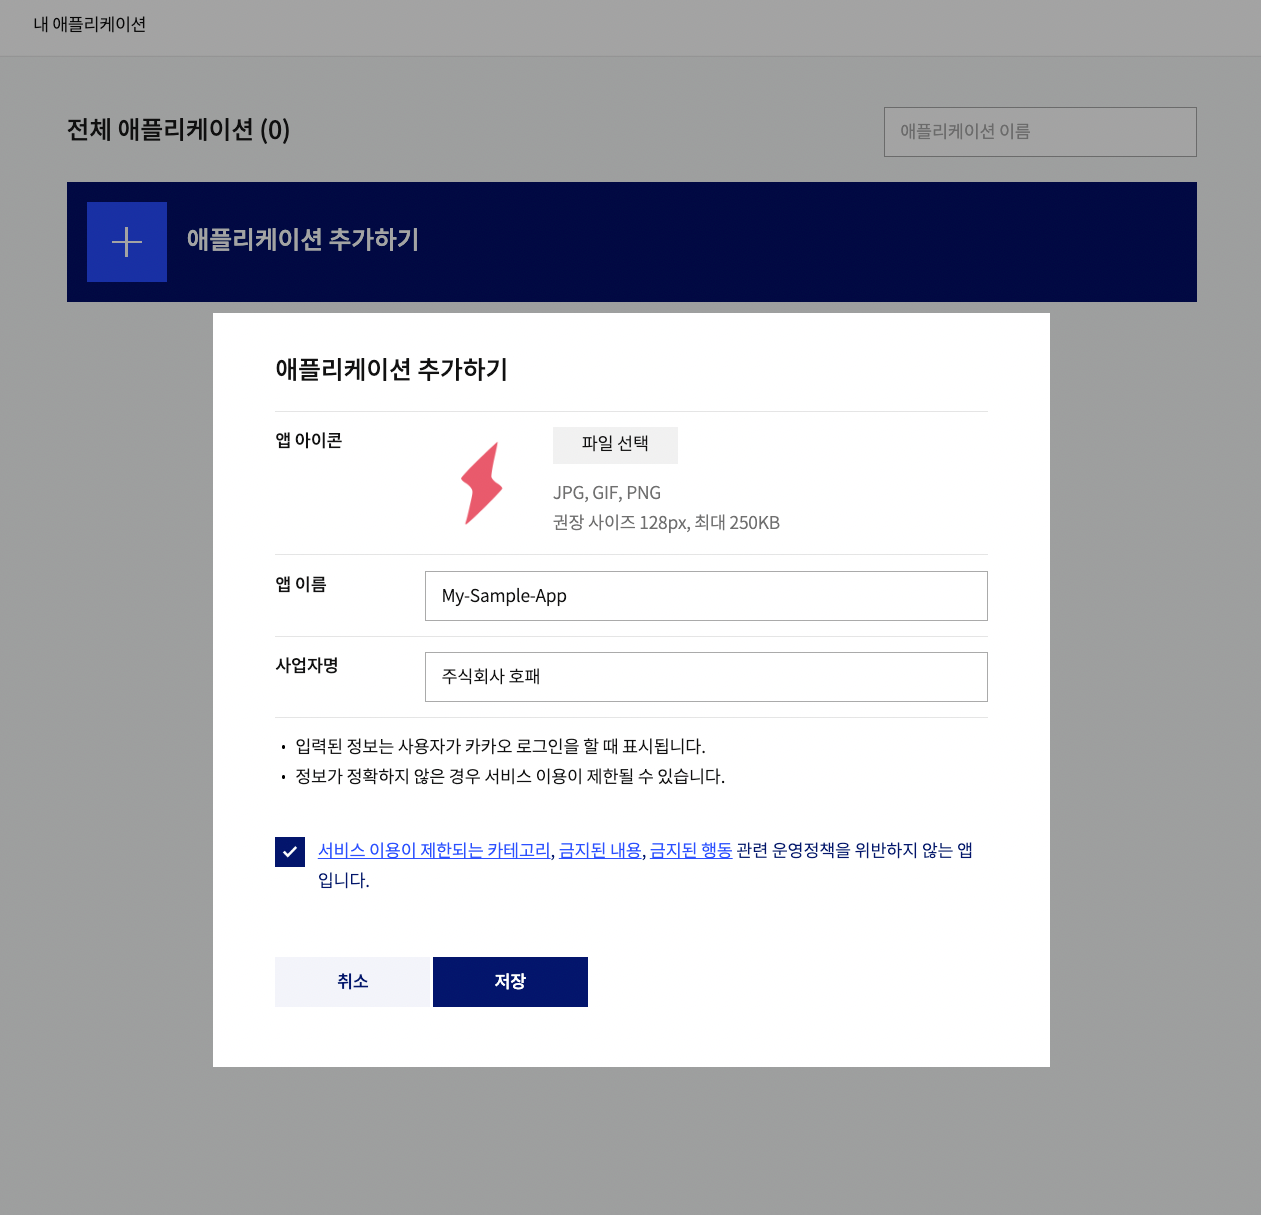
To enable Kakao OAuth, you need to create an application on Kakao Developers and set the generated REST API key as the API Key in the Furo Console.
 Add
Add 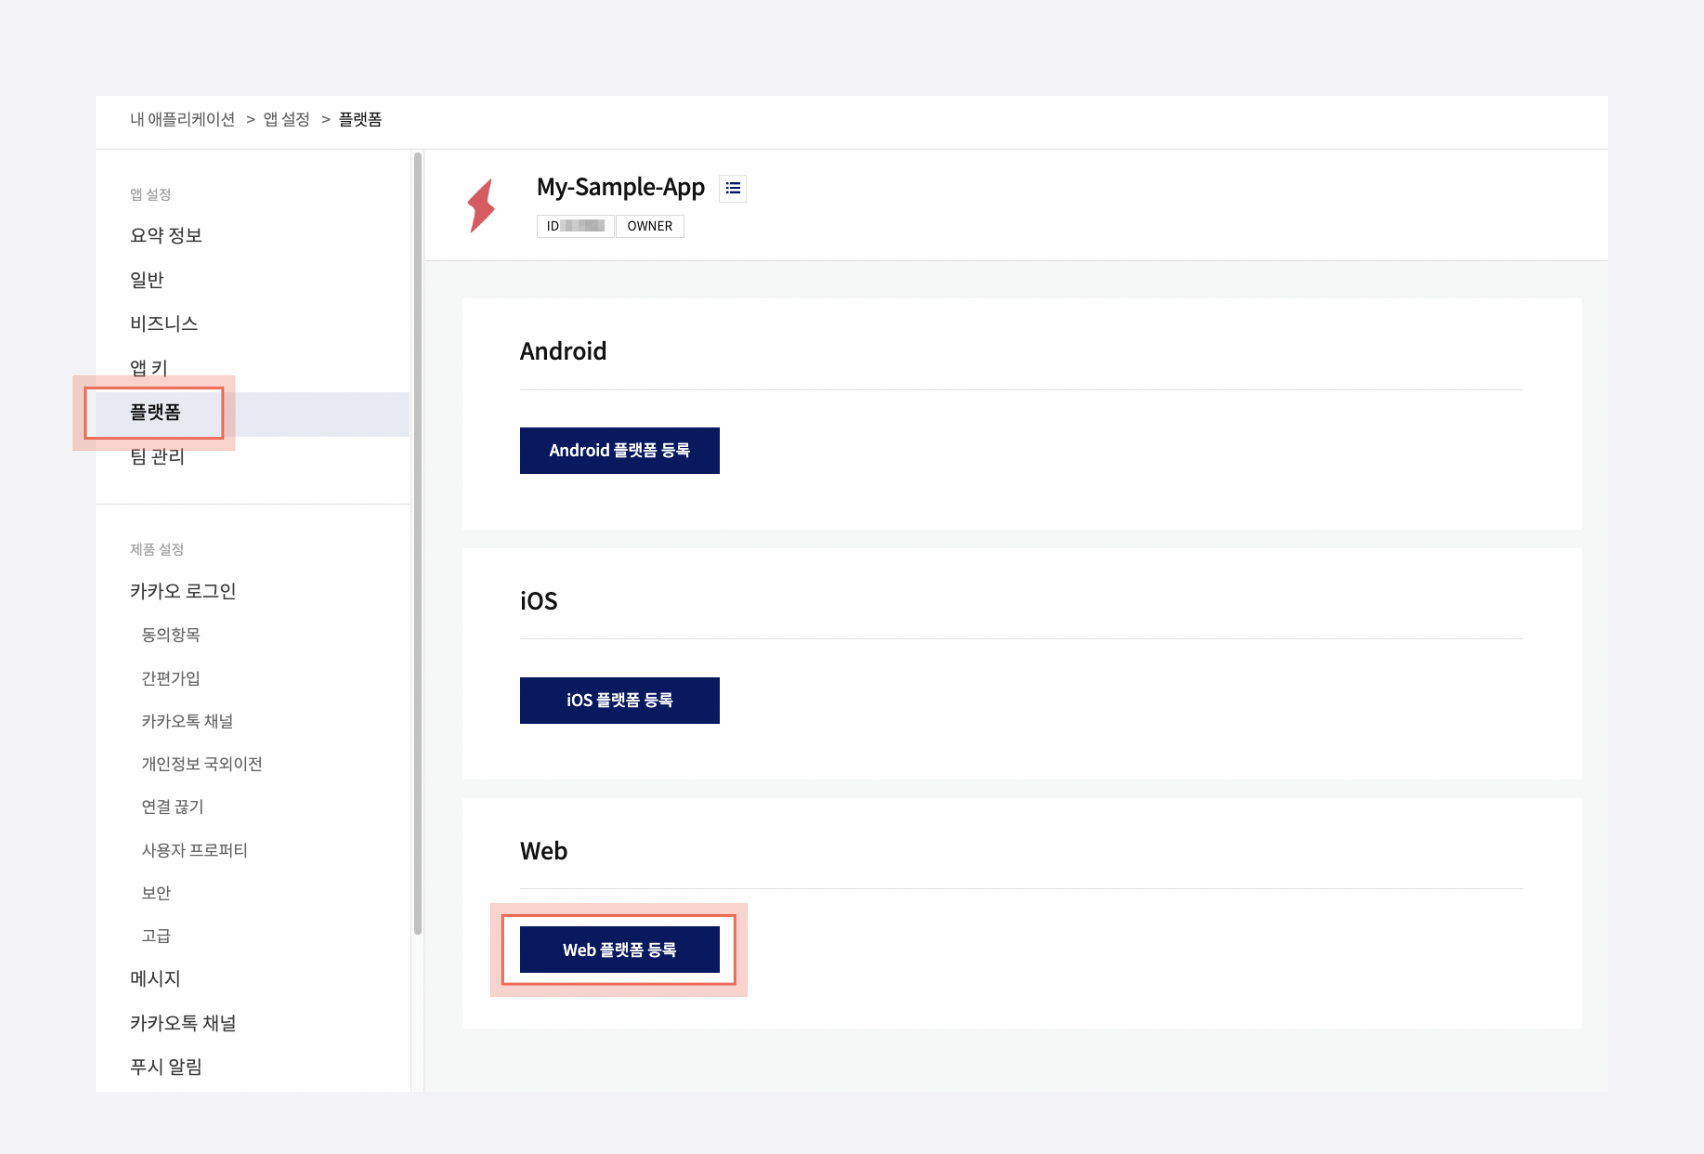
 Under the Redirect URI 항목 (Redirect URI), click the Redirect URI 등록 (Add Redirect URI) button.
 Add
Add 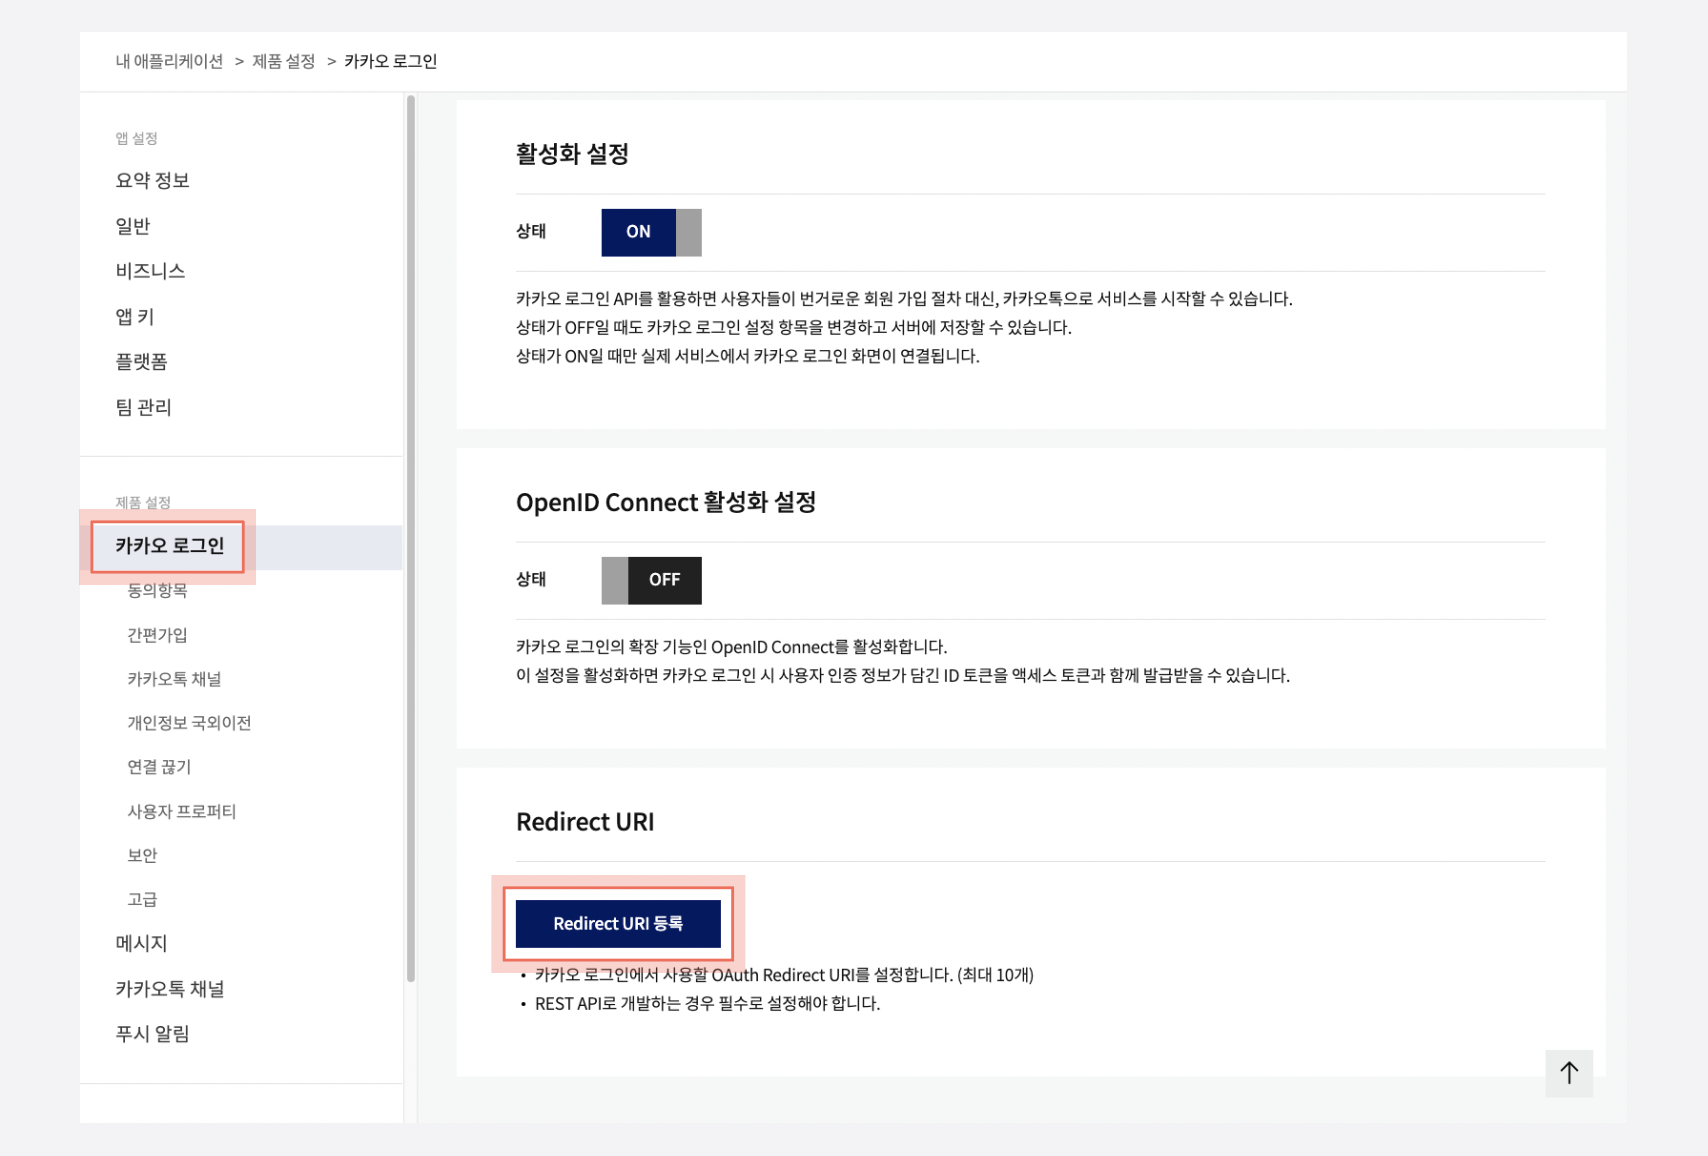
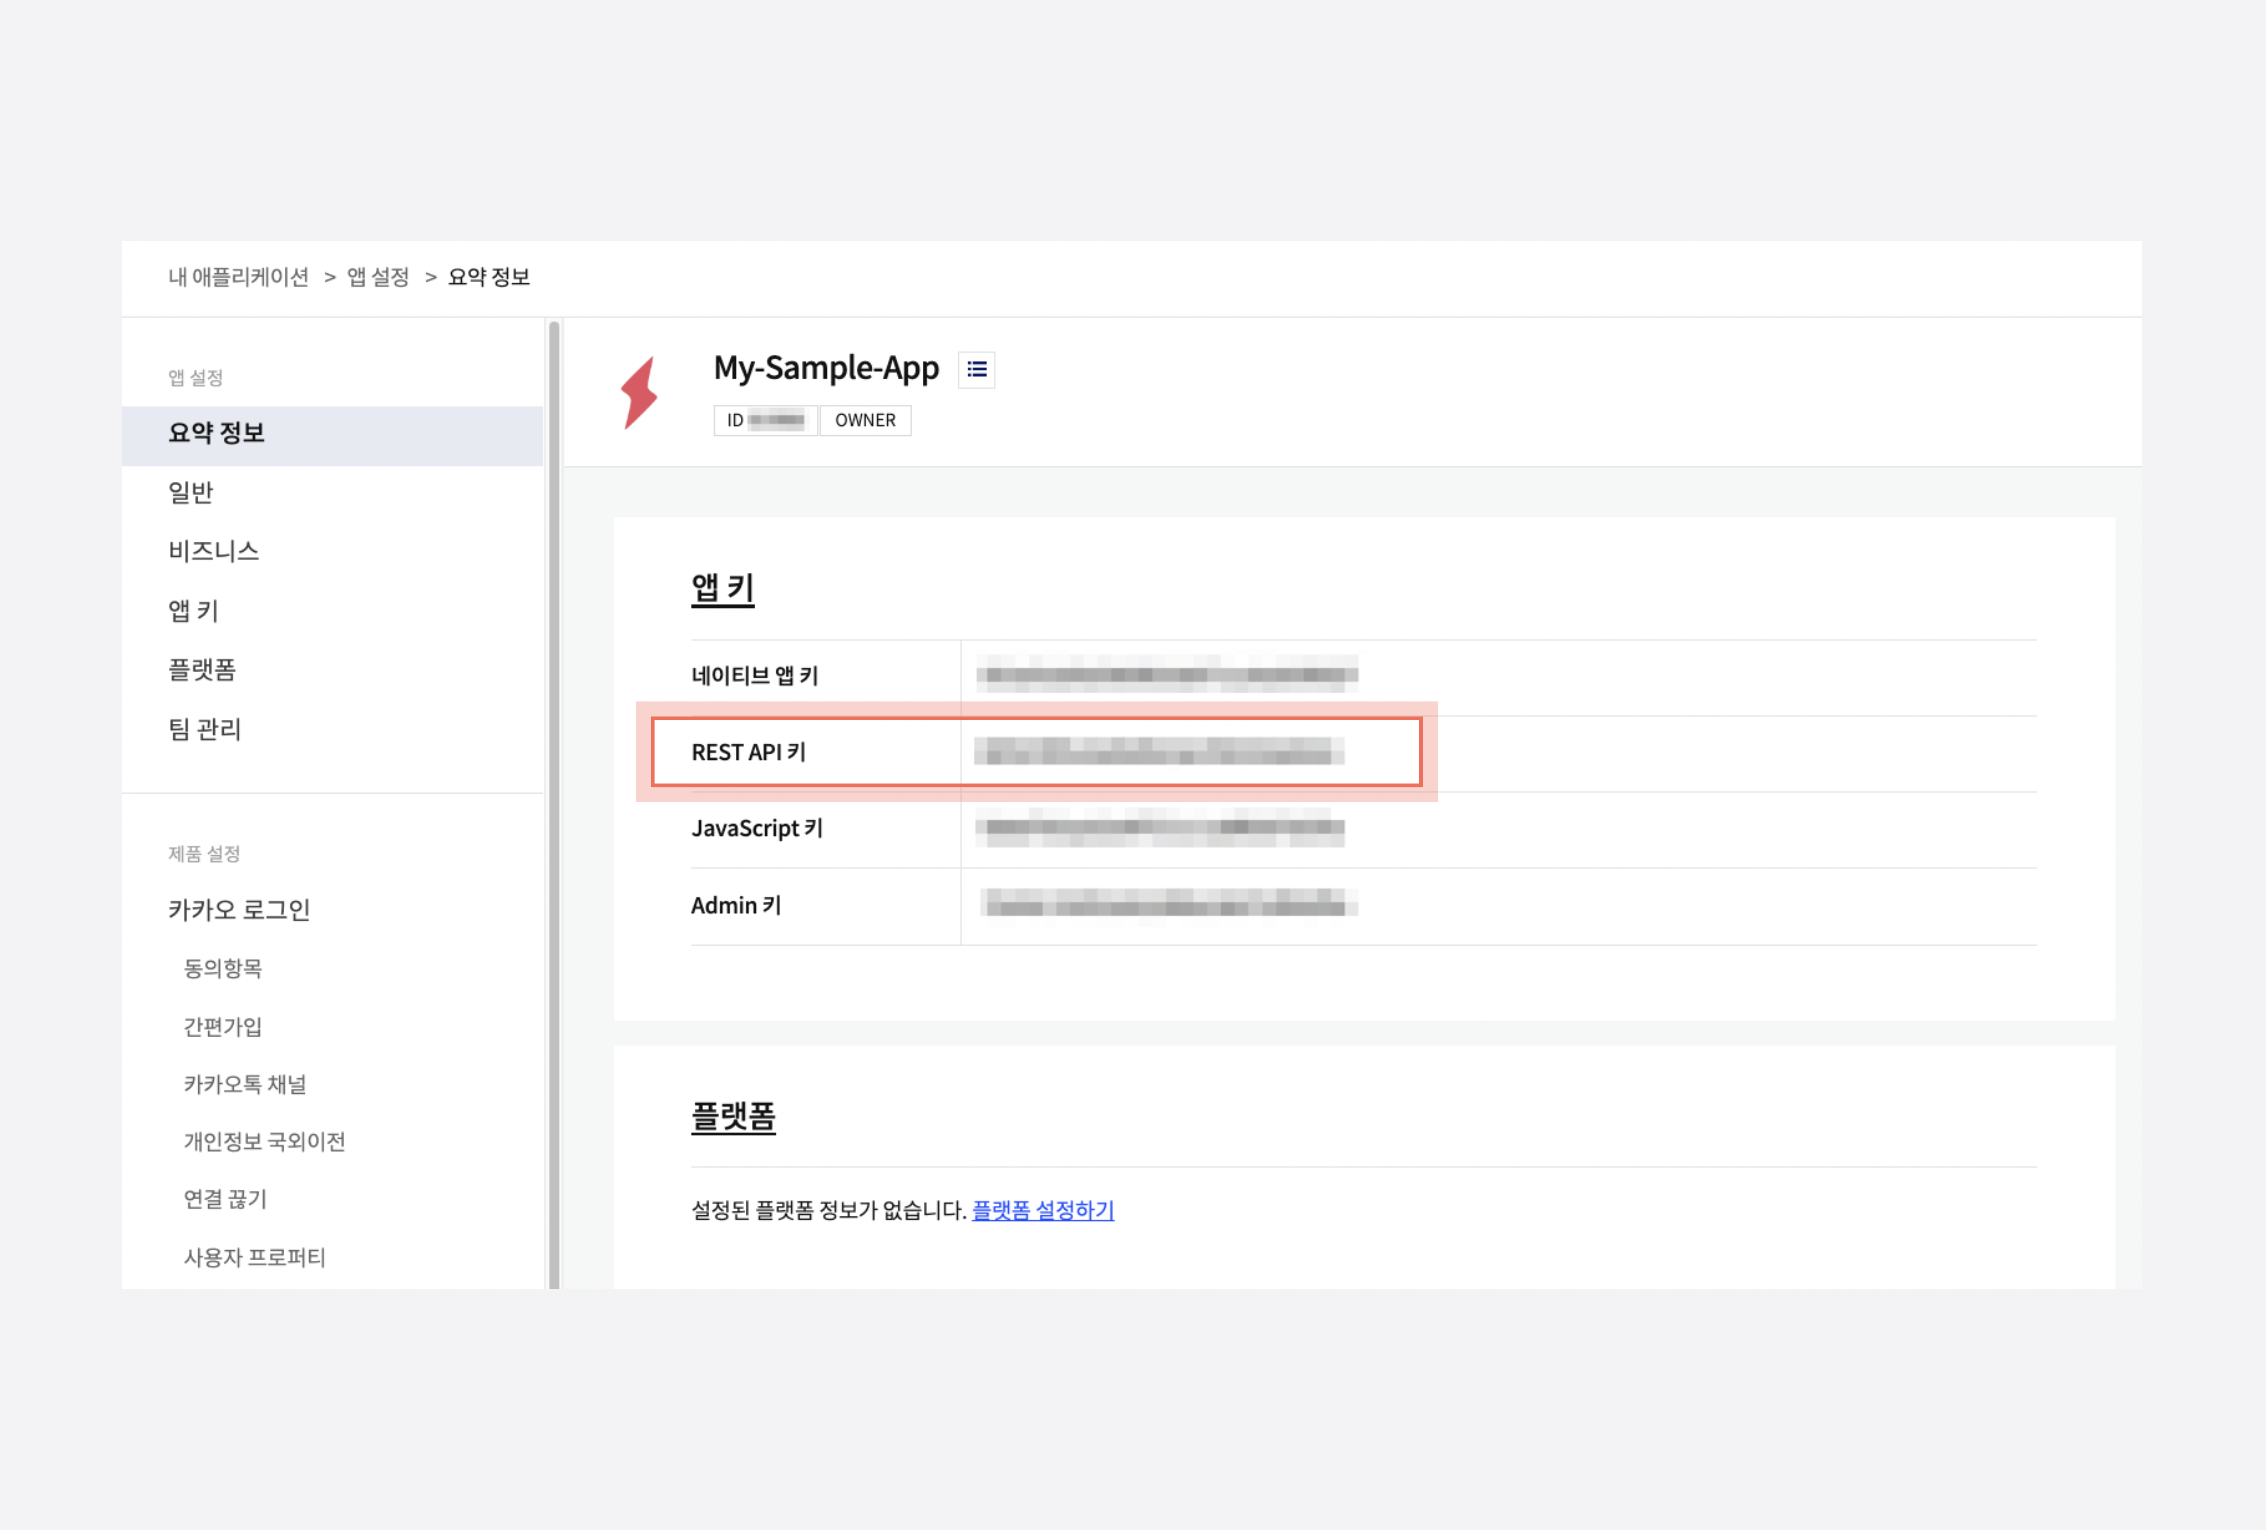
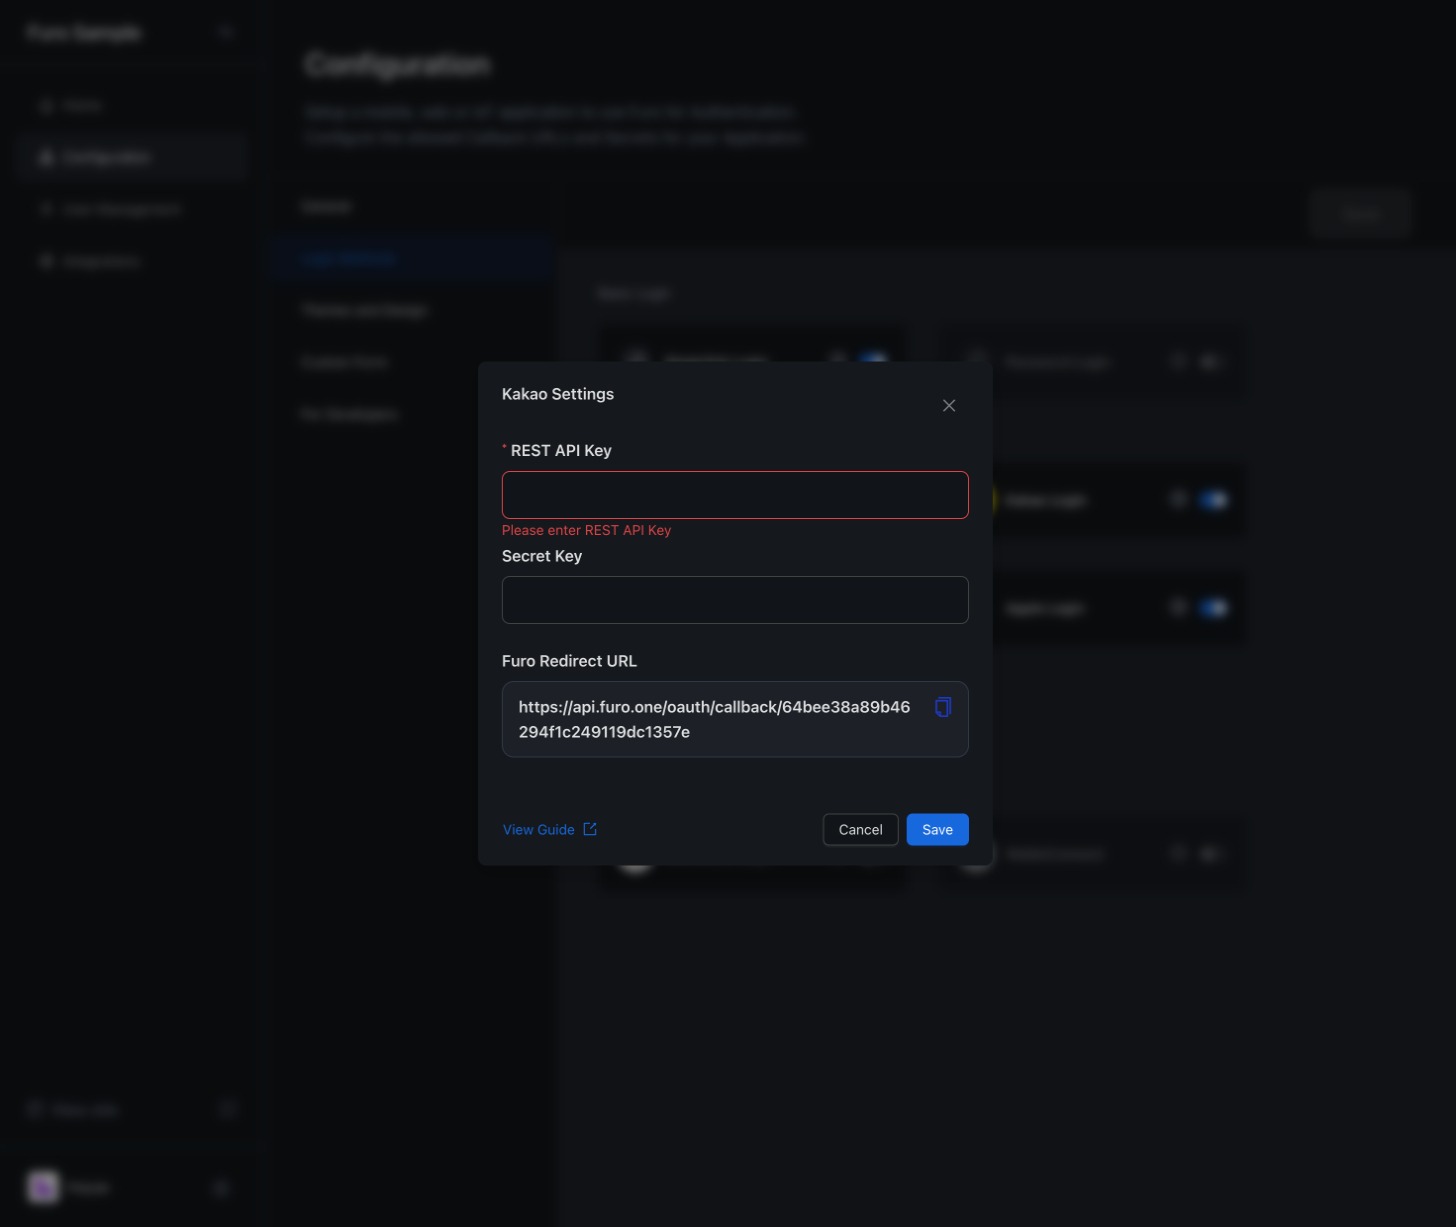
 Paste the copied REST API key into the REST API Key input field in the Kakao Login settings in the Furo Console, and save.
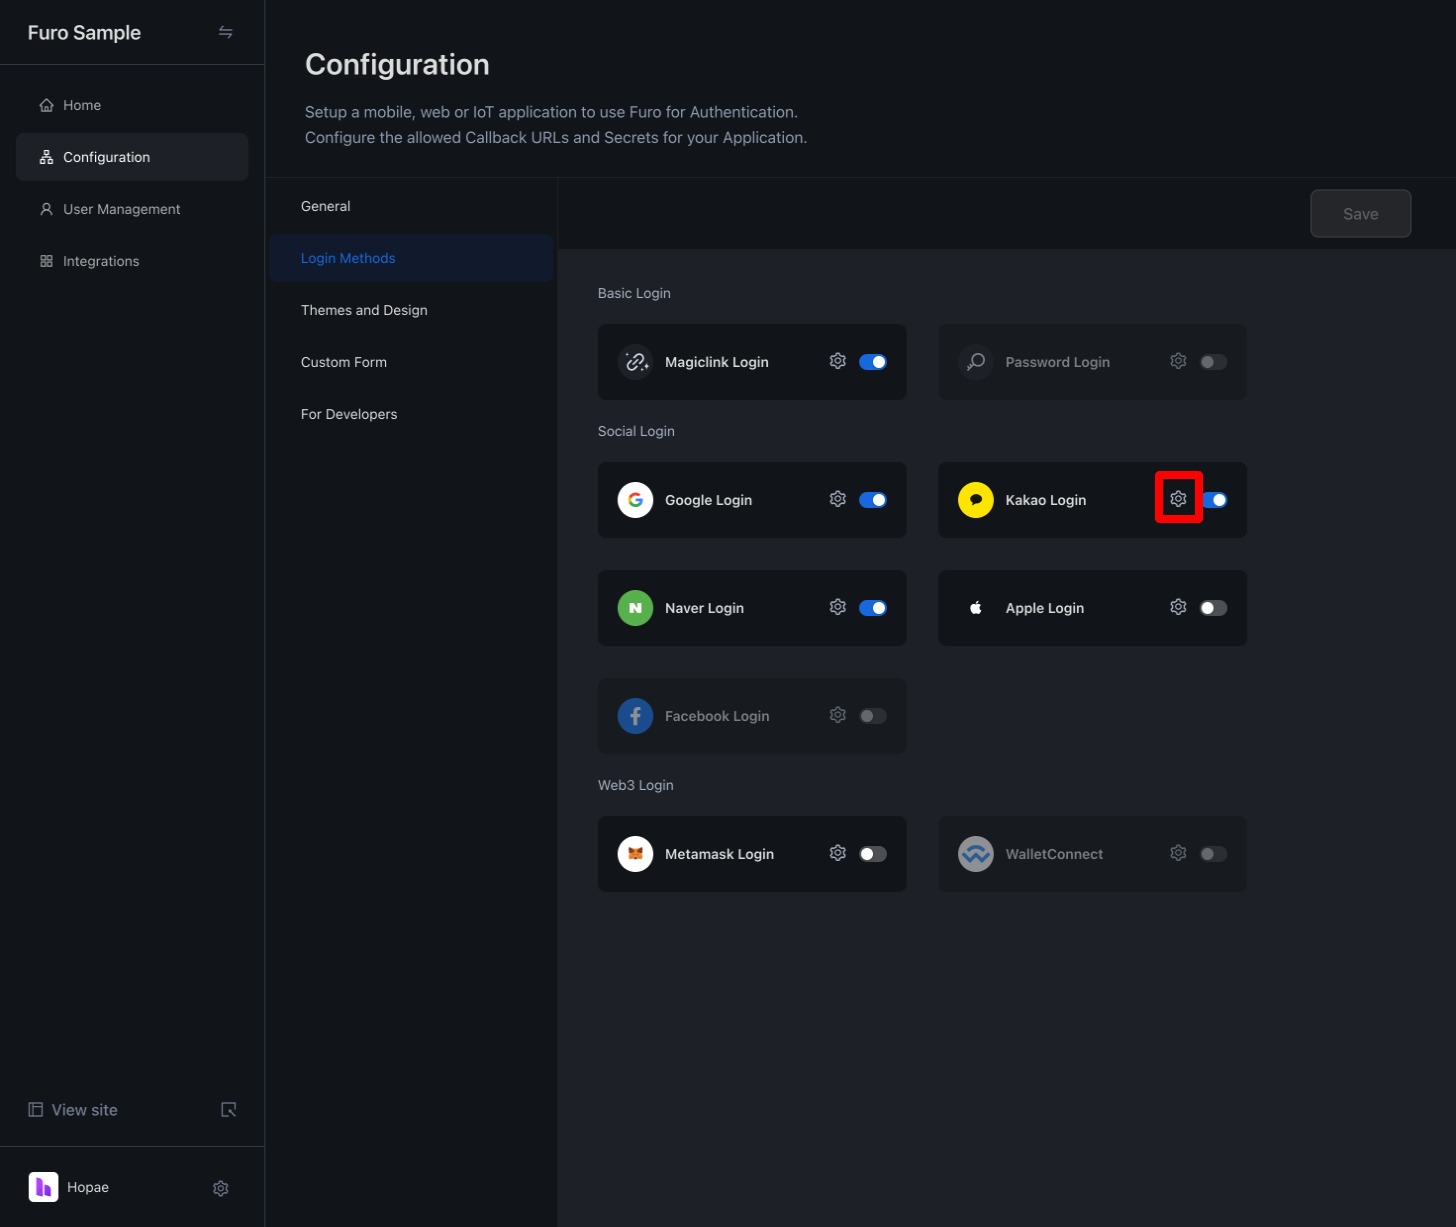 Once these settings are complete, the Kakao로 시작하기 (Start with Kakao) button will be activated on your project’s login page.
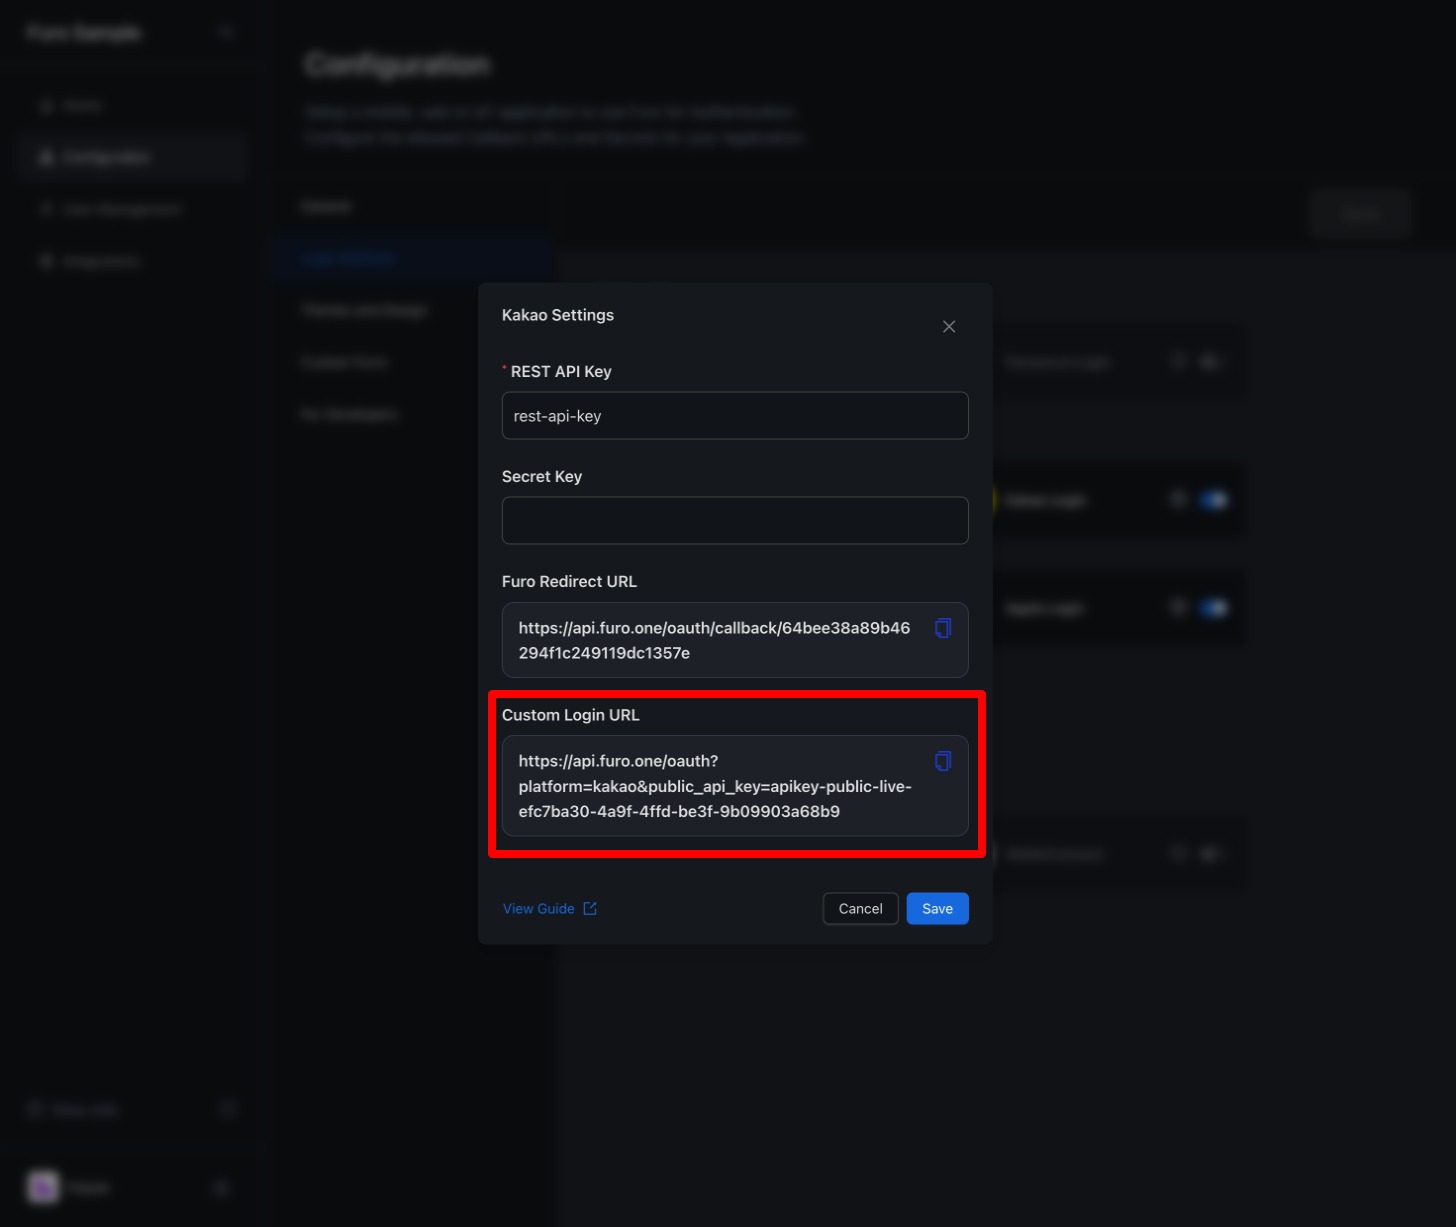 By calling a method in the onClick() prop of your button that redirects to the above URL, users will be taken to the Kakao login prompt. Once Kakao authentication is completed, they will be redirected to the Callback URI configured in your project.
- Adding a Kakao Login Application

2. Register a Platform
Select [앱 설정 (App Settings) > 플랫폼 (Platform)] from the left menu. Click the Web 플랫폼 등록 (Register Web Platform) button. Add
Add https://api.furo.one to the 사이트 도메인 (Site Domain) field and save.

3. Configure Kakao Login
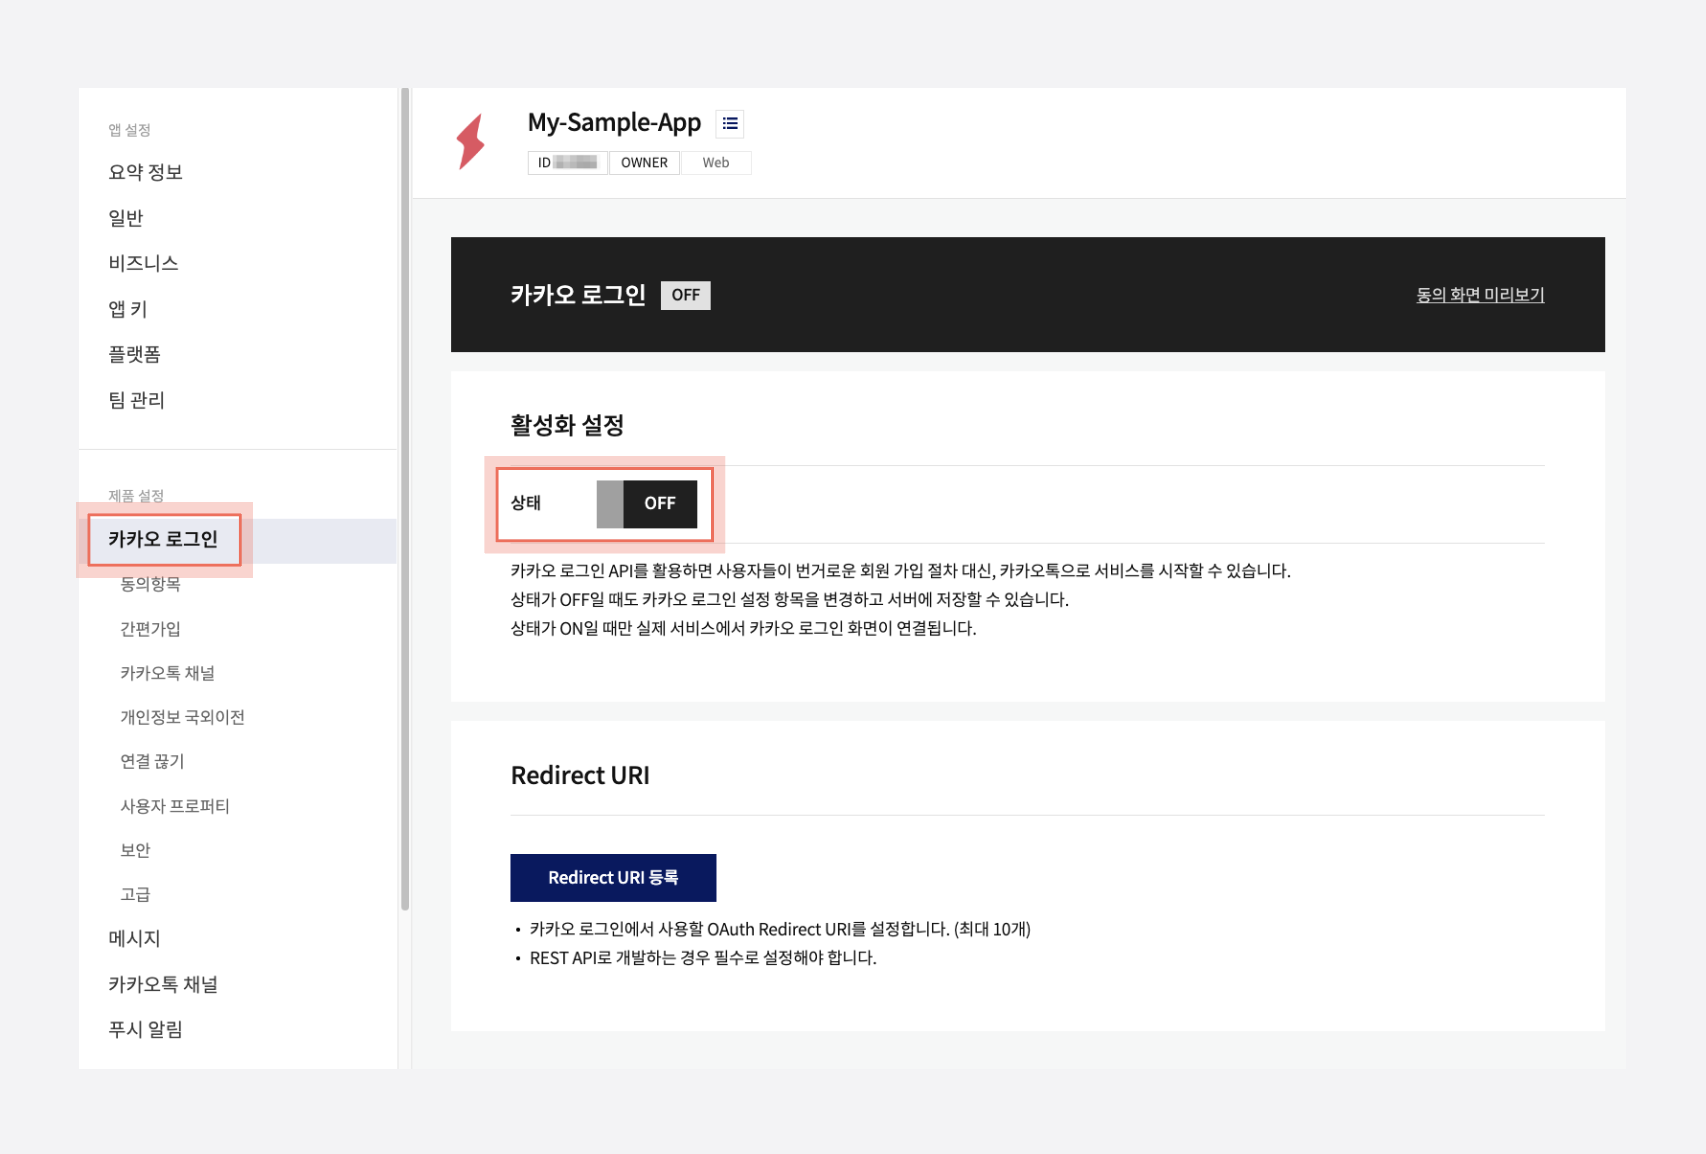
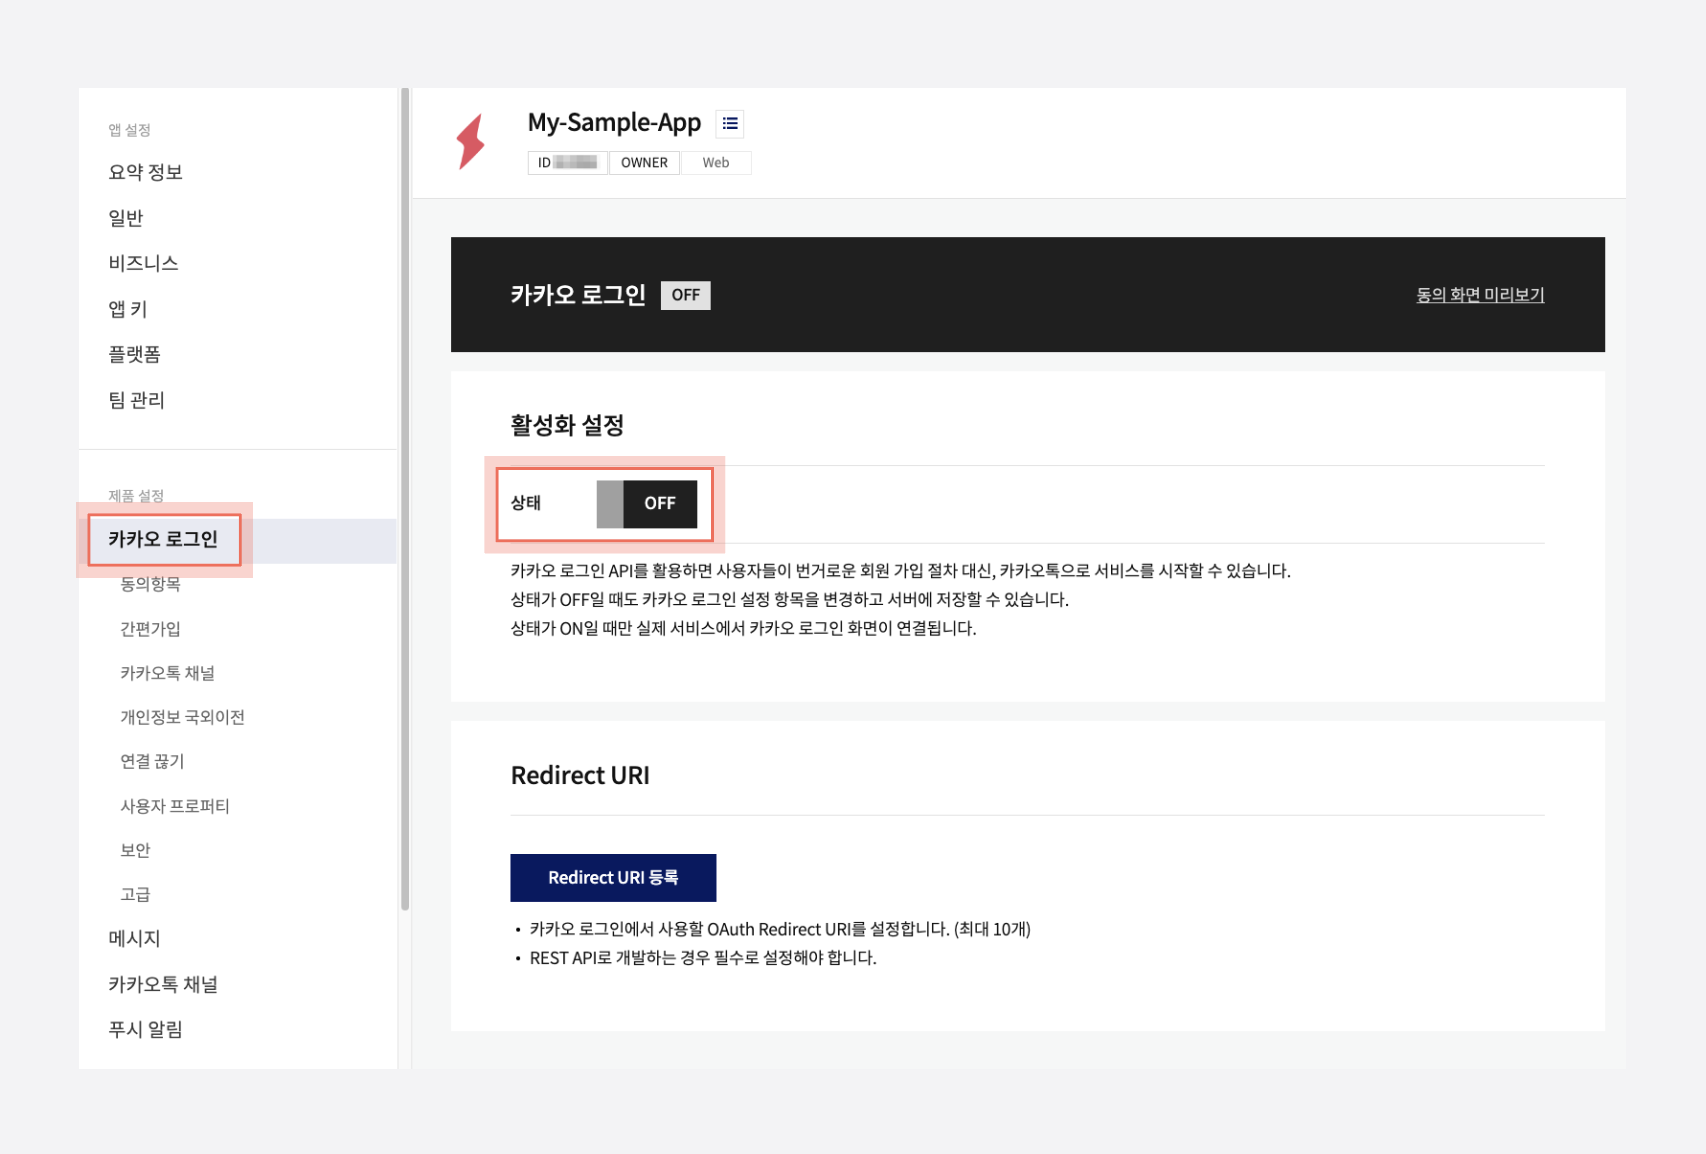
From the left menu, select [제품 설정 (Product Settings) > 카카오 로그인 (Kakao Login)]. In the 활성화 설정 (Activation Settings) section, enable the status switch. Under the Redirect URI 항목 (Redirect URI), click the Redirect URI 등록 (Add Redirect URI) button.
 Add
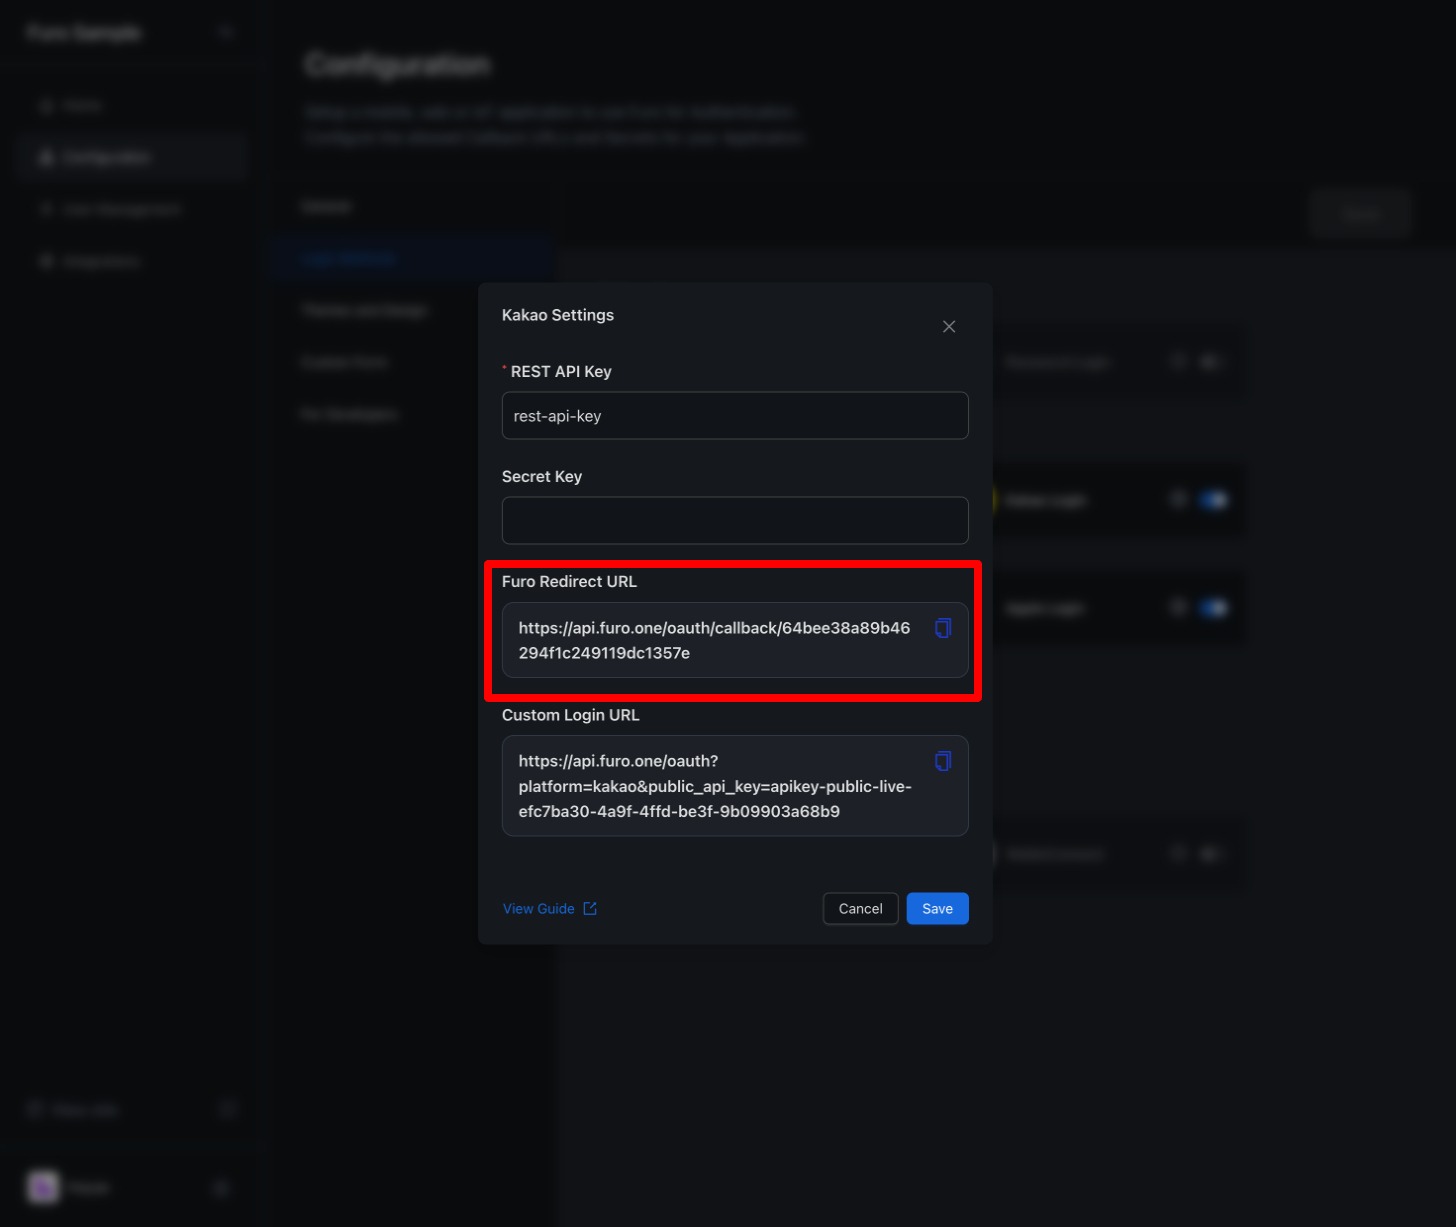
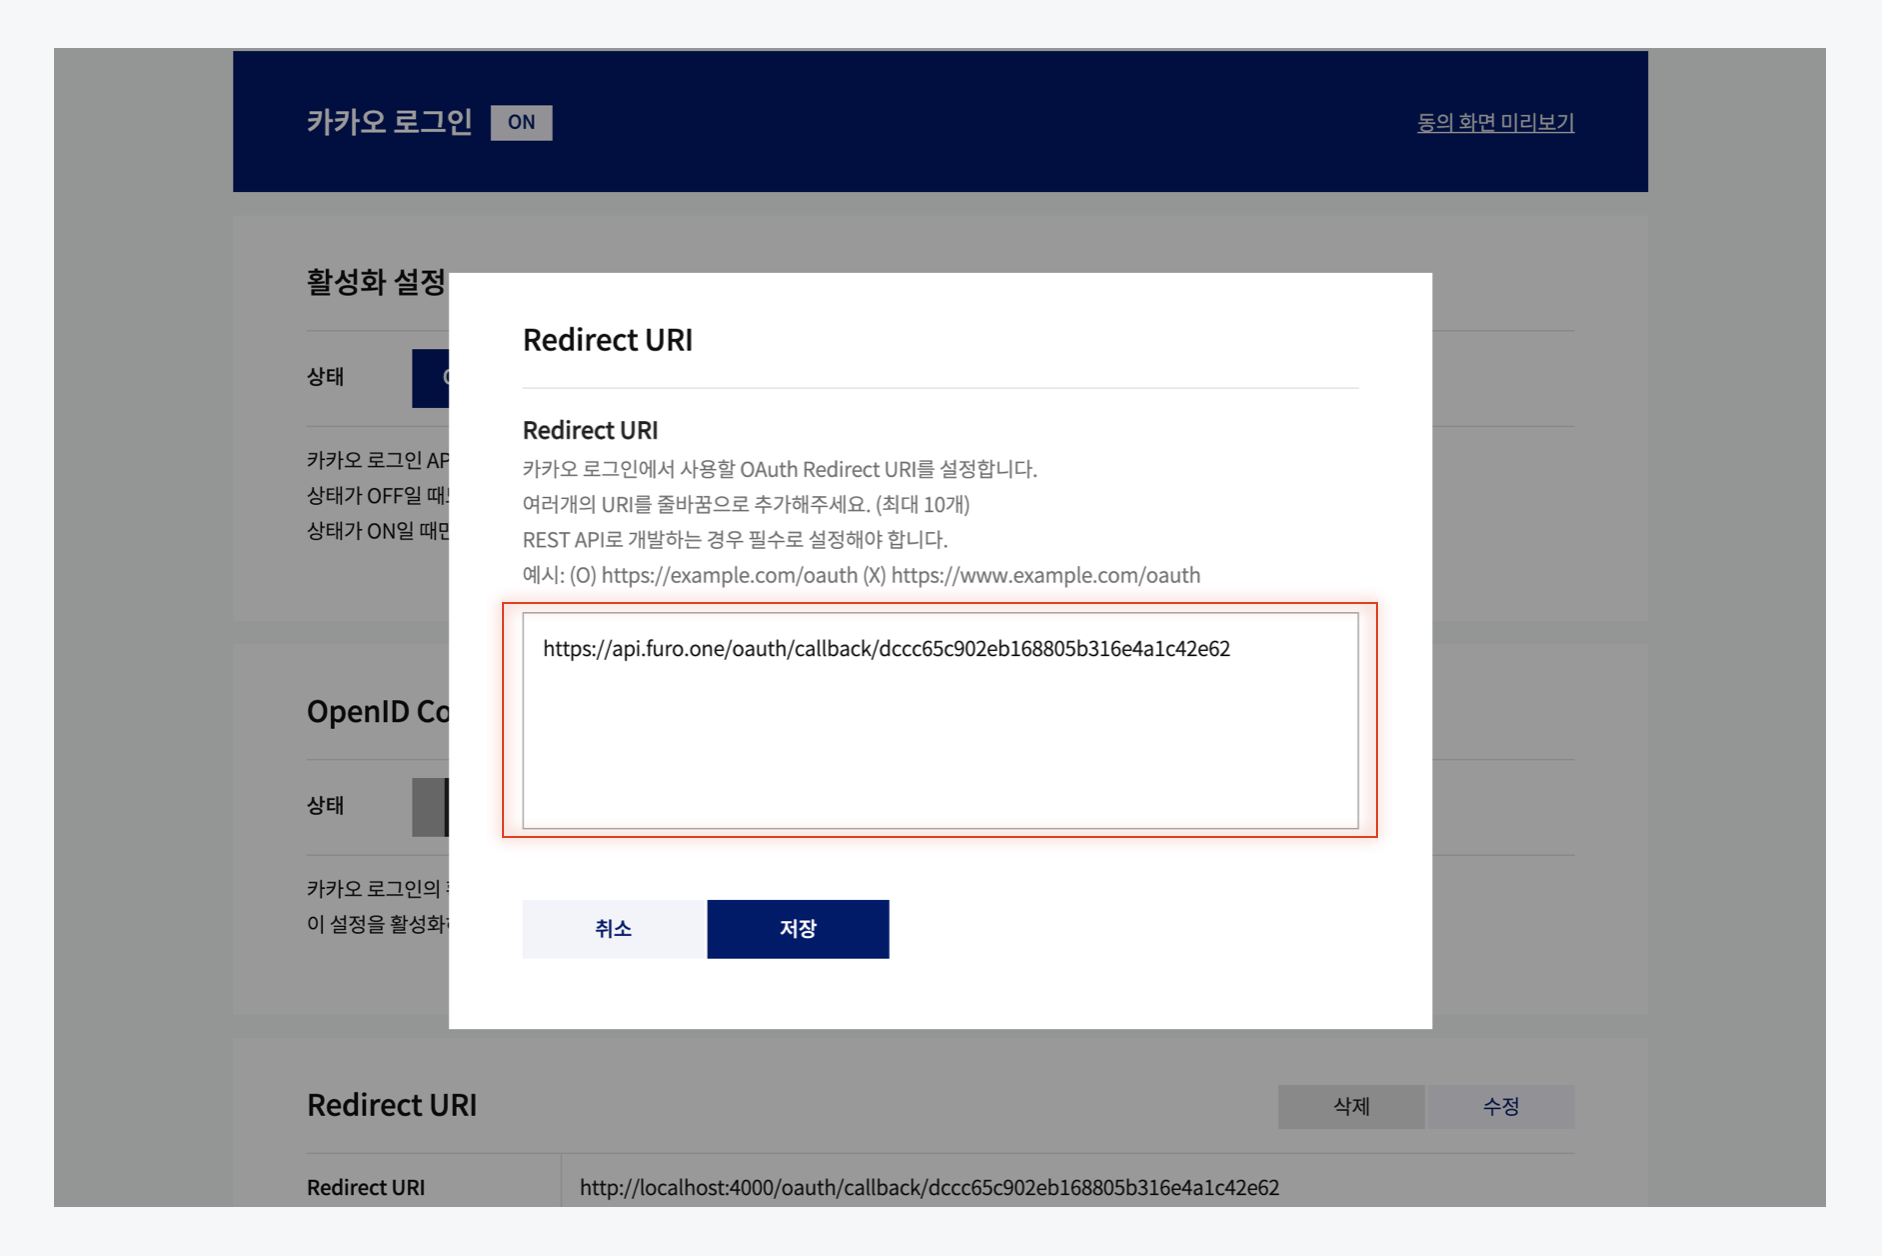
Add https://api.furo.one/oauth/callback/<FURO_PROJECT_CLIENT_ID> to the Redirect URI, and save. You can copy this value from the Furo Redirect URL field in the Kakao Login settings in the Furo Console.


4. Activate Kakao Auth for Your Project
From the left menu, select [앱 설정 (App Settings) > 요약정보 (Summary)]. Copy the REST API key from the 앱 키 (App Key) field. Paste the copied REST API key into the REST API Key input field in the Kakao Login settings in the Furo Console, and save.

 Once these settings are complete, the Kakao로 시작하기 (Start with Kakao) button will be activated on your project’s login page.

5. Customize the Login Button
If you wish to customize the Kakao Login button, you can embed the API URL provided by Furo in your custom login button. By calling a method in the onClick() prop of your button that redirects to the above URL, users will be taken to the Kakao login prompt. Once Kakao authentication is completed, they will be redirected to the Callback URI configured in your project.
