Configure Social Login
Naver
To enable Naver OAuth, you need to create an application in Naver Login and set the generated Client ID and Client Secret in the Furo Console.
 Select the provided information. Please note that you need to verify your application to receive information other than email addresses.
 Add PC web and Mobile web to the usage environment.
 Add https://api.furo.one to the service URL and add
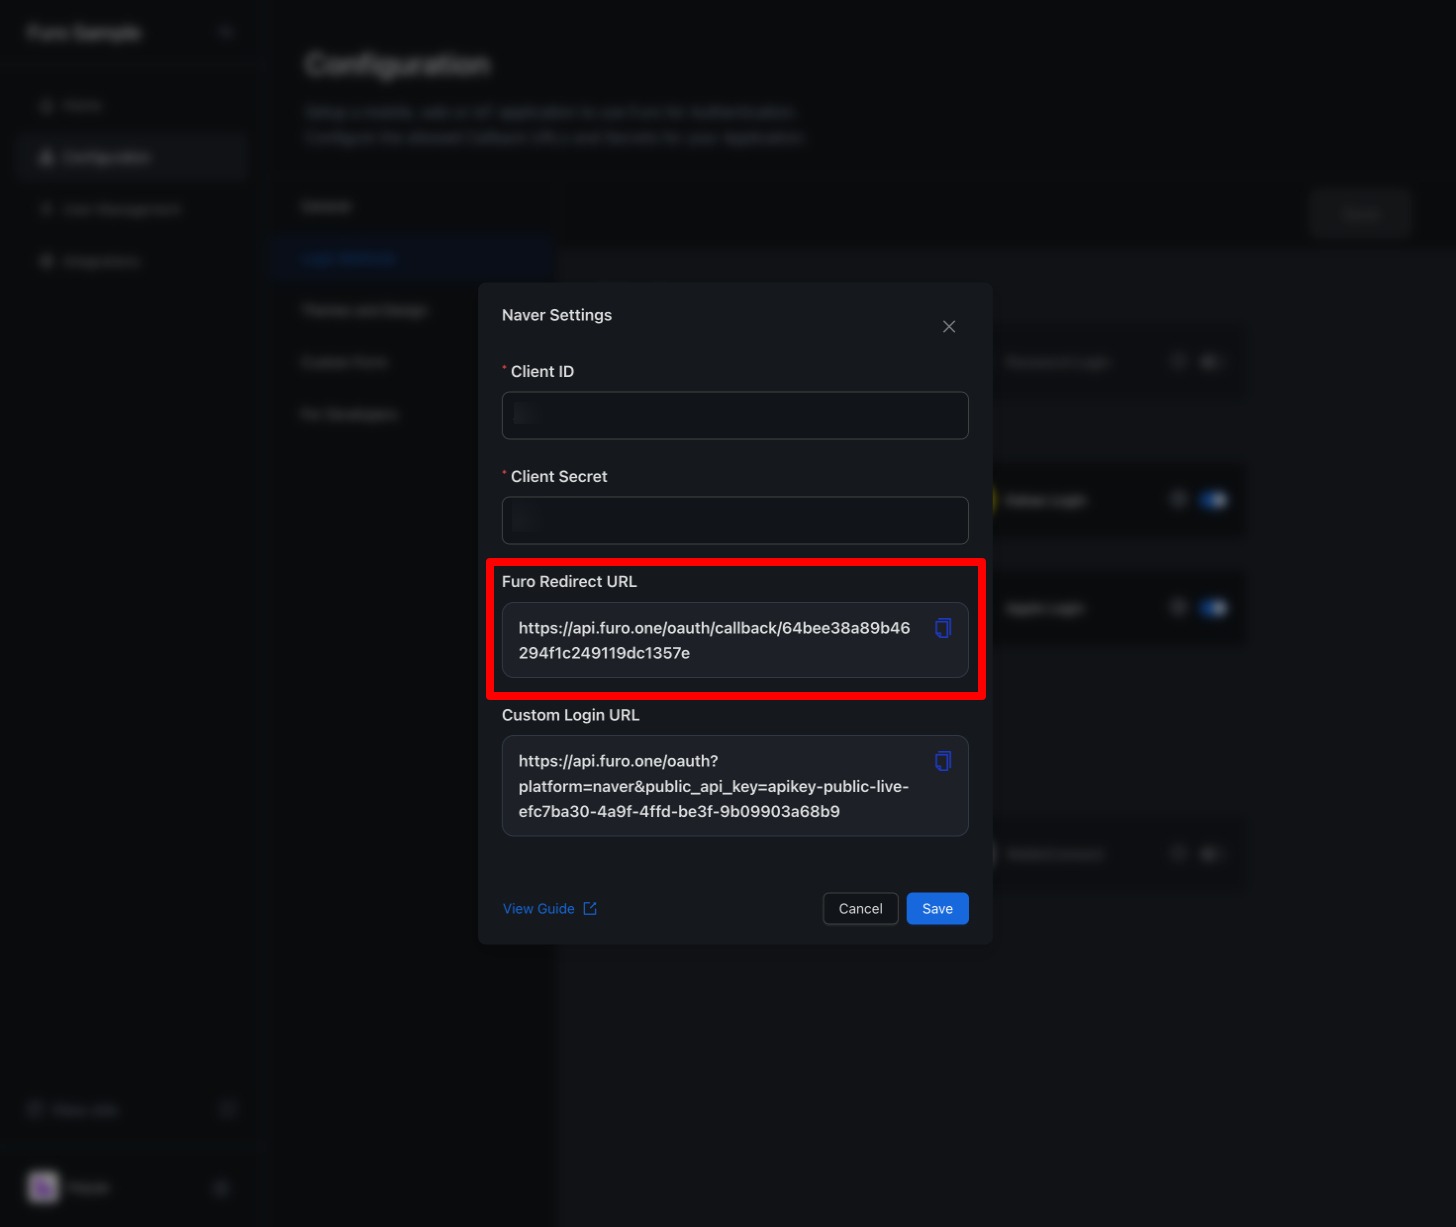
 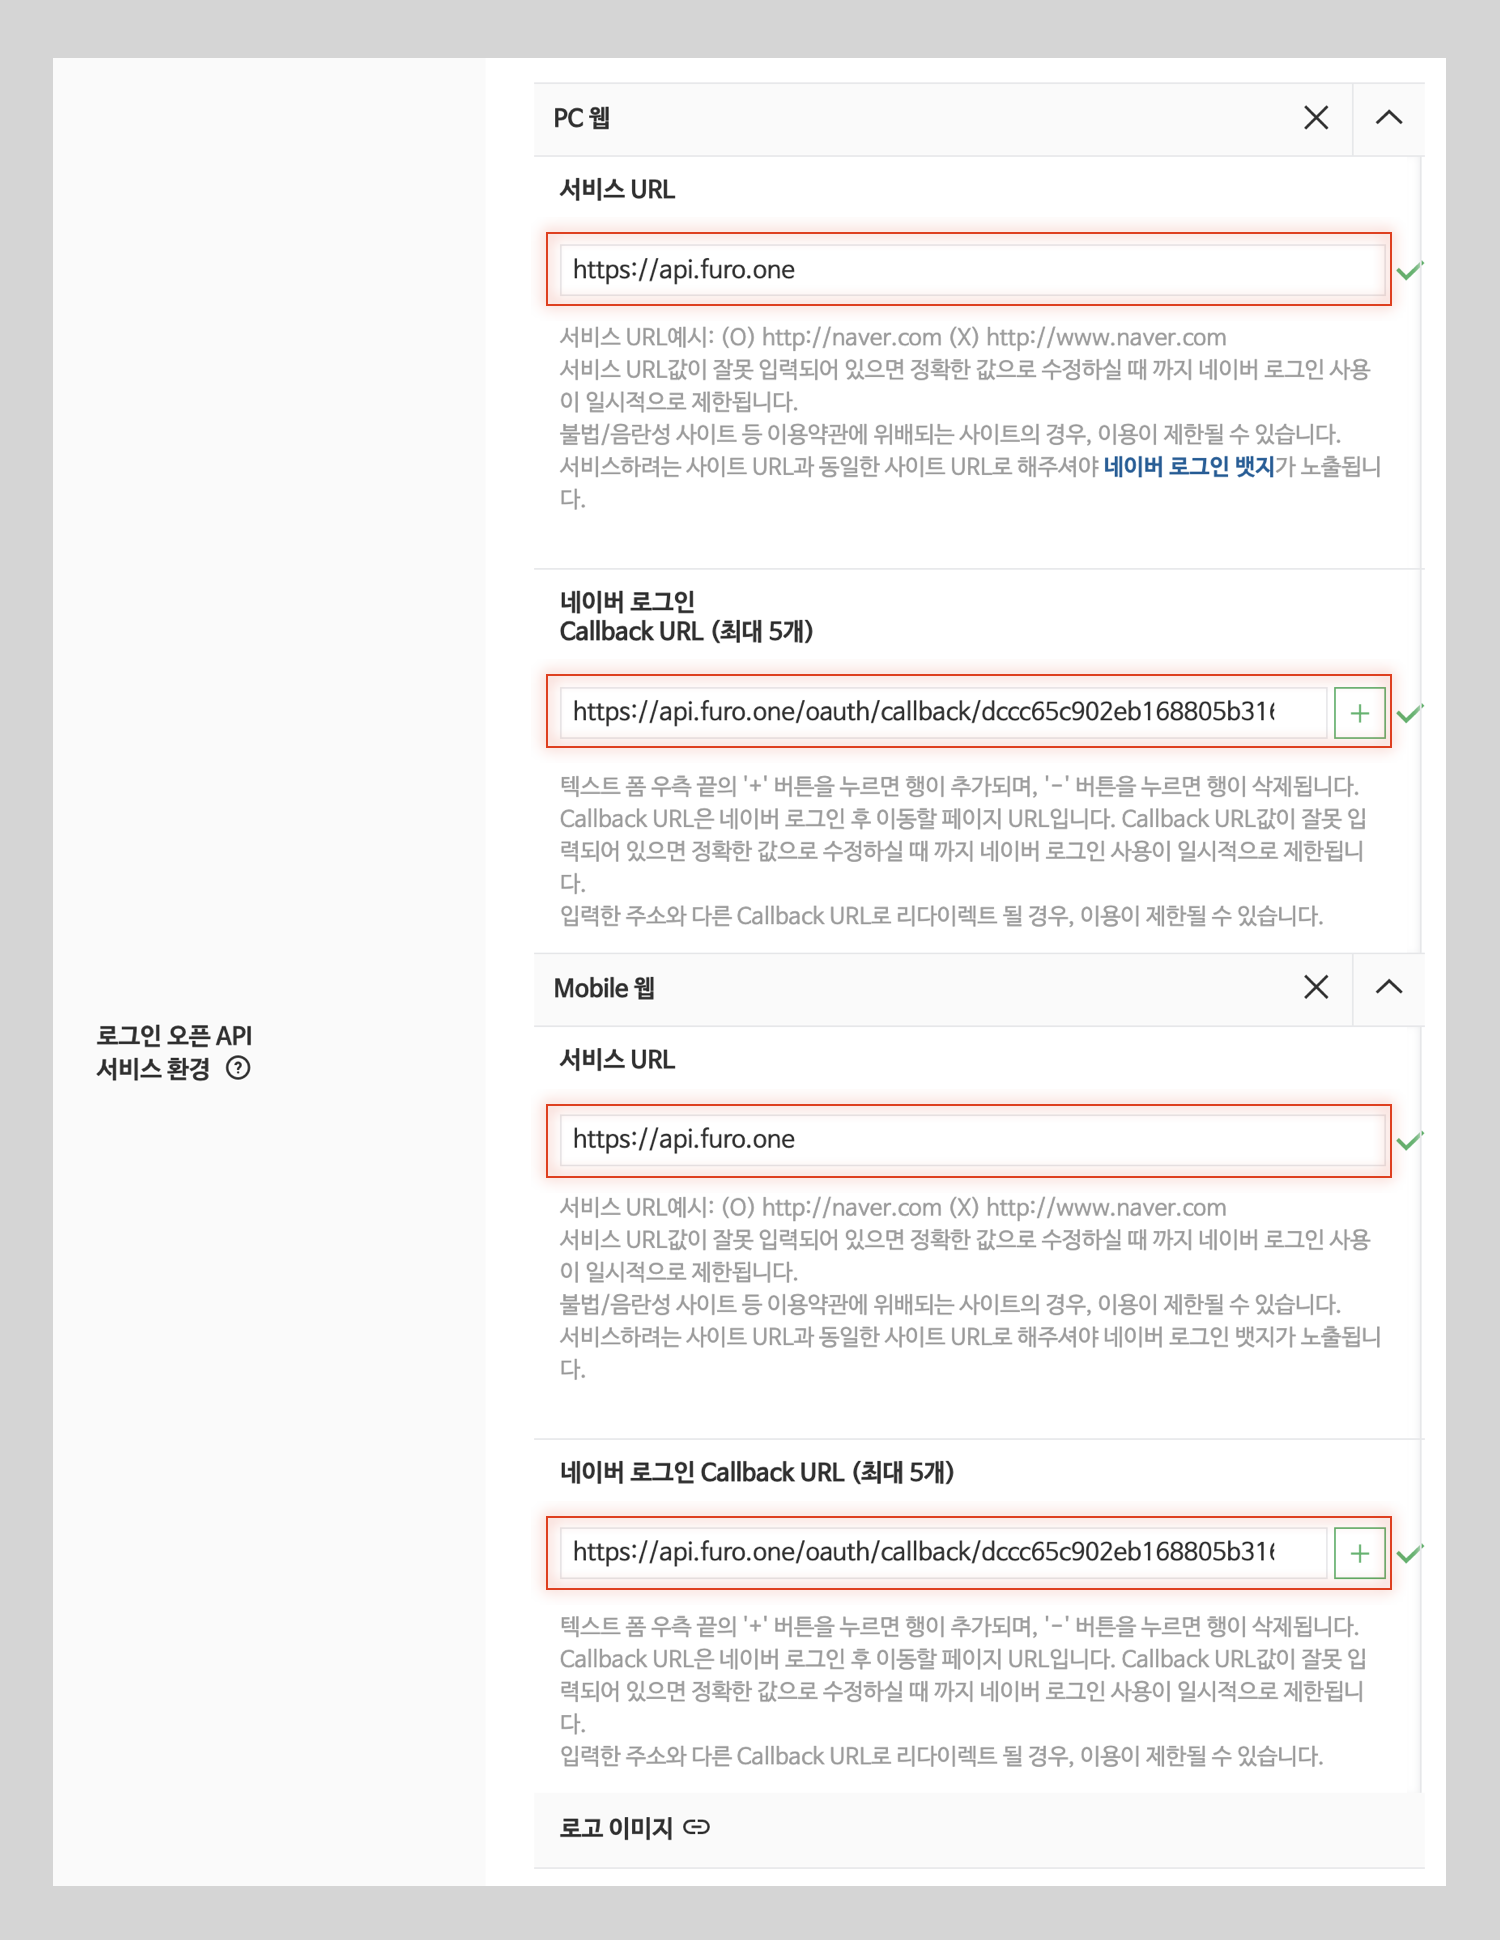 Copy the Furo Redirect URL item in the Furo Console Naver Login settings for the Callback URL.
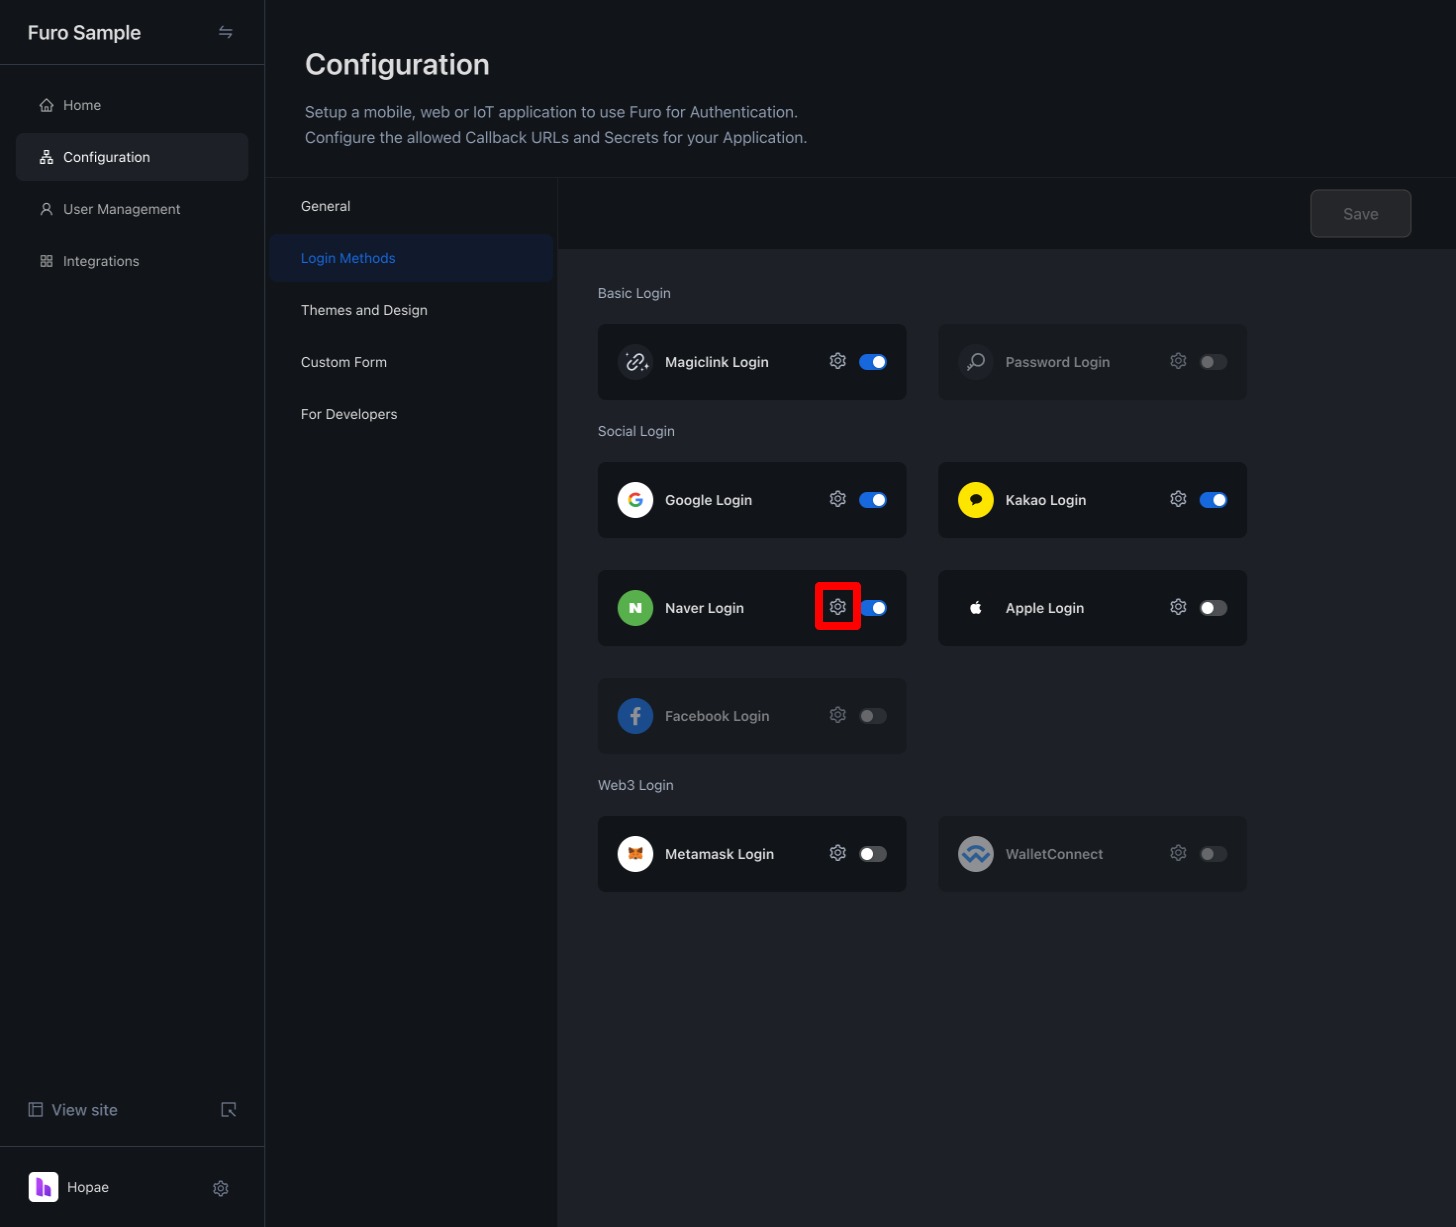
 Click the Naver Login Settings button in the Furo Console’s login method tab.
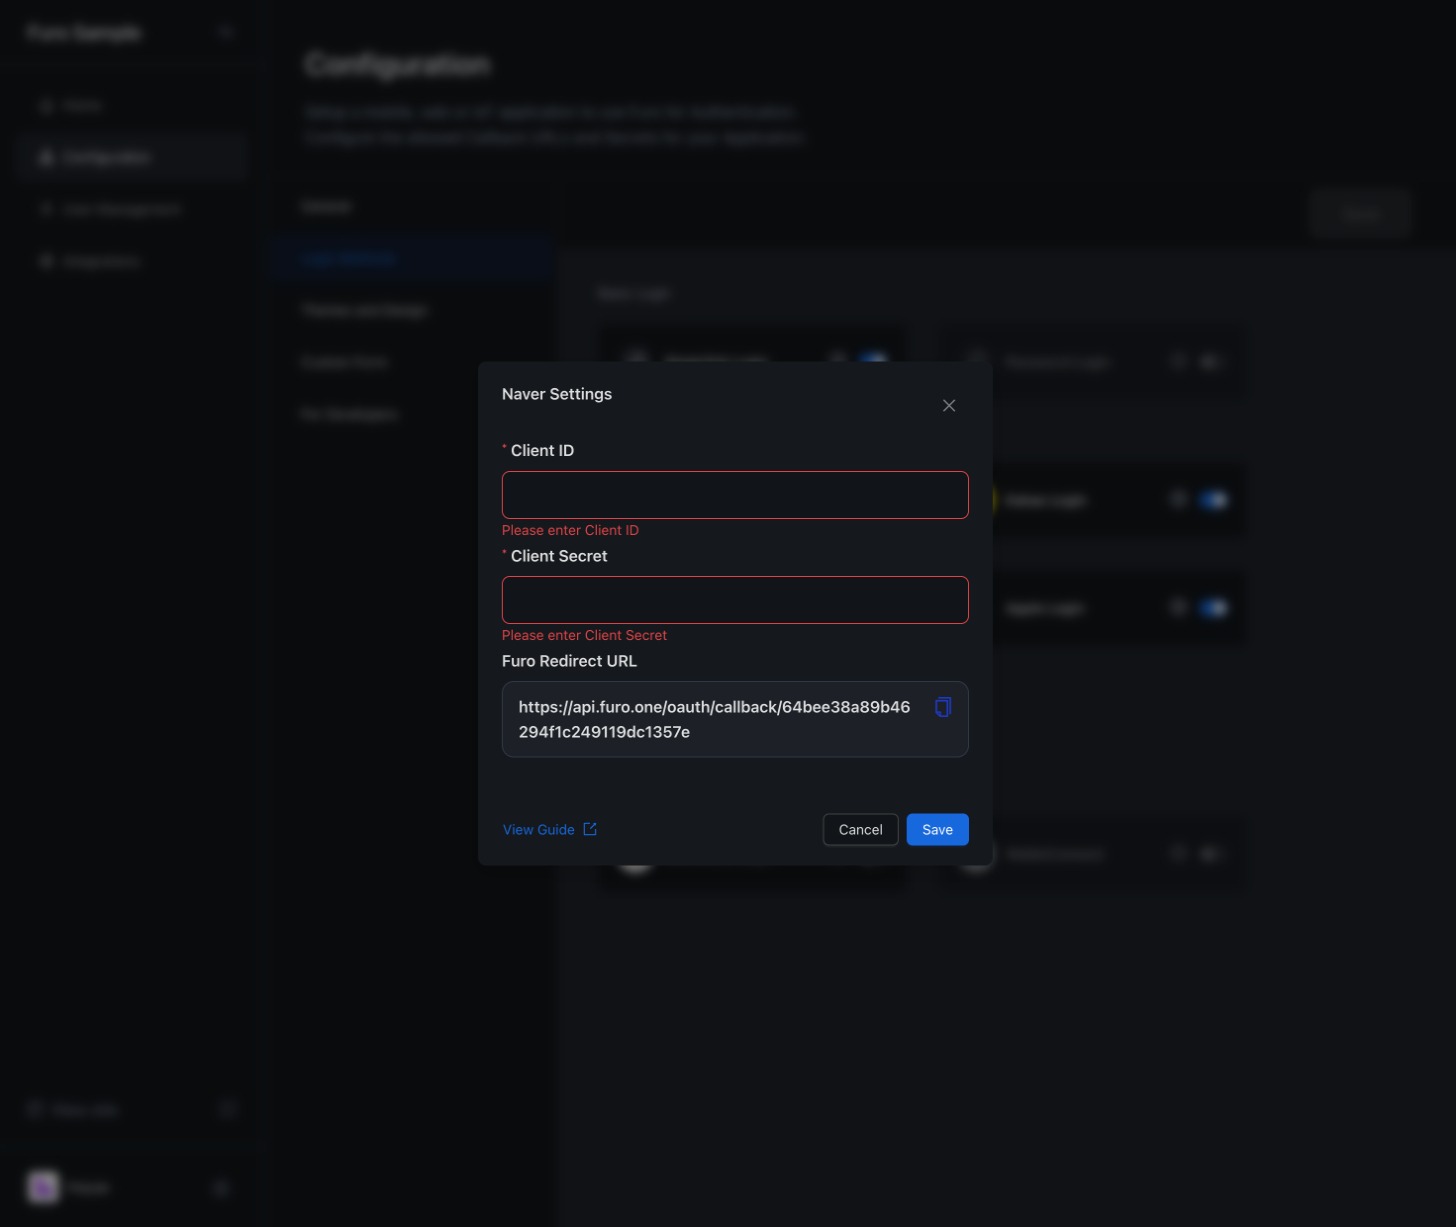
 Enter the Client ID and Client Secret, and save.
 By calling a method that redirects to the URL above in the onClick() prop of your custom button, users will be taken to the Naver login prompt. Once Naver authentication is completed, they will be redirected to the Callback URI configured in your project.
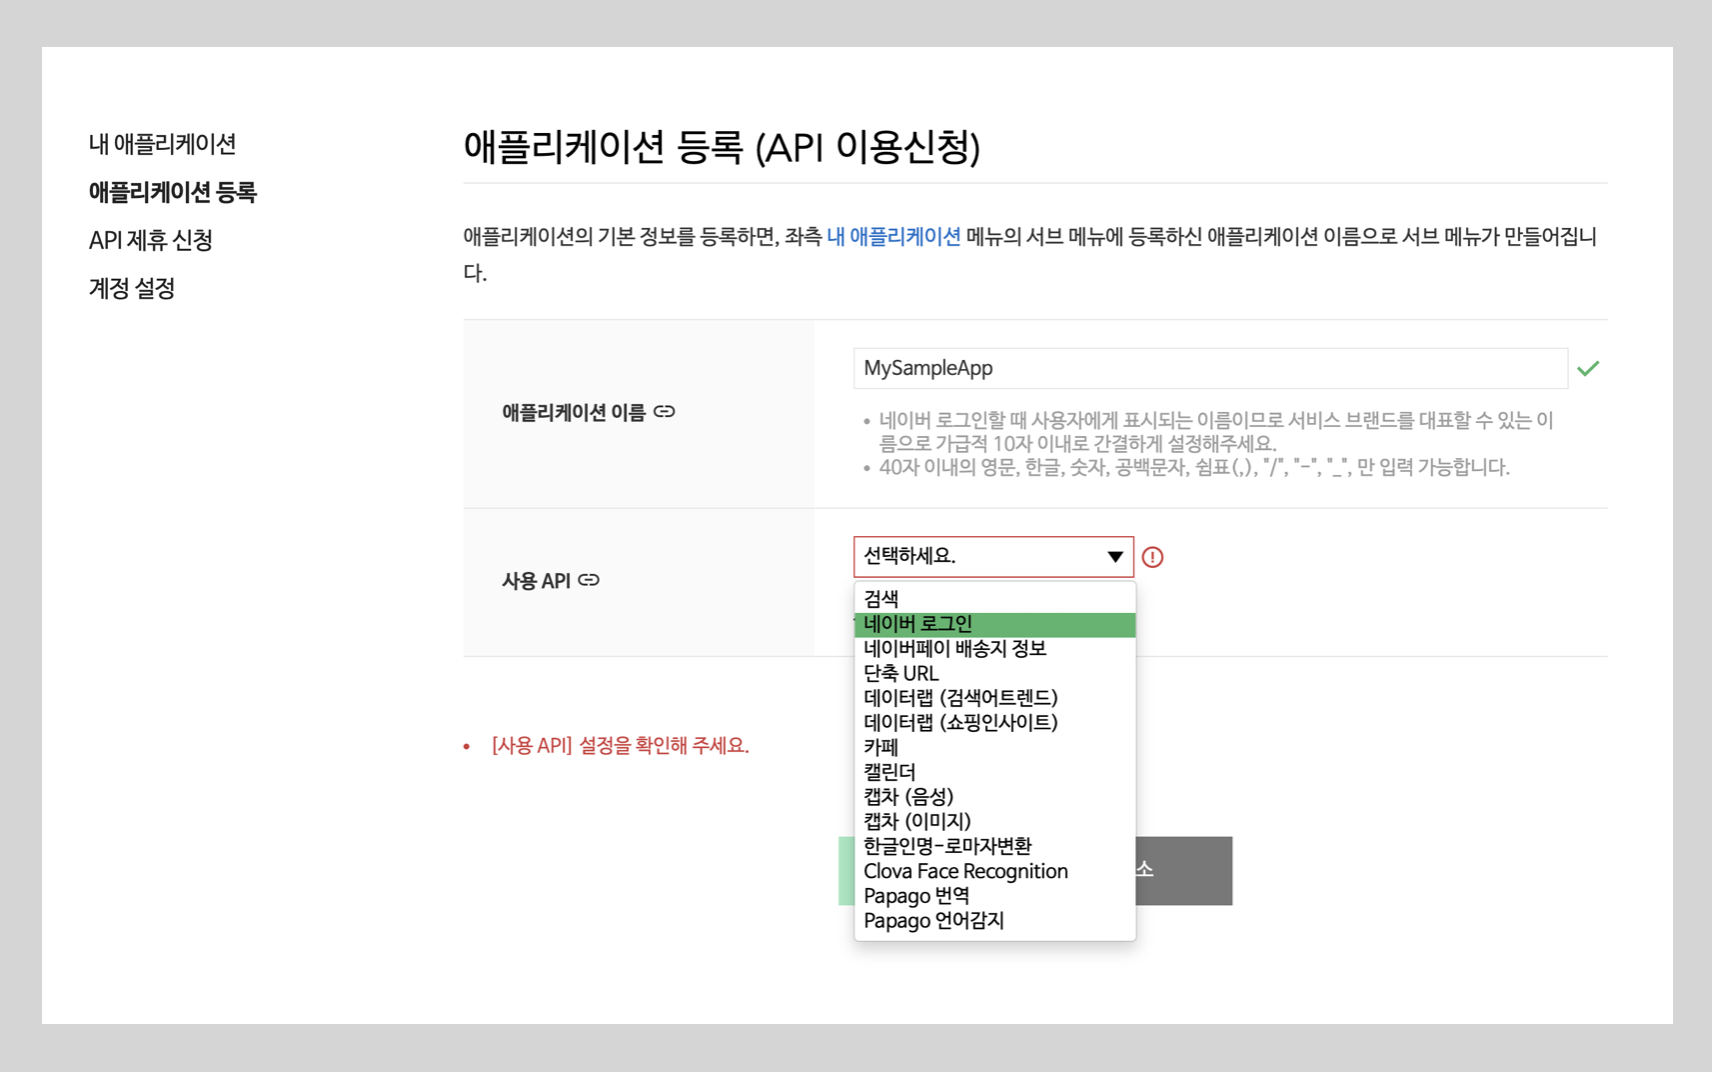
1. Adding a Naver Login Application
Access Naver Developers. Click the Application button on the top menu tab. Click the [Register Application] button on the right of the Application list. Enter the application name and set the usage API to Naver Login.
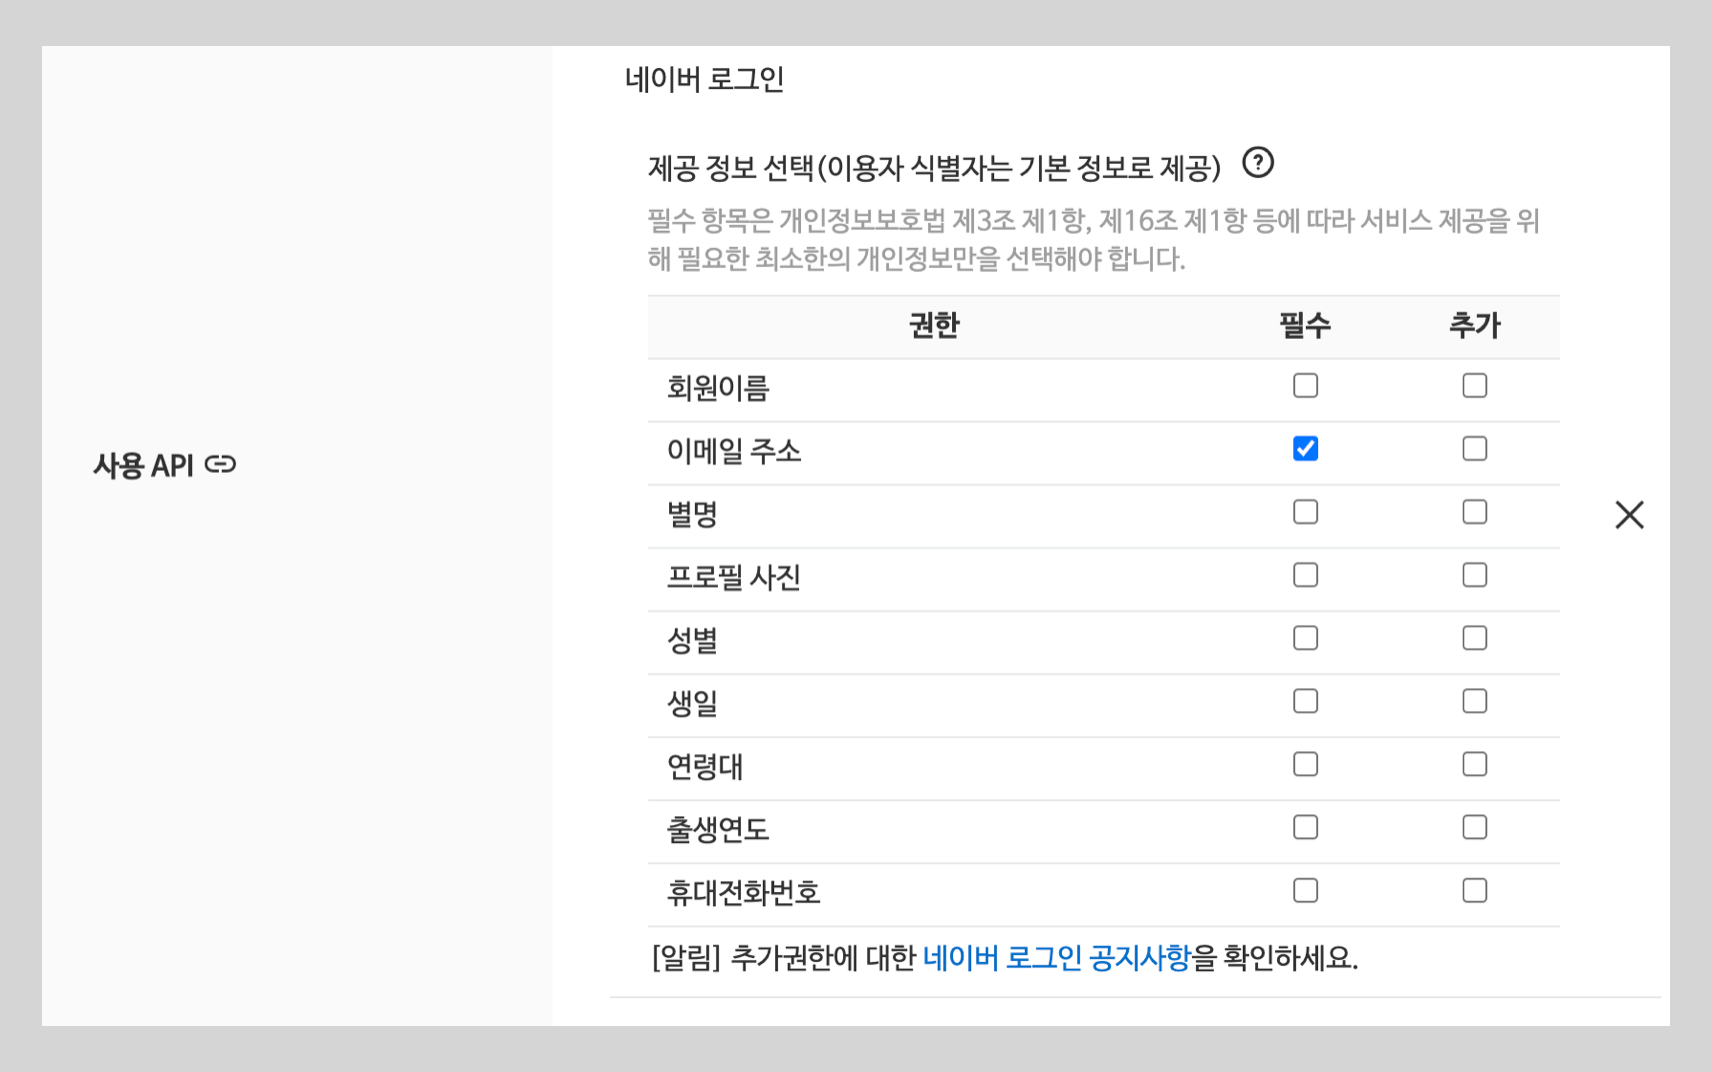
Select the provided information. Please note that you need to verify your application to receive information other than email addresses.
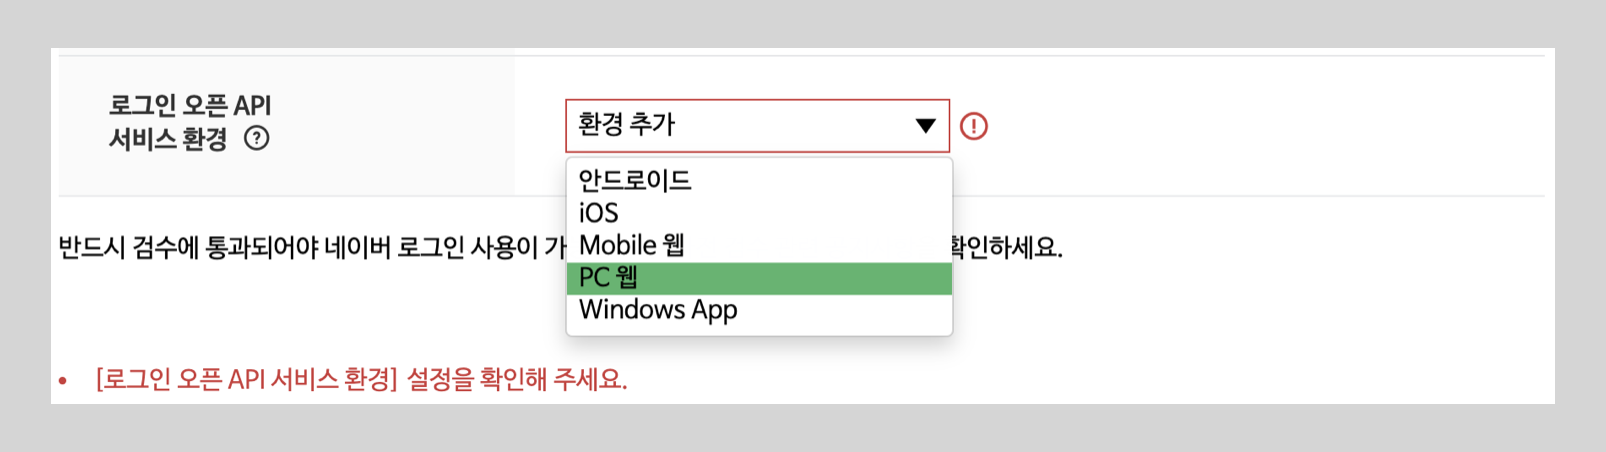
Add PC web and Mobile web to the usage environment.
Add https://api.furo.one to the service URL and add https://api.furo.one/oauth/callback/<FURO_PROJECT_CLIENT_ID> to the Callback URL before saving.
Copy the Furo Redirect URL item in the Furo Console Naver Login settings for the Callback URL.
2. Activate Naver Login for the Project
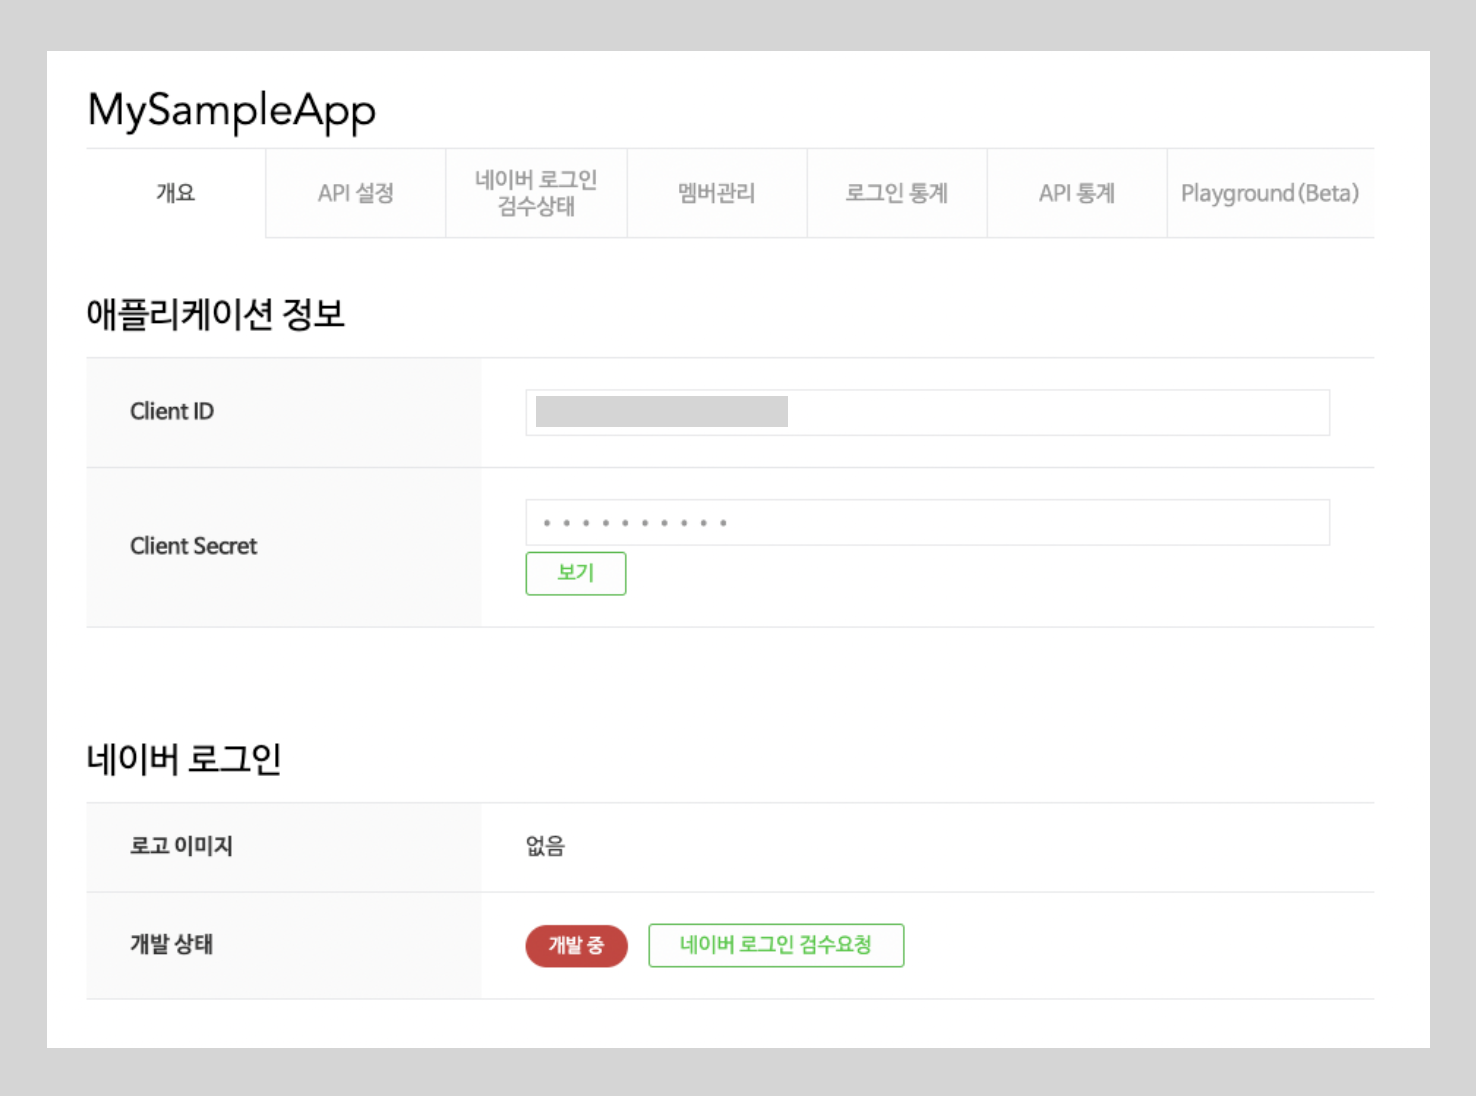
Check the Client ID and Client Secret in the created project.
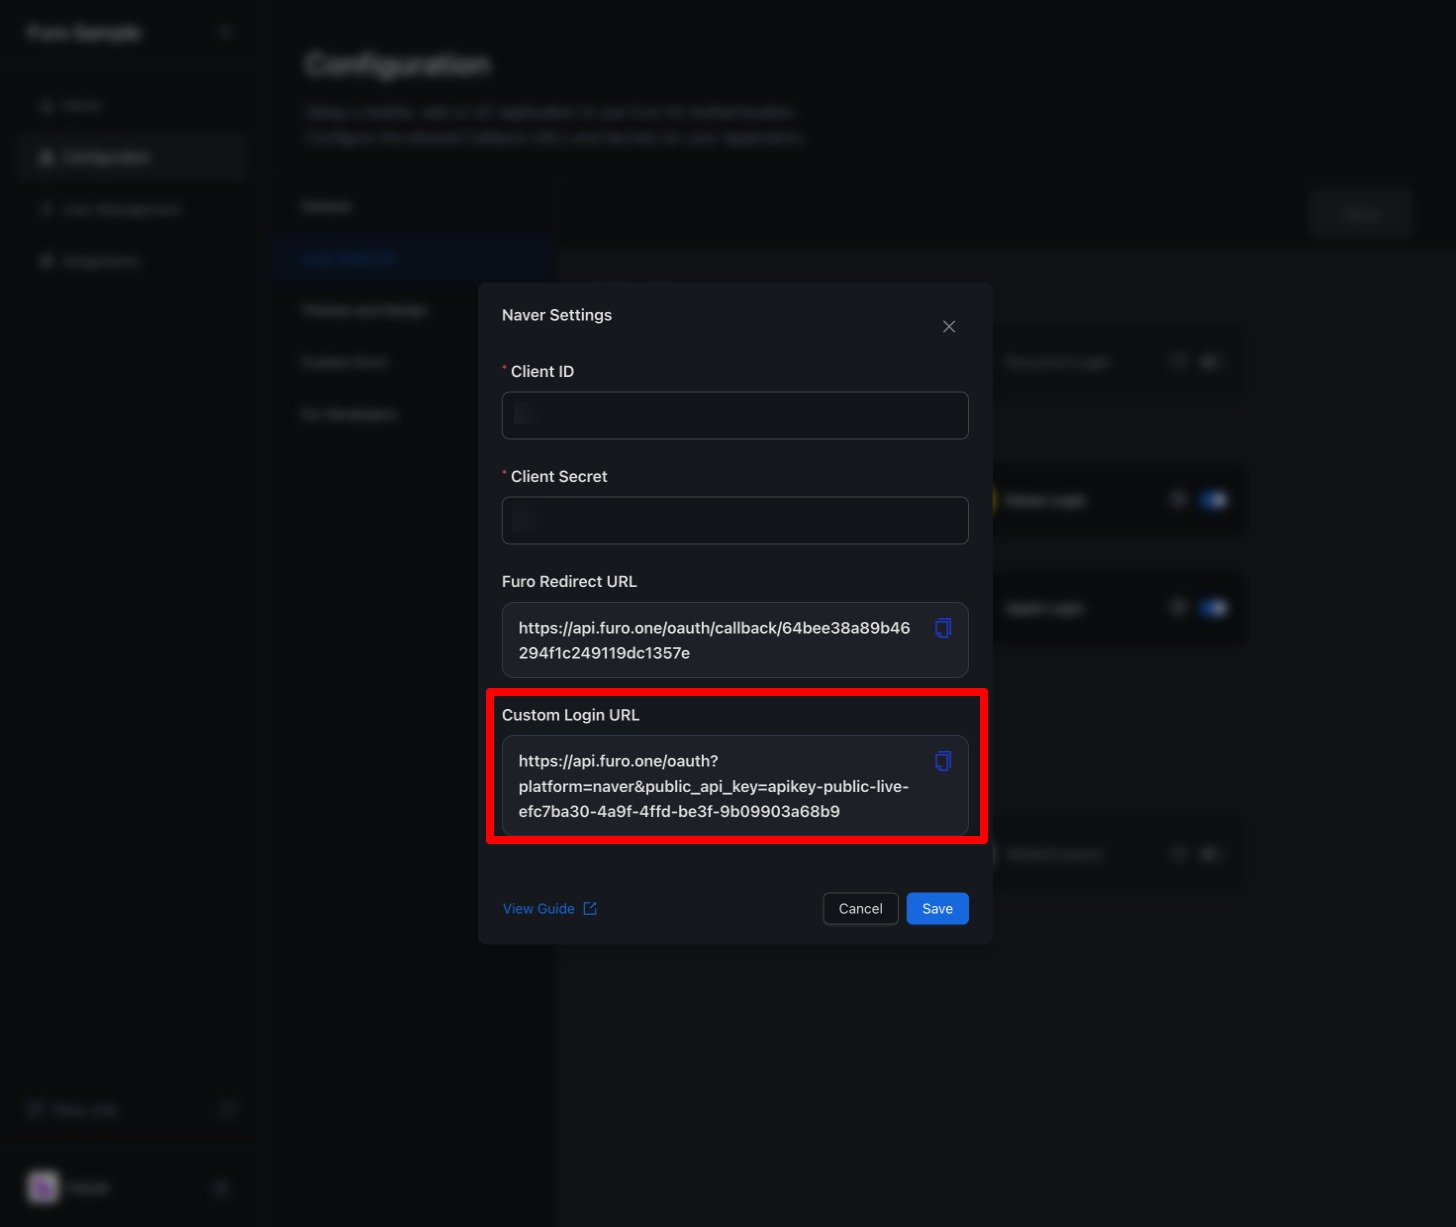
Click the Naver Login Settings button in the Furo Console’s login method tab.
Enter the Client ID and Client Secret, and save.
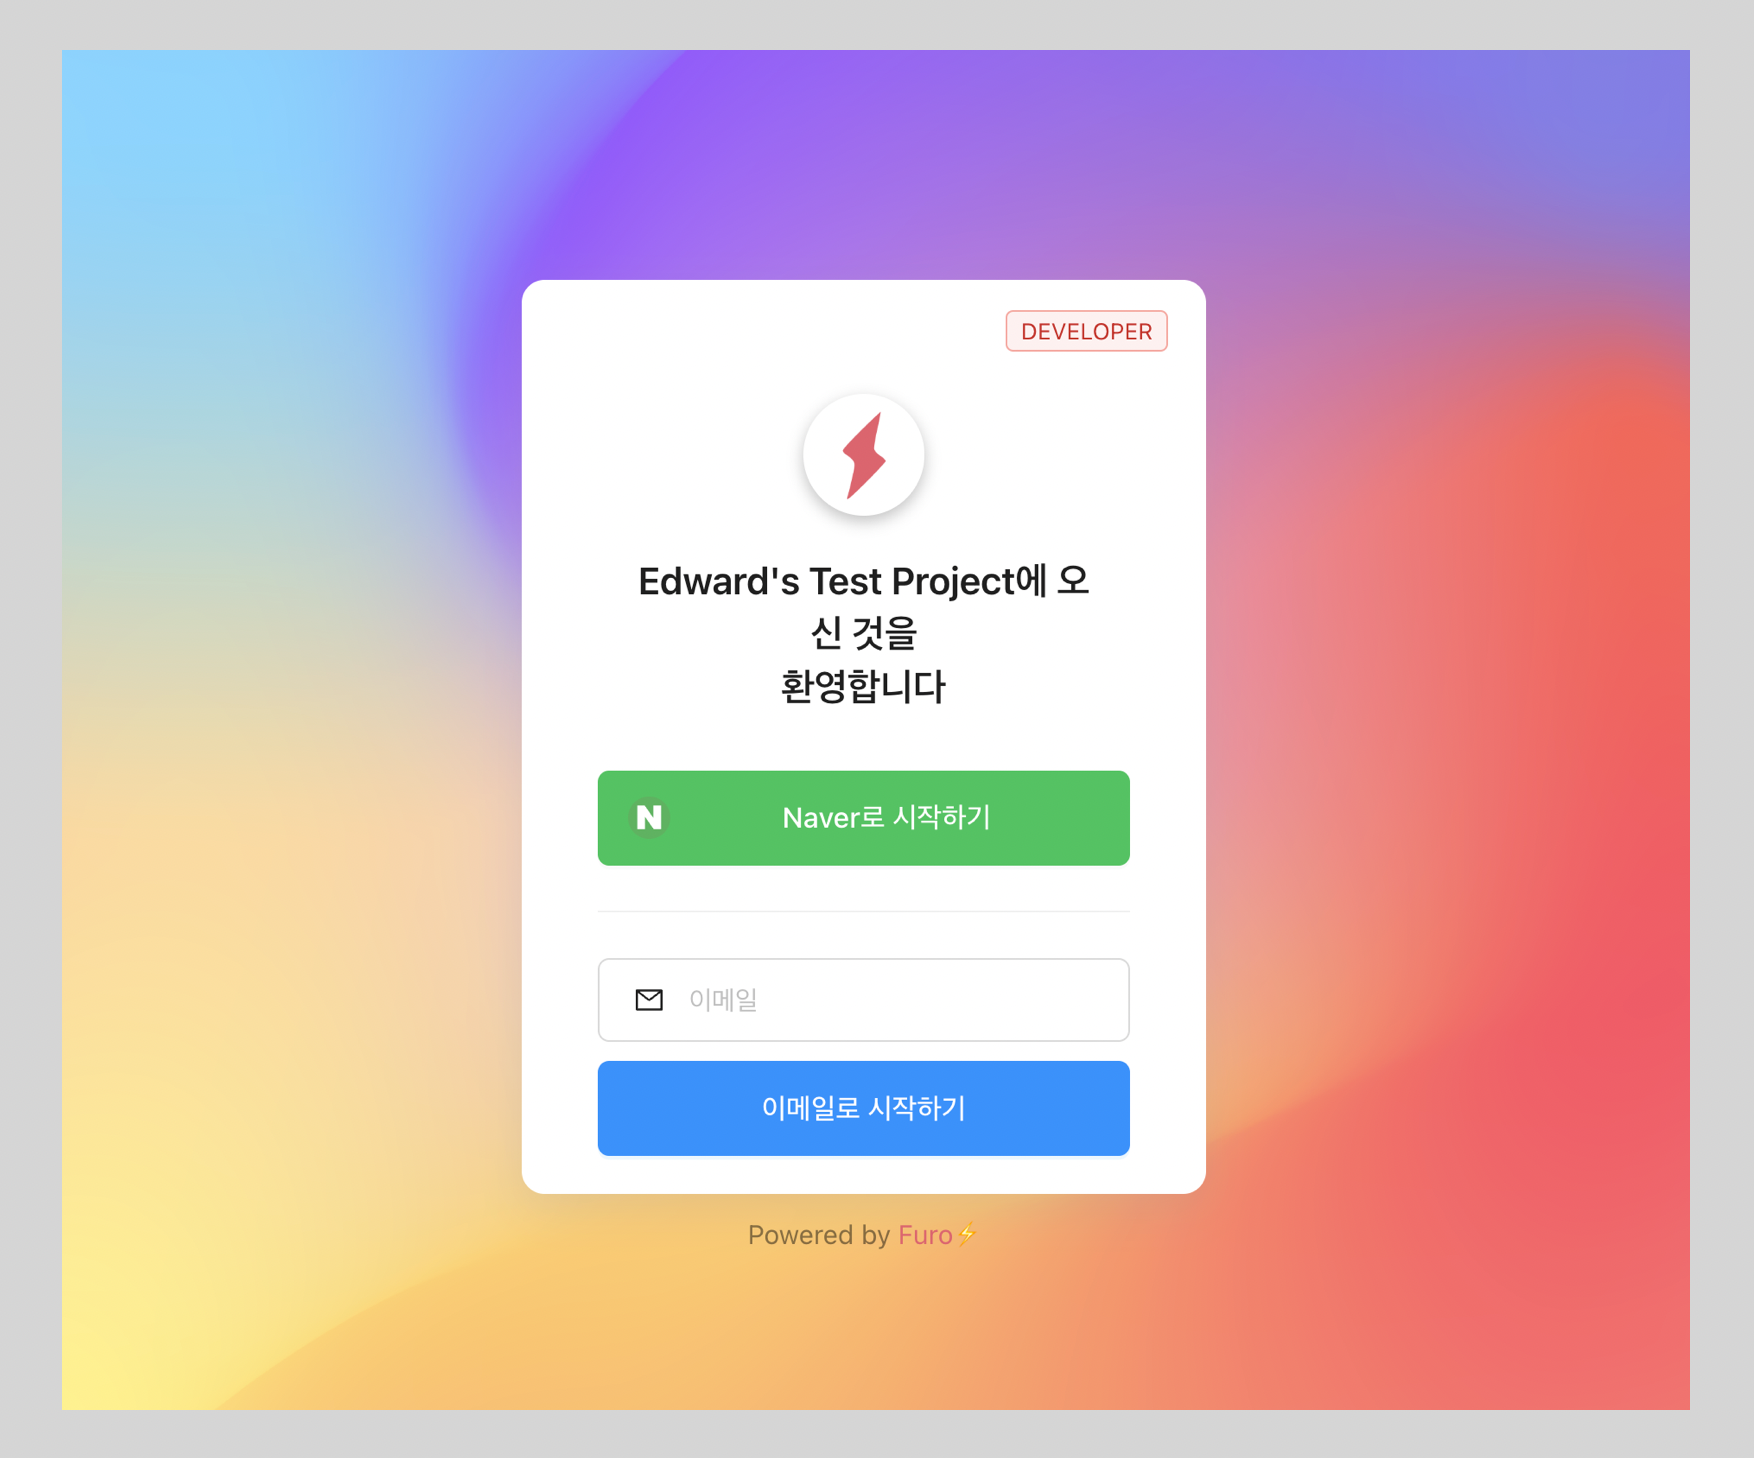
3. Check the Login Page
4. Customize the Login Button
If you want to customize the Naver Login button, you can embed the API URL provided by Furo in your custom login button.
By calling a method that redirects to the URL above in the onClick() prop of your custom button, users will be taken to the Naver login prompt. Once Naver authentication is completed, they will be redirected to the Callback URI configured in your project.