Configure Social Login
To enable Google OAuth, you need to create an OAuth Client in the Google API Console and configure the Client ID and Client Secret in your project created in the Furo Console.
 Choose “External” as the User Type and click the Create button.
 Add furo.one to the Authorized domains and proceed.
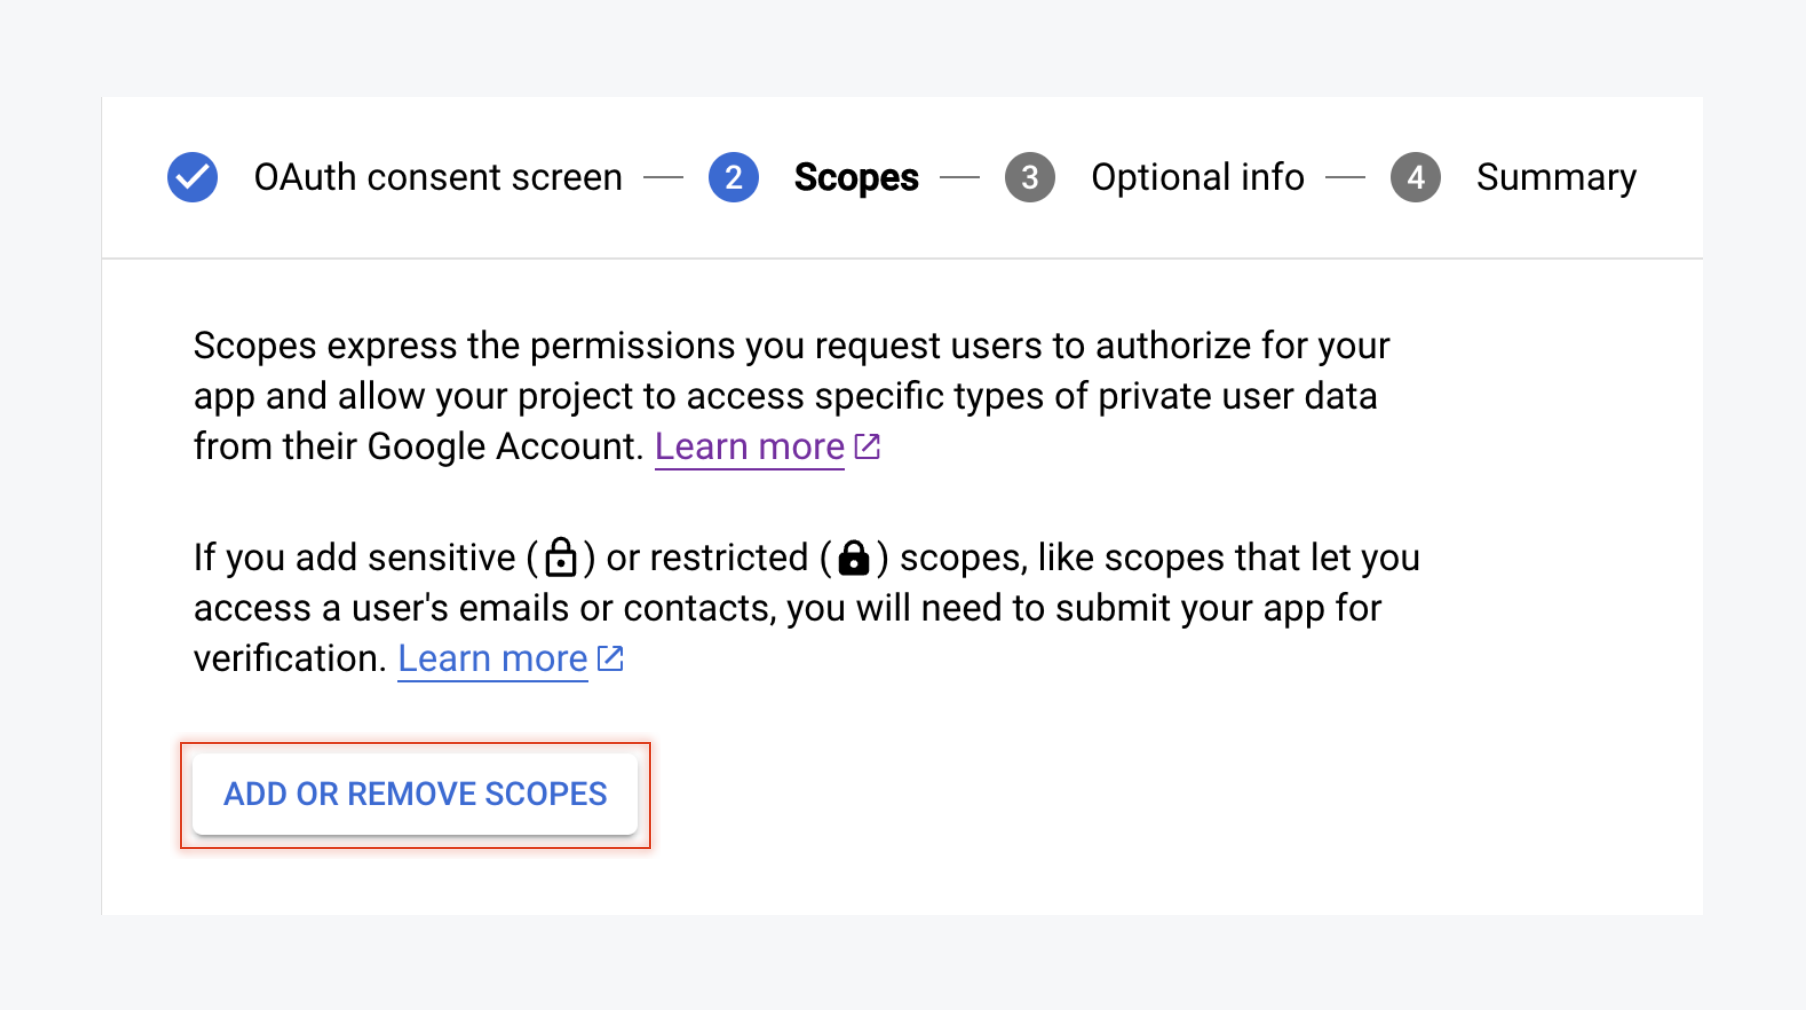
 Set permissions for the information your users will use from their Google accounts. Include /auth/userinfo.email and /auth/userinfo.profile for permissions.
 The remaining settings are optional, so click the Save and Close button to complete.
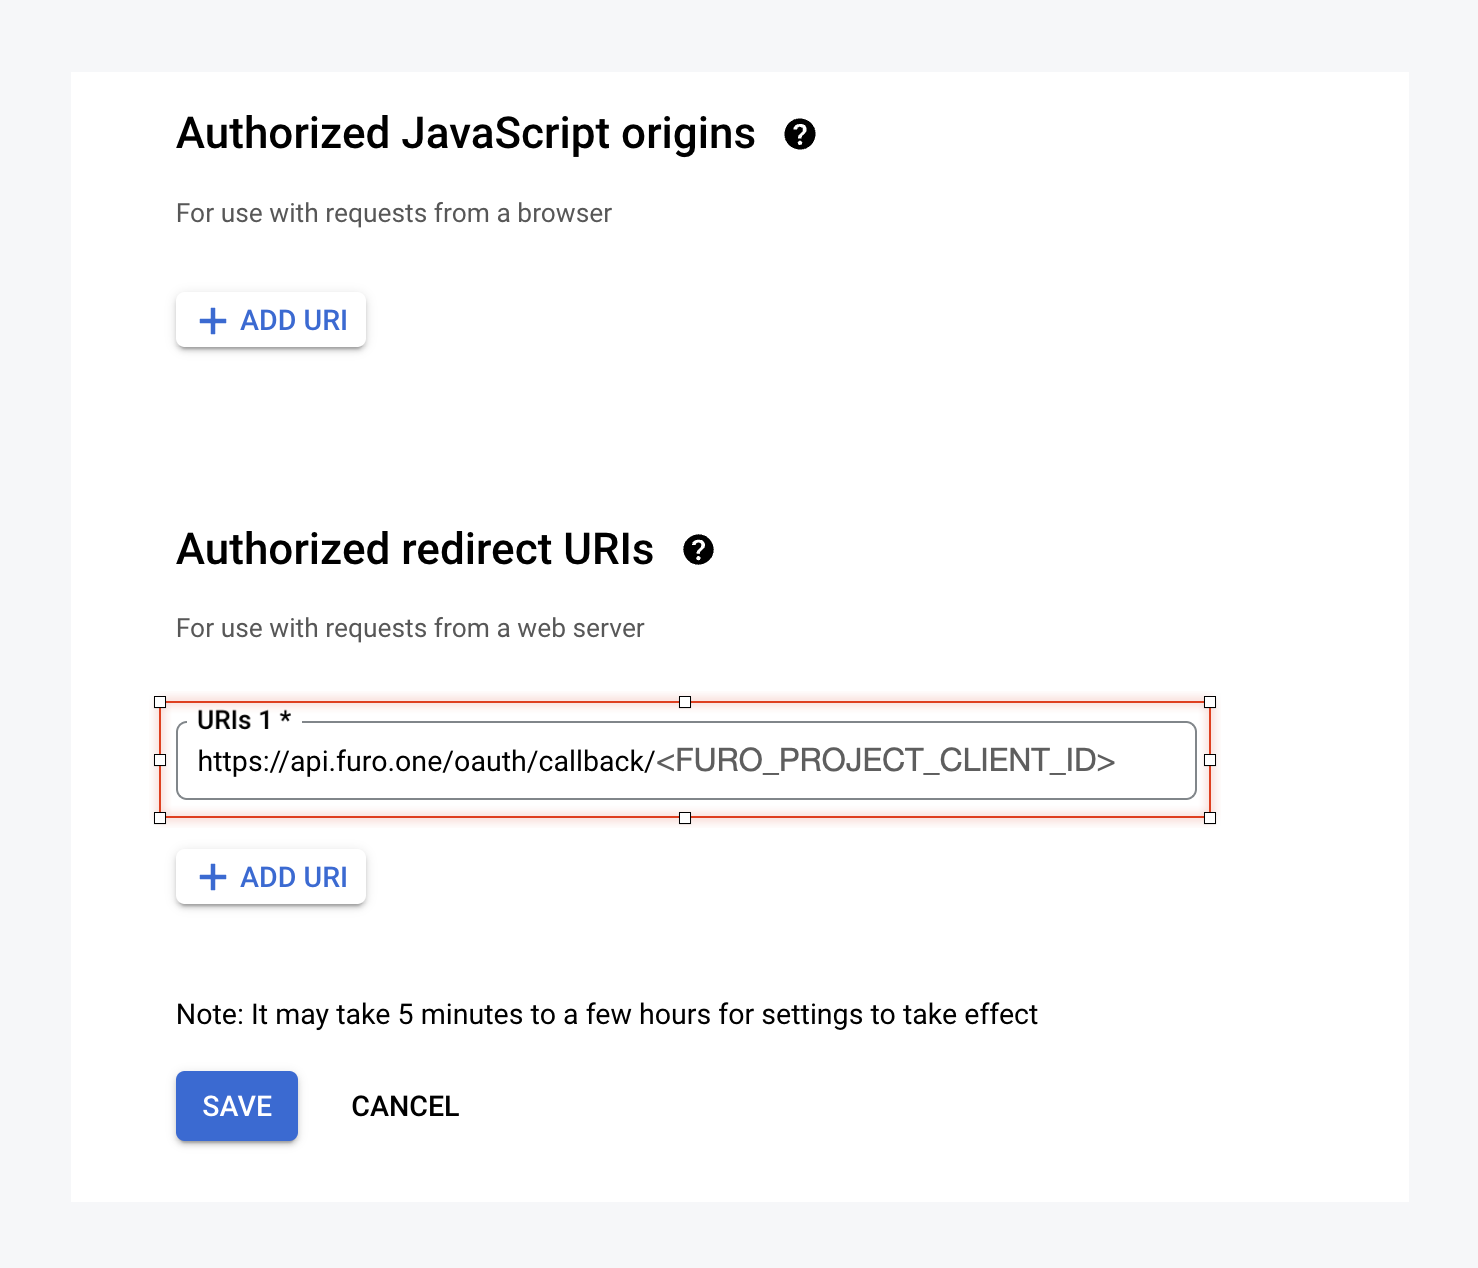
 Input the necessary configuration items to create the OAuth Client. When creating it, add
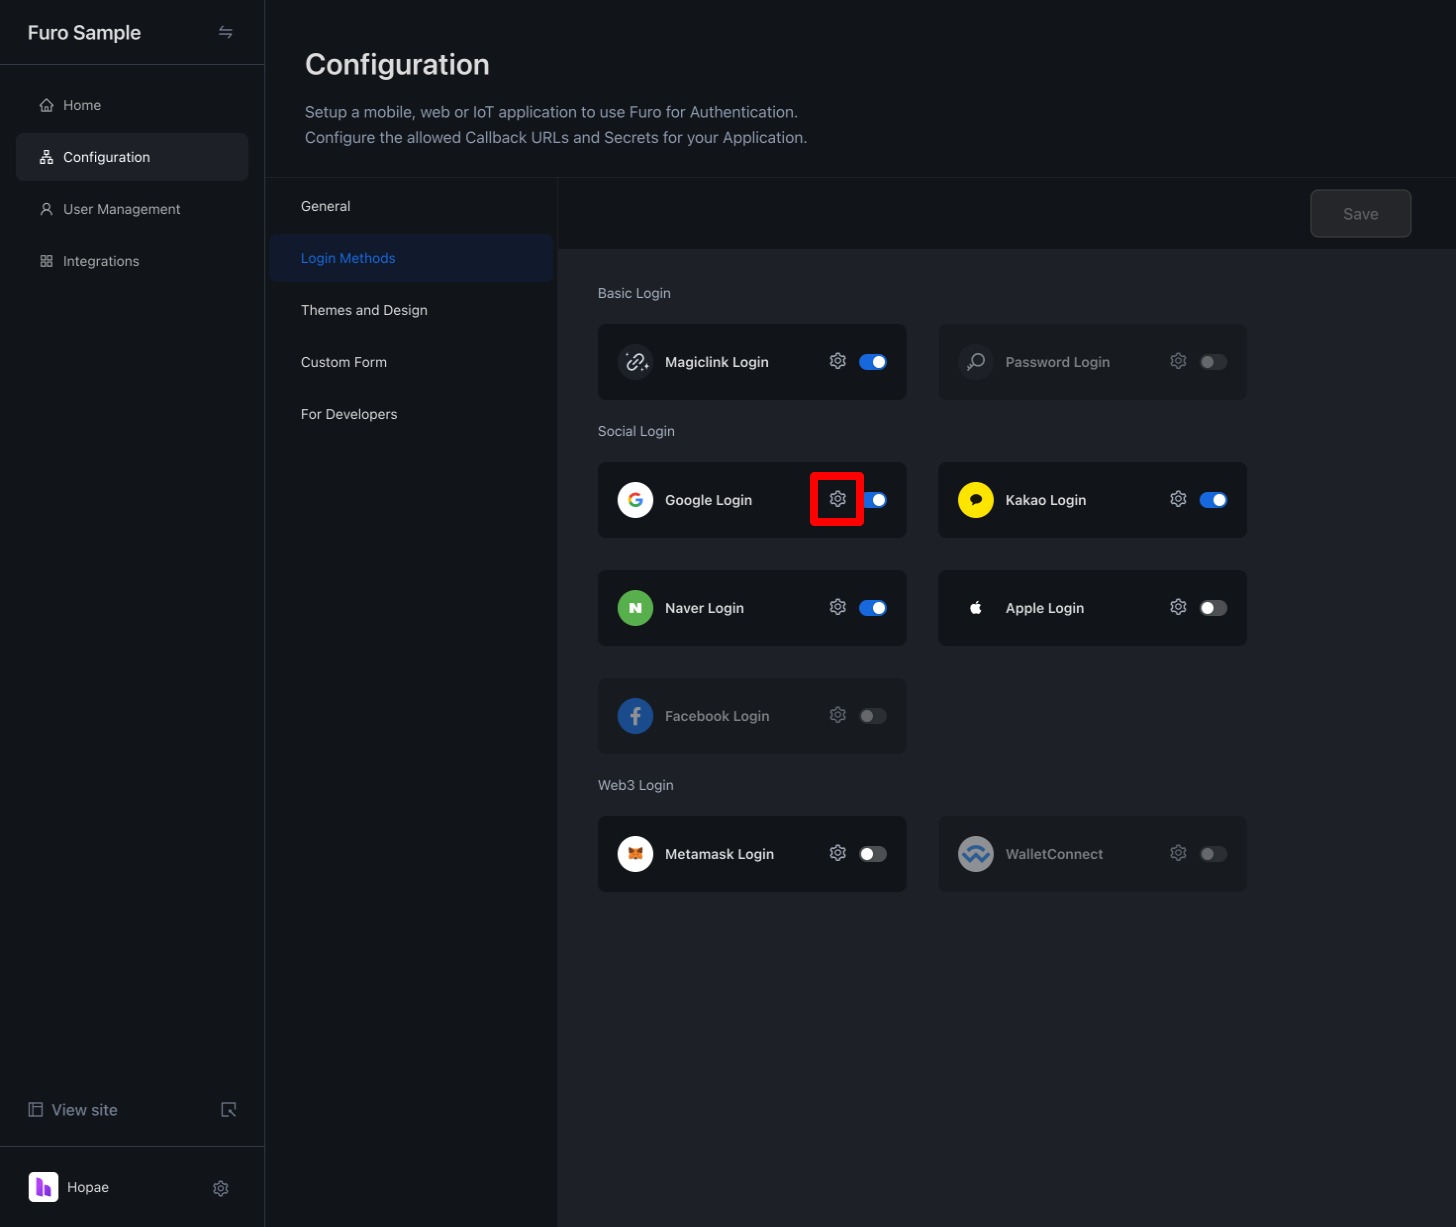

 Save the changes.
 Input the copied Client ID in the Google Client ID and Client Secret fields in the Furo Console.
 Once these settings are complete, the Log in with Google button will be activated on your project’s login page.

 By calling a method in the onClick() prop of your button that redirects to the above URL, users will be taken to the Google login prompt. Once Google authentication is completed, they will be redirected to the Callback URI configured in your project.
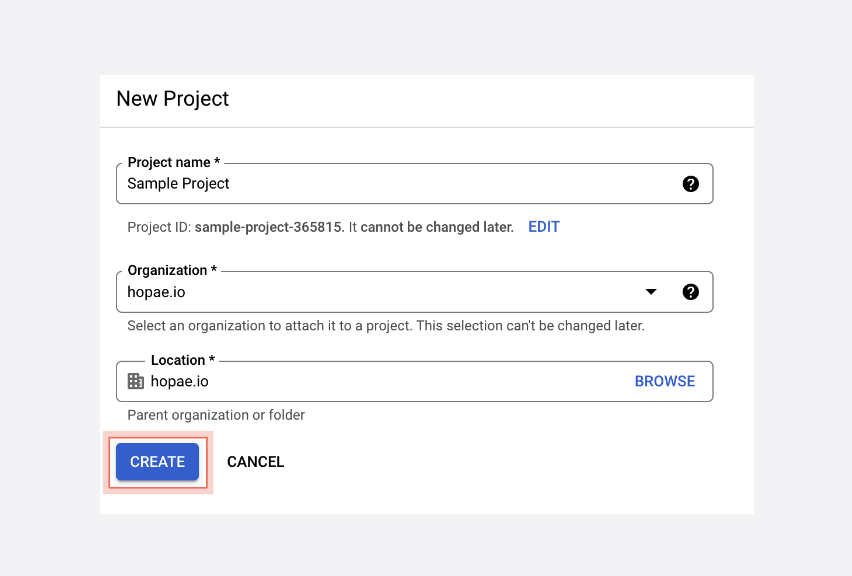
1. Create a Google Cloud Project
Access the Google API Console. Click the New Project button in the top left to create a new project.
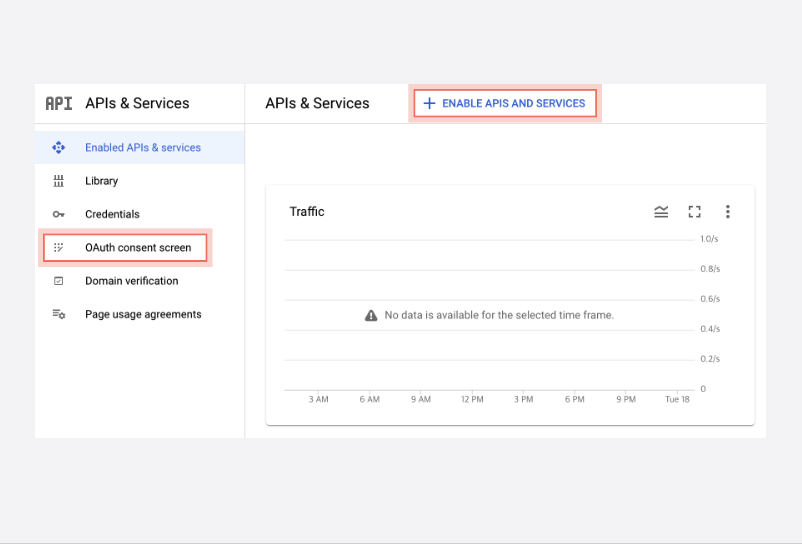
2. Configure the OAuth Consent Screen
Select OAuth consent screen from the left menu.
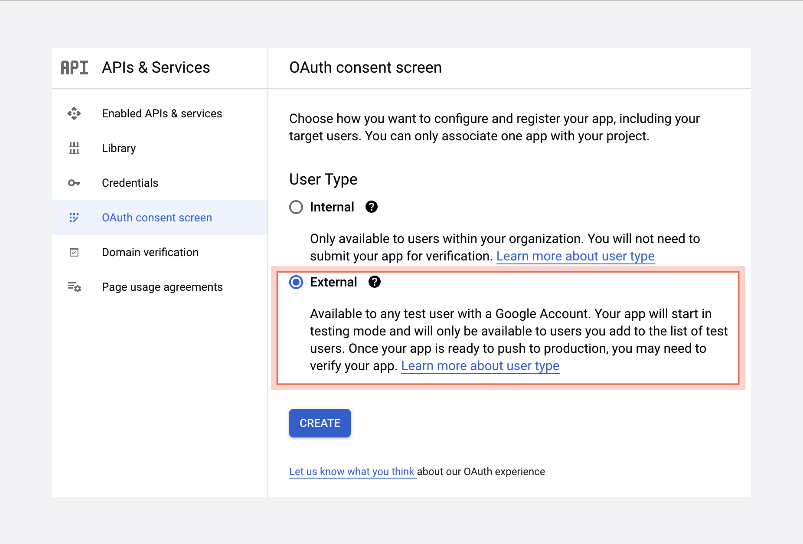
Choose “External” as the User Type and click the Create button.
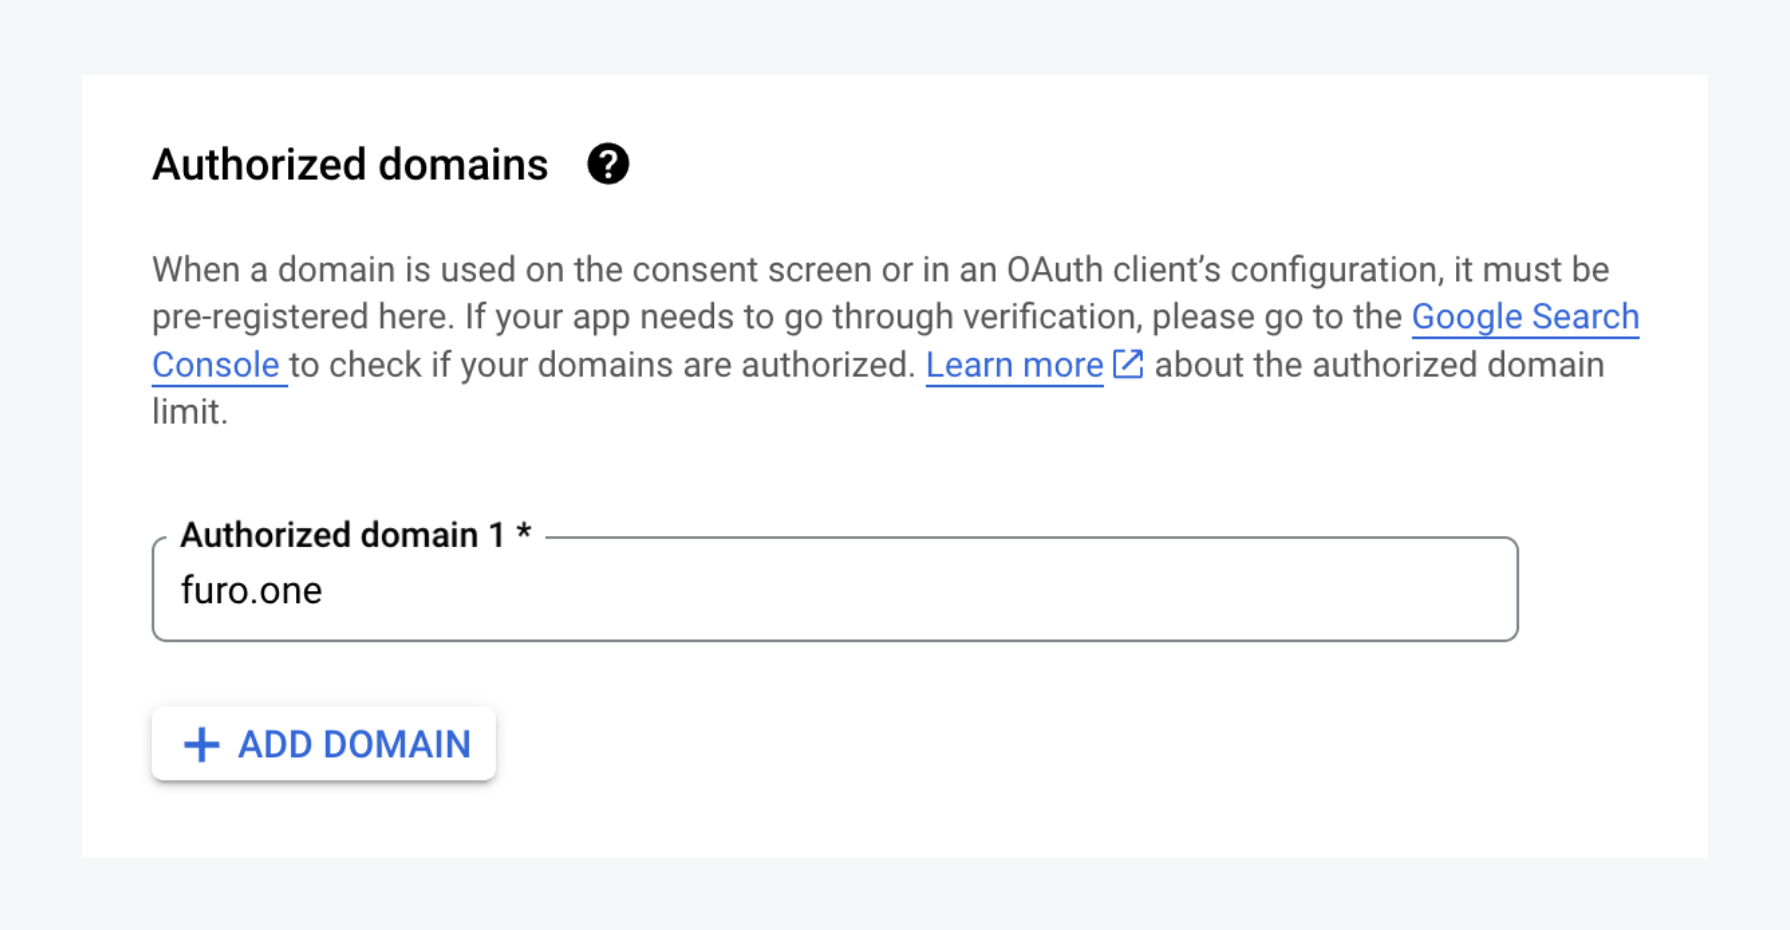
Add furo.one to the Authorized domains and proceed.
Set permissions for the information your users will use from their Google accounts. Include /auth/userinfo.email and /auth/userinfo.profile for permissions.
The remaining settings are optional, so click the Save and Close button to complete.
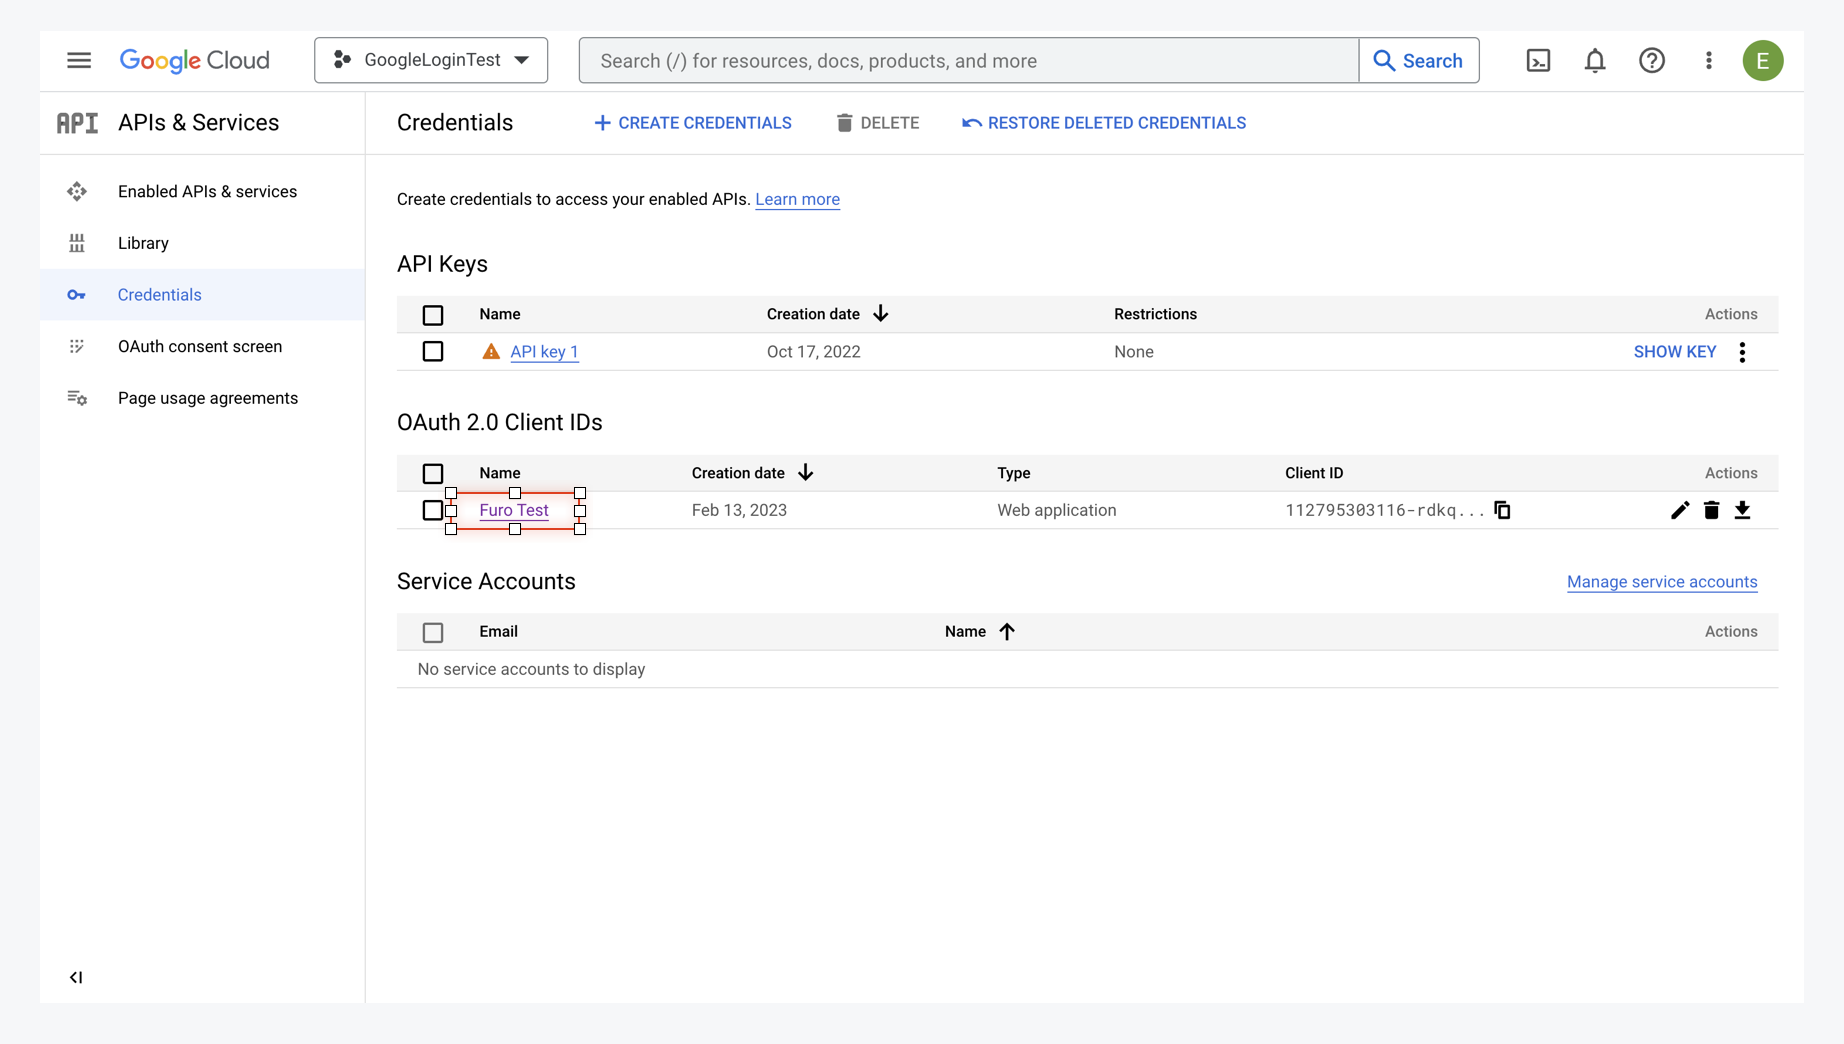
3. Create and Configure the Google OAuth Client
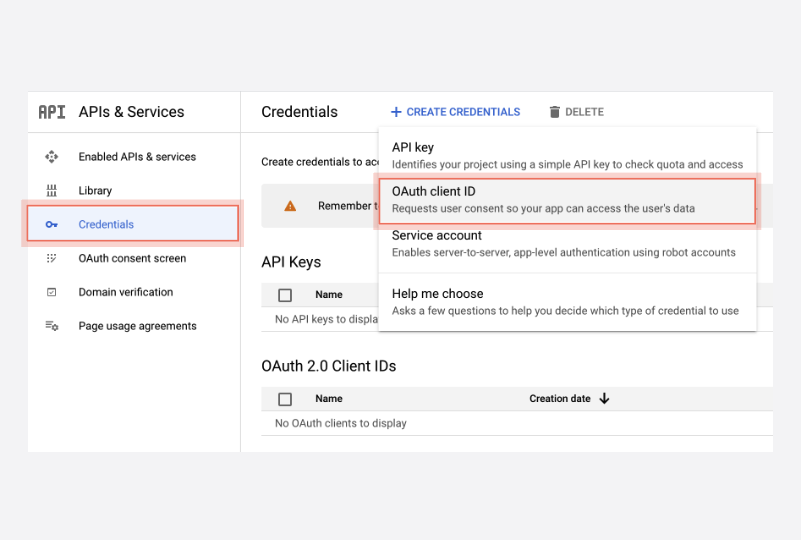
In the Credentials page, select [CREATE CREDENTIALS > OAuth client ID].
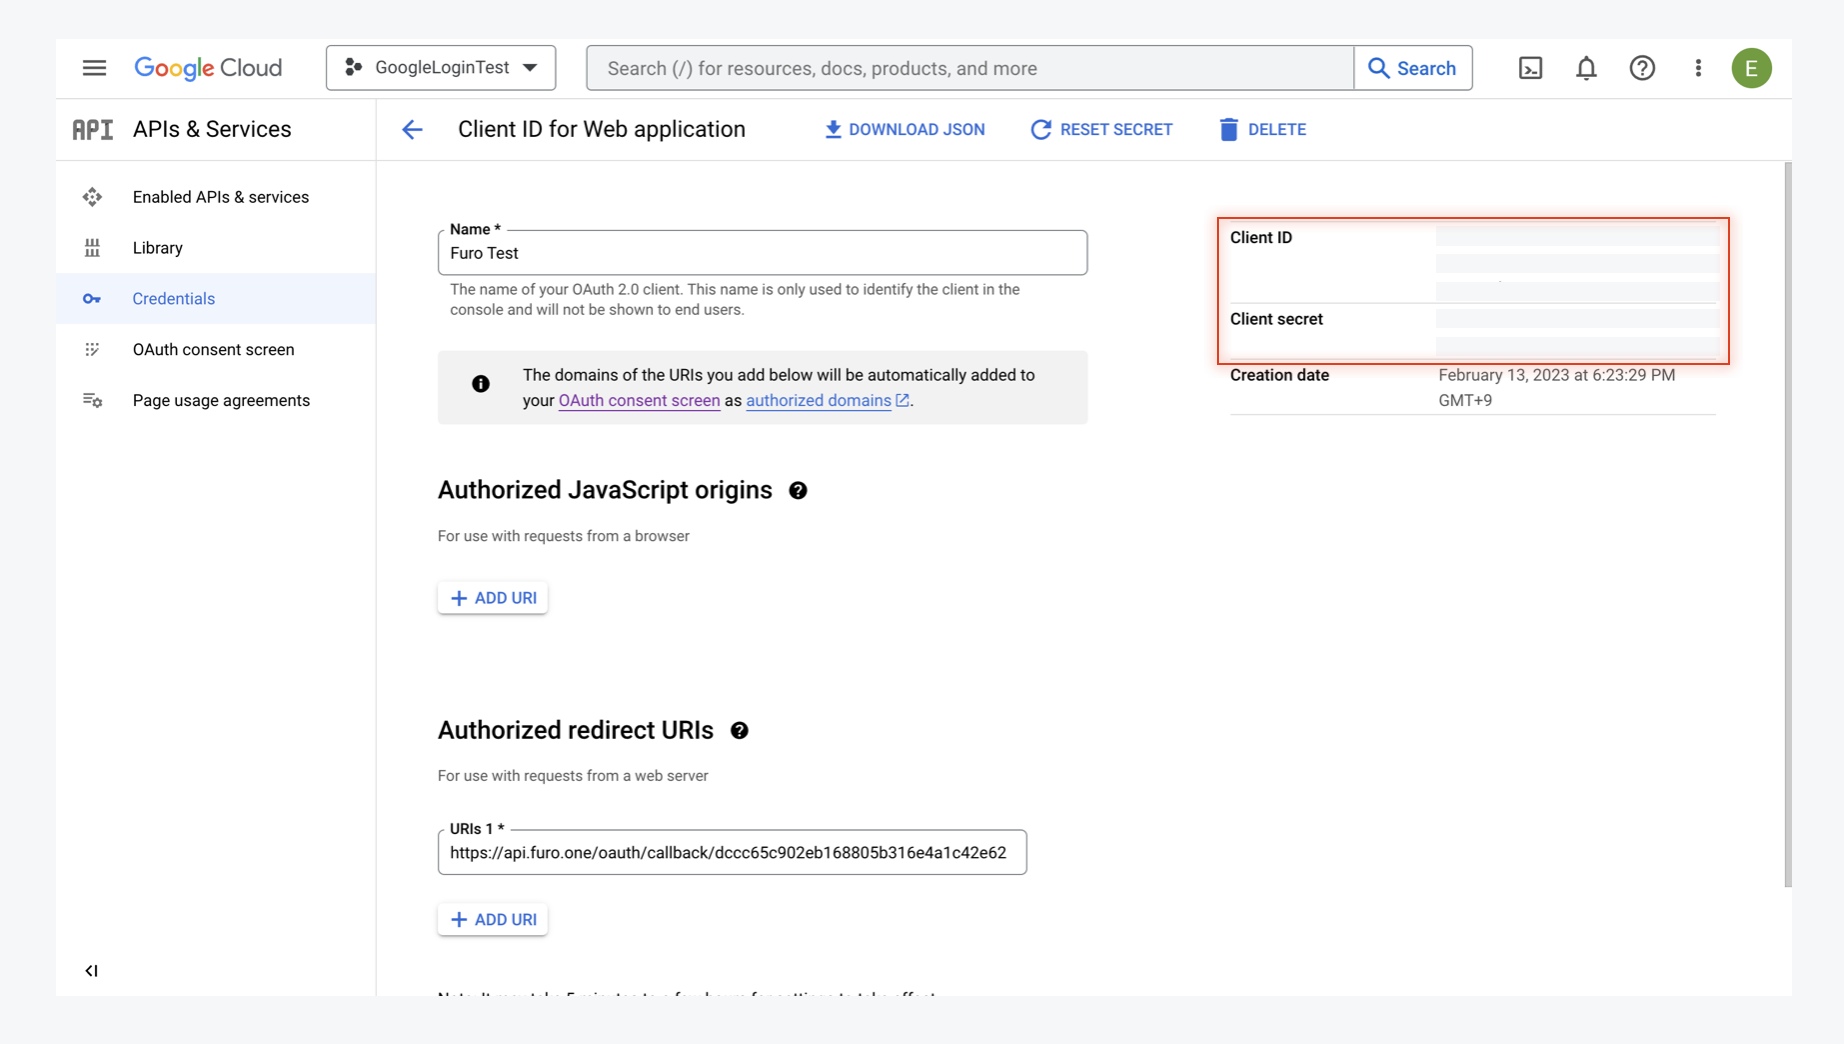
Input the necessary configuration items to create the OAuth Client. When creating it, add https://api.furo.one/oauth/callback/<FURO_PROJECT_CLIENT_ID> to the Authorized redirect URIs. You can copy and paste the redirect URI from the Google Login settings in the Furo Console.
Save the changes.
4. Activate Google Auth for Your Project
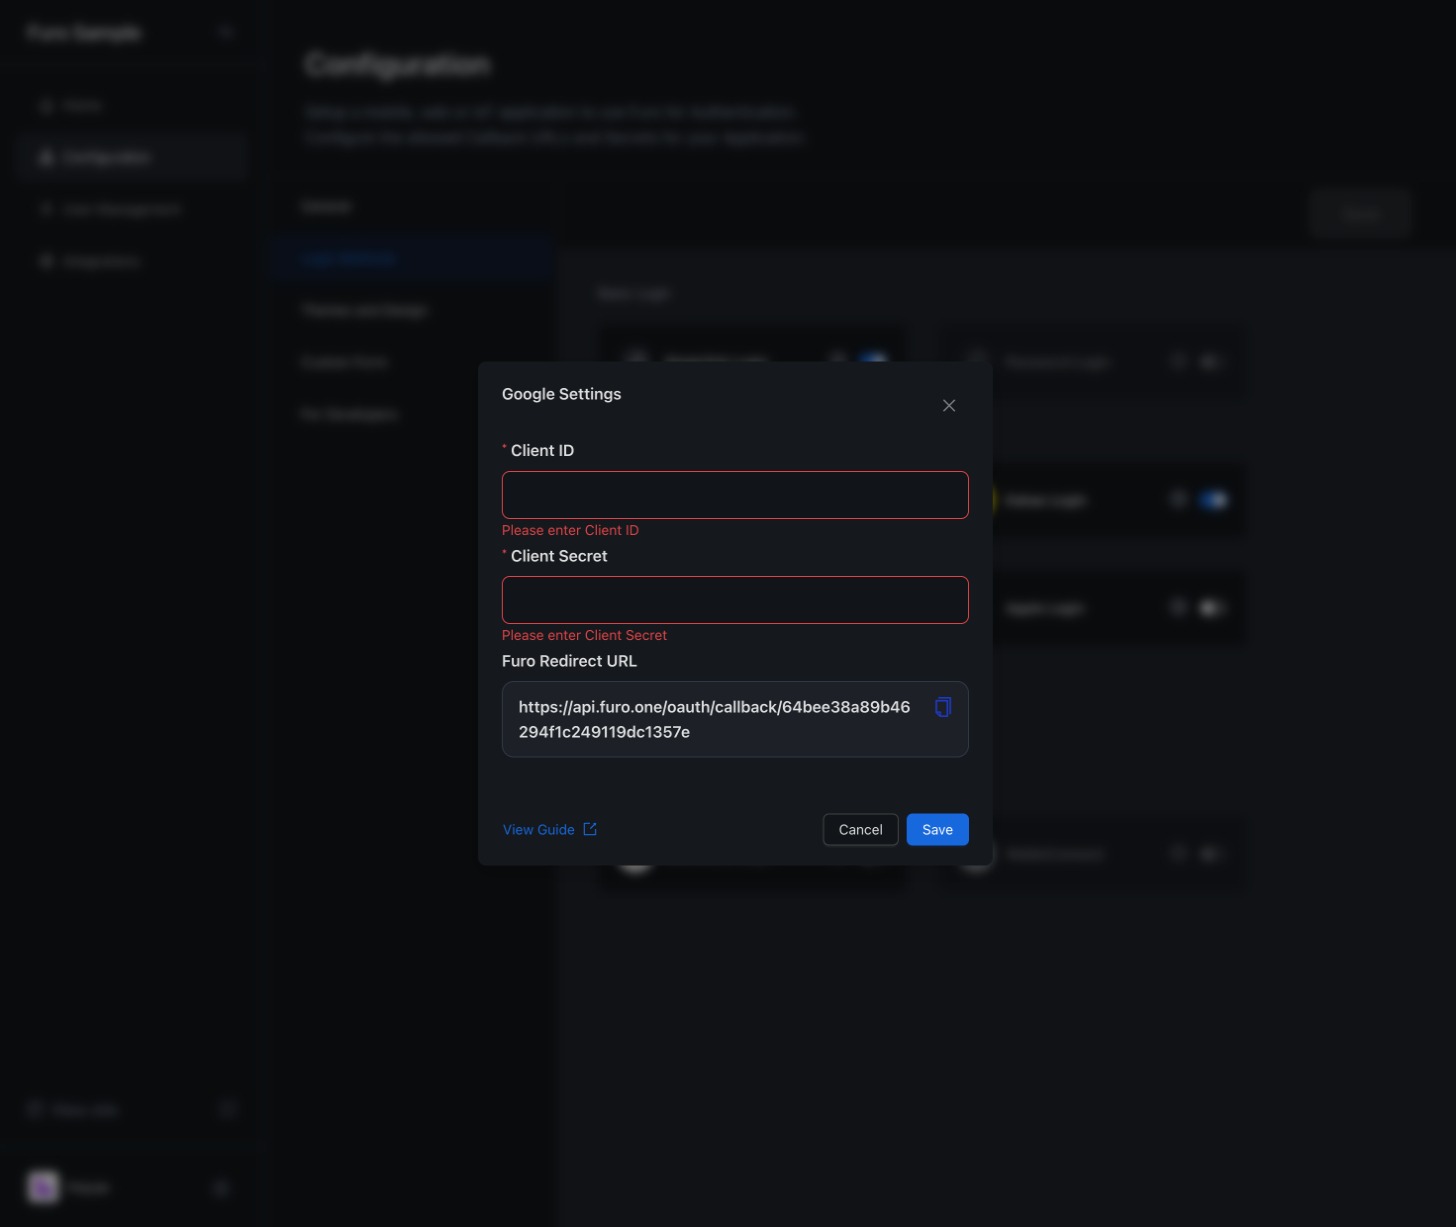
Copy the Client ID and Client Secret of the OAuth Client you created on the Google Credentials page.
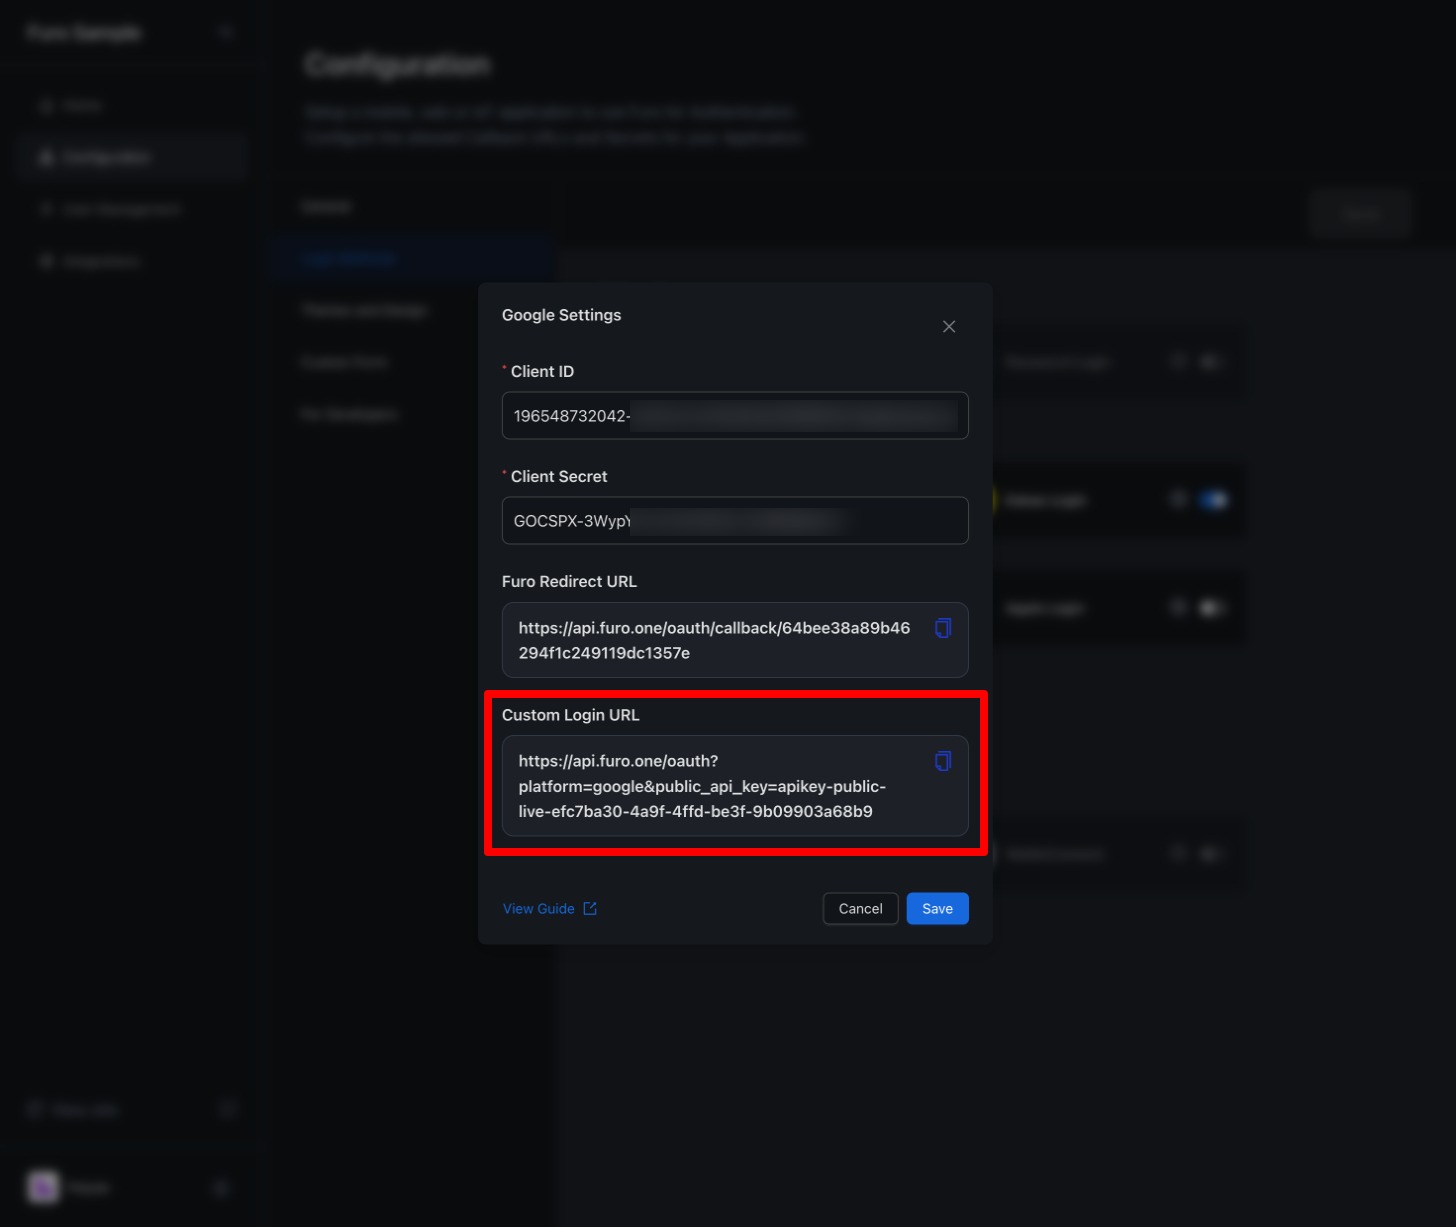
Input the copied Client ID in the Google Client ID and Client Secret fields in the Furo Console.
Once these settings are complete, the Log in with Google button will be activated on your project’s login page.
5. Customize the Google Login Button
If you wish to customize the Google Login button, you can embed the API URL provided by Furo in your custom login button.
By calling a method in the onClick() prop of your button that redirects to the above URL, users will be taken to the Google login prompt. Once Google authentication is completed, they will be redirected to the Callback URI configured in your project.